
Open Editor Preferences
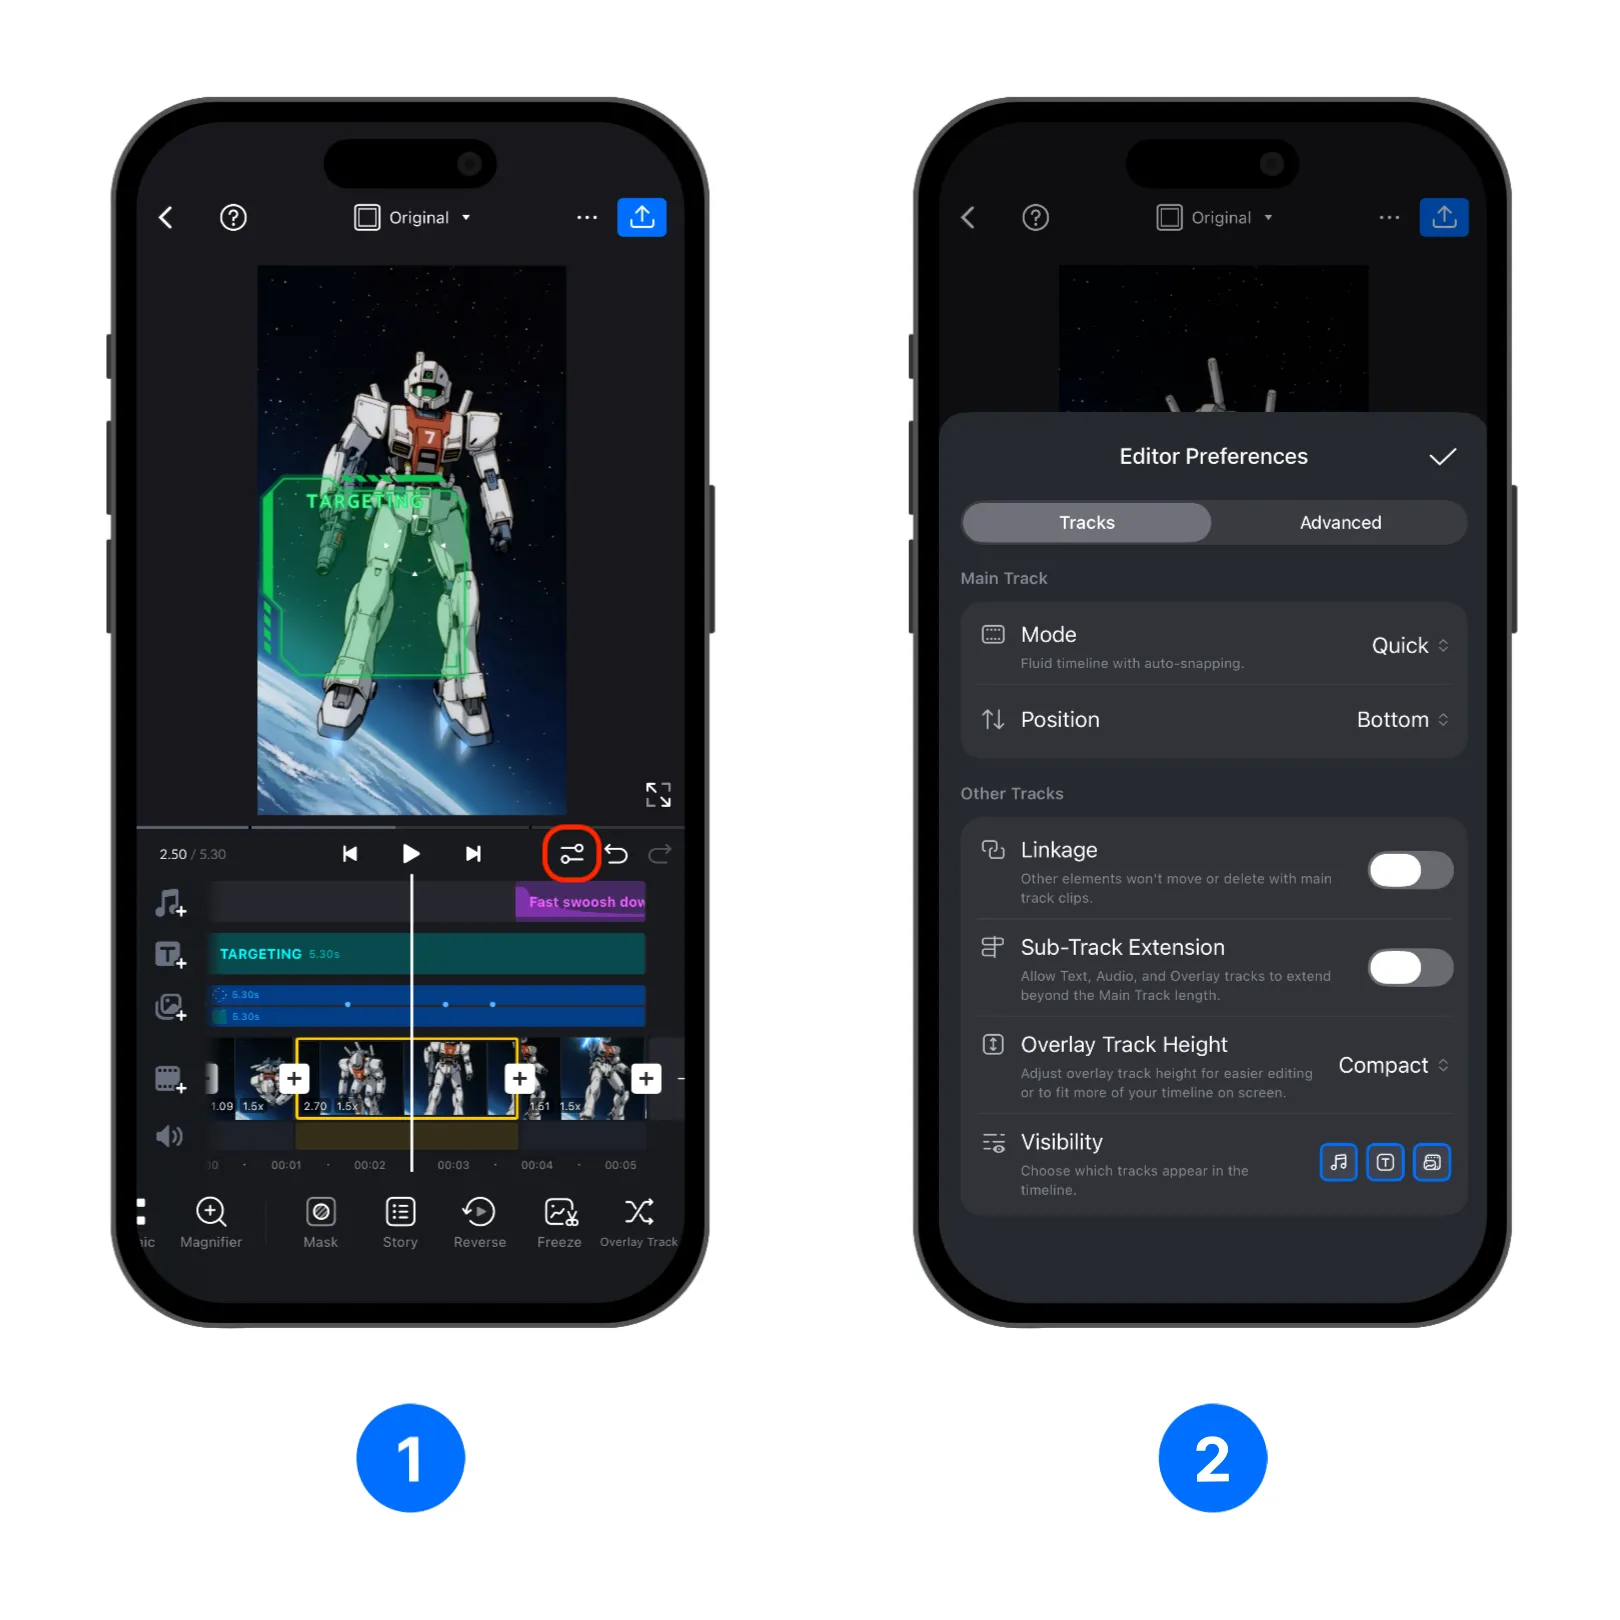
1. Open a project in VN and enter the editor.
2. Tap the [Editor Preferences] button in the editor toolbar to open the settings panel.
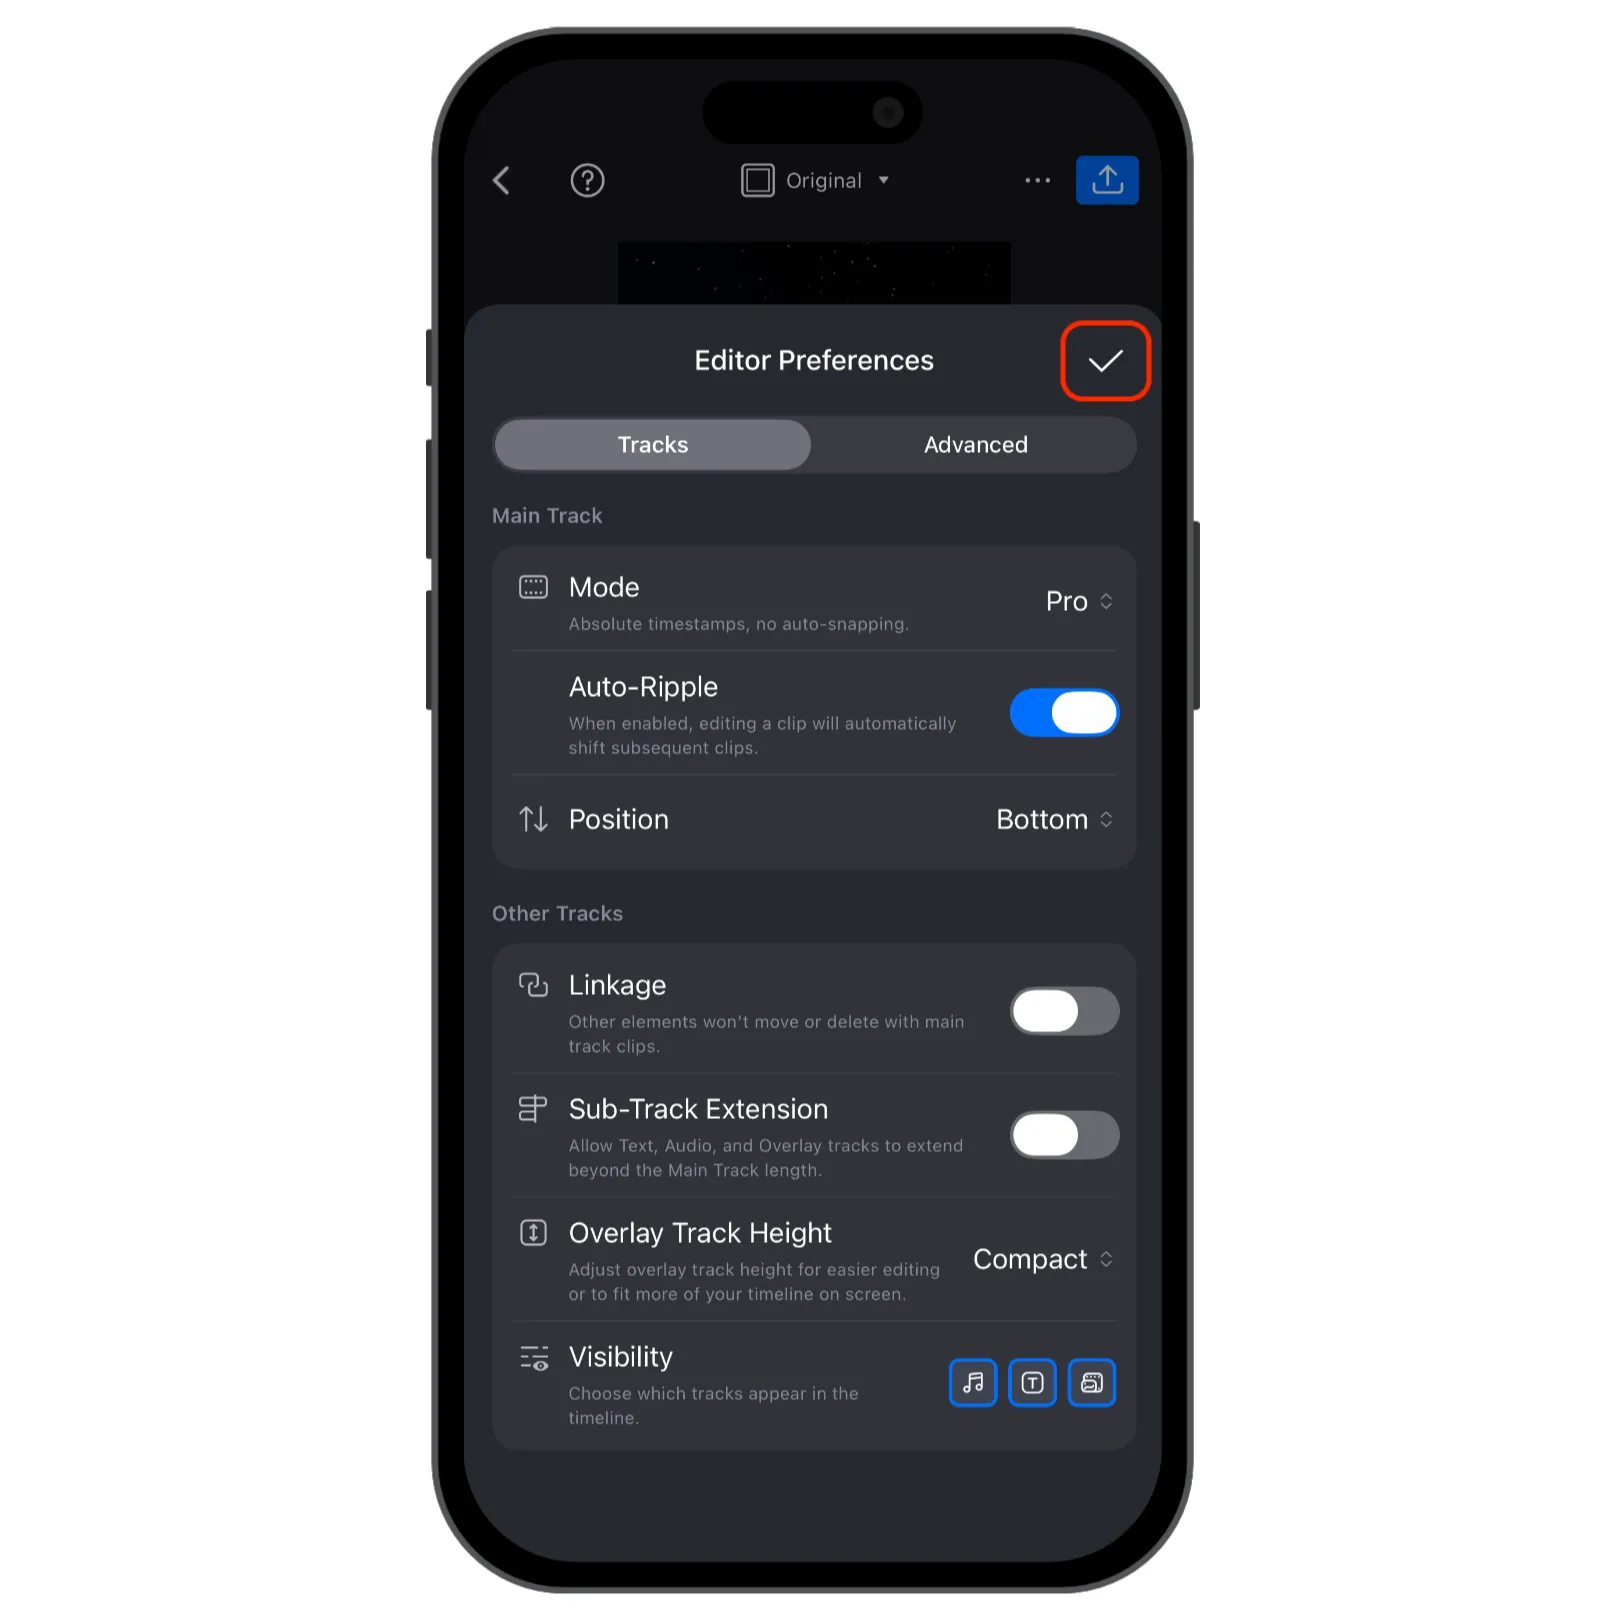
3. After adjusting the settings, tap [✓] to apply the changes and return to editing.
Main Track Mode
Main Track Mode controls how clips behave on the main timeline. Choose Quick for fast, connected editing, or Pro when you need more precise control over clip timing and gaps.
Quick Mode
1. In [Editor Preferences], go to [Main Track Mode] and tap [Quick].
2. Use Quick Mode when you want a fluid timeline with auto-snapping enabled. This helps main-track clips stay connected while you arrange or edit them.
Pro Mode
1. In [Editor Preferences], go to [Main Track Mode] and tap [Pro].
2. Use Pro Mode when you want absolute timestamps and more manual control. This mode is useful when you need to keep empty spaces, align clips at exact times, or decide whether later clips should move after an edit.
Auto-Ripple
Auto-Ripple is available in Pro Mode. When enabled, editing a main-track clip automatically shifts subsequent clips so the timeline stays connected. When disabled, later clips keep their original timestamps.
Enable Auto-Ripple
1. Set [Main Track Mode] to [Pro].
2. Turn on [Auto-Ripple].
3. Edit a main-track clip. Subsequent clips will move automatically to close the gap or follow the edit.
Disable Auto-Ripple
1. Set [Main Track Mode] to [Pro].
2. Turn off [Auto-Ripple].
3. Edit a main-track clip. Subsequent clips will stay at their original positions, which can leave a gap in the timeline (the gap can be edited like any clips).
Sub-Track Extension
Sub-Track Extension controls whether Text, Audio, and Overlay tracks can extend beyond the length of the main track.
Enable Sub-Track Extension
1. In [Editor Preferences], turn on [Sub-Track Extension].
2. Text, Audio, and Overlay materials can now continue beyond the end of the main track. Use this when you need extra audio, captions, or overlays after the main clip ends.
Disable Sub-Track Extension
1. In [Editor Preferences], turn off [Sub-Track Extension].
2. Text, Audio, and Overlay materials will be limited by the main track length. Use this when you want the project duration to stay aligned with the main video track.
Track Linkage
Track Linkage controls whether elements on other tracks move with, or are deleted together with, main-track clips.
Enable Track Linkage
1. In [Editor Preferences], turn on [Track Linkage].
2. Move or delete a main-track clip. Related Text, Audio, Overlay, and other elements will move with or be deleted together with the main-track clip, helping linked materials stay in sync.
Disable Track Linkage
1. In [Editor Preferences], turn off [Track Linkage].
2. Move or delete a main-track clip. Elements on other tracks will keep their existing positions, which is useful when you want subtitles, audio, or overlays to stay fixed on the timeline.
Object Snapping
Object Snapping helps you align objects on the preview canvas while editing overlays, stickers, text, and other visual elements.
Enable Object Snapping
1. In [Editor Preferences], turn on [Object Snapping].
2. Drag an object on the preview canvas. Snapping guides make it easier to align the object with edges, centers, or nearby visual elements.
Disable Object Snapping
1. In [Editor Preferences], turn off [Object Snapping].
2. Drag an object on the preview canvas. Use this mode when you want freer manual placement or when snapping gets in the way of precise positioning.
Preview FPS
1. In [Editor Preferences], find [Preview FPS].
2. Drag the slider to set the frame rate used for editor preview playback.

3. Lower the preview FPS if playback feels laggy on a complex project. Raise it when you want smoother preview playback and your device can handle it.
4. Preview FPS affects the editing preview. To change the final video frame rate, adjust the export settings when exporting the project.