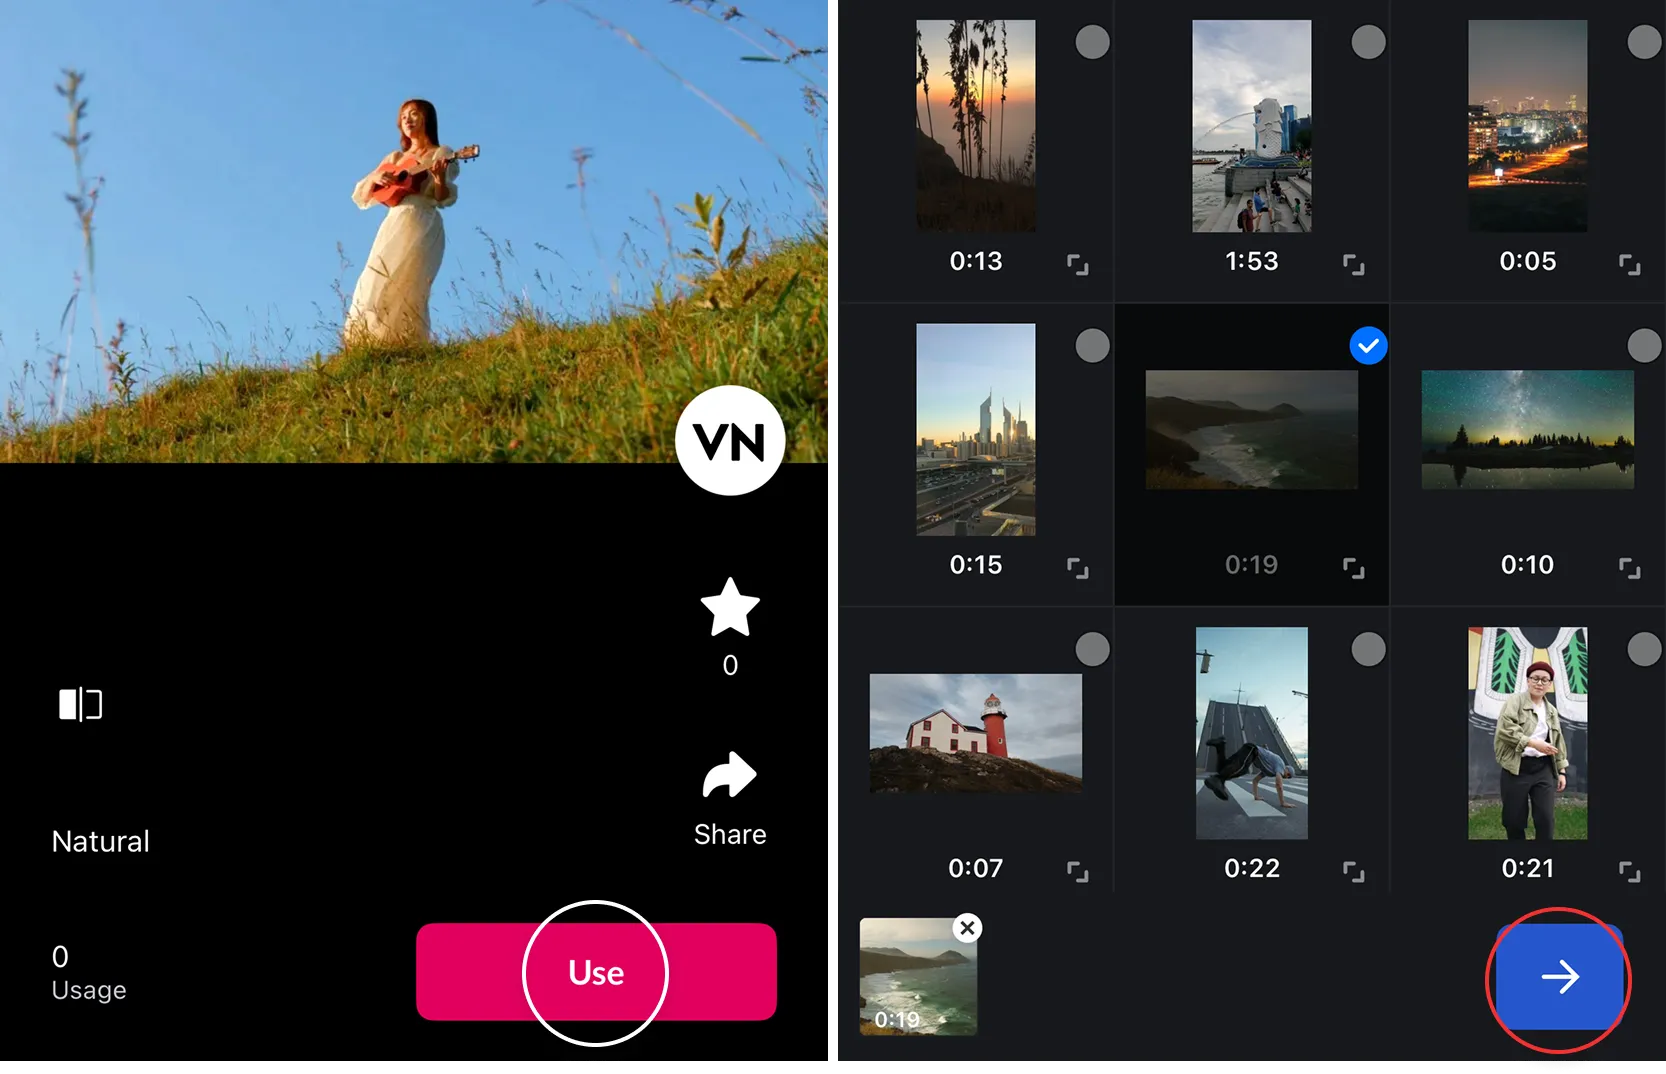

Find Filters
1. On the home screen, tap [+] button > Tap [Yours] > Tap [Filters]
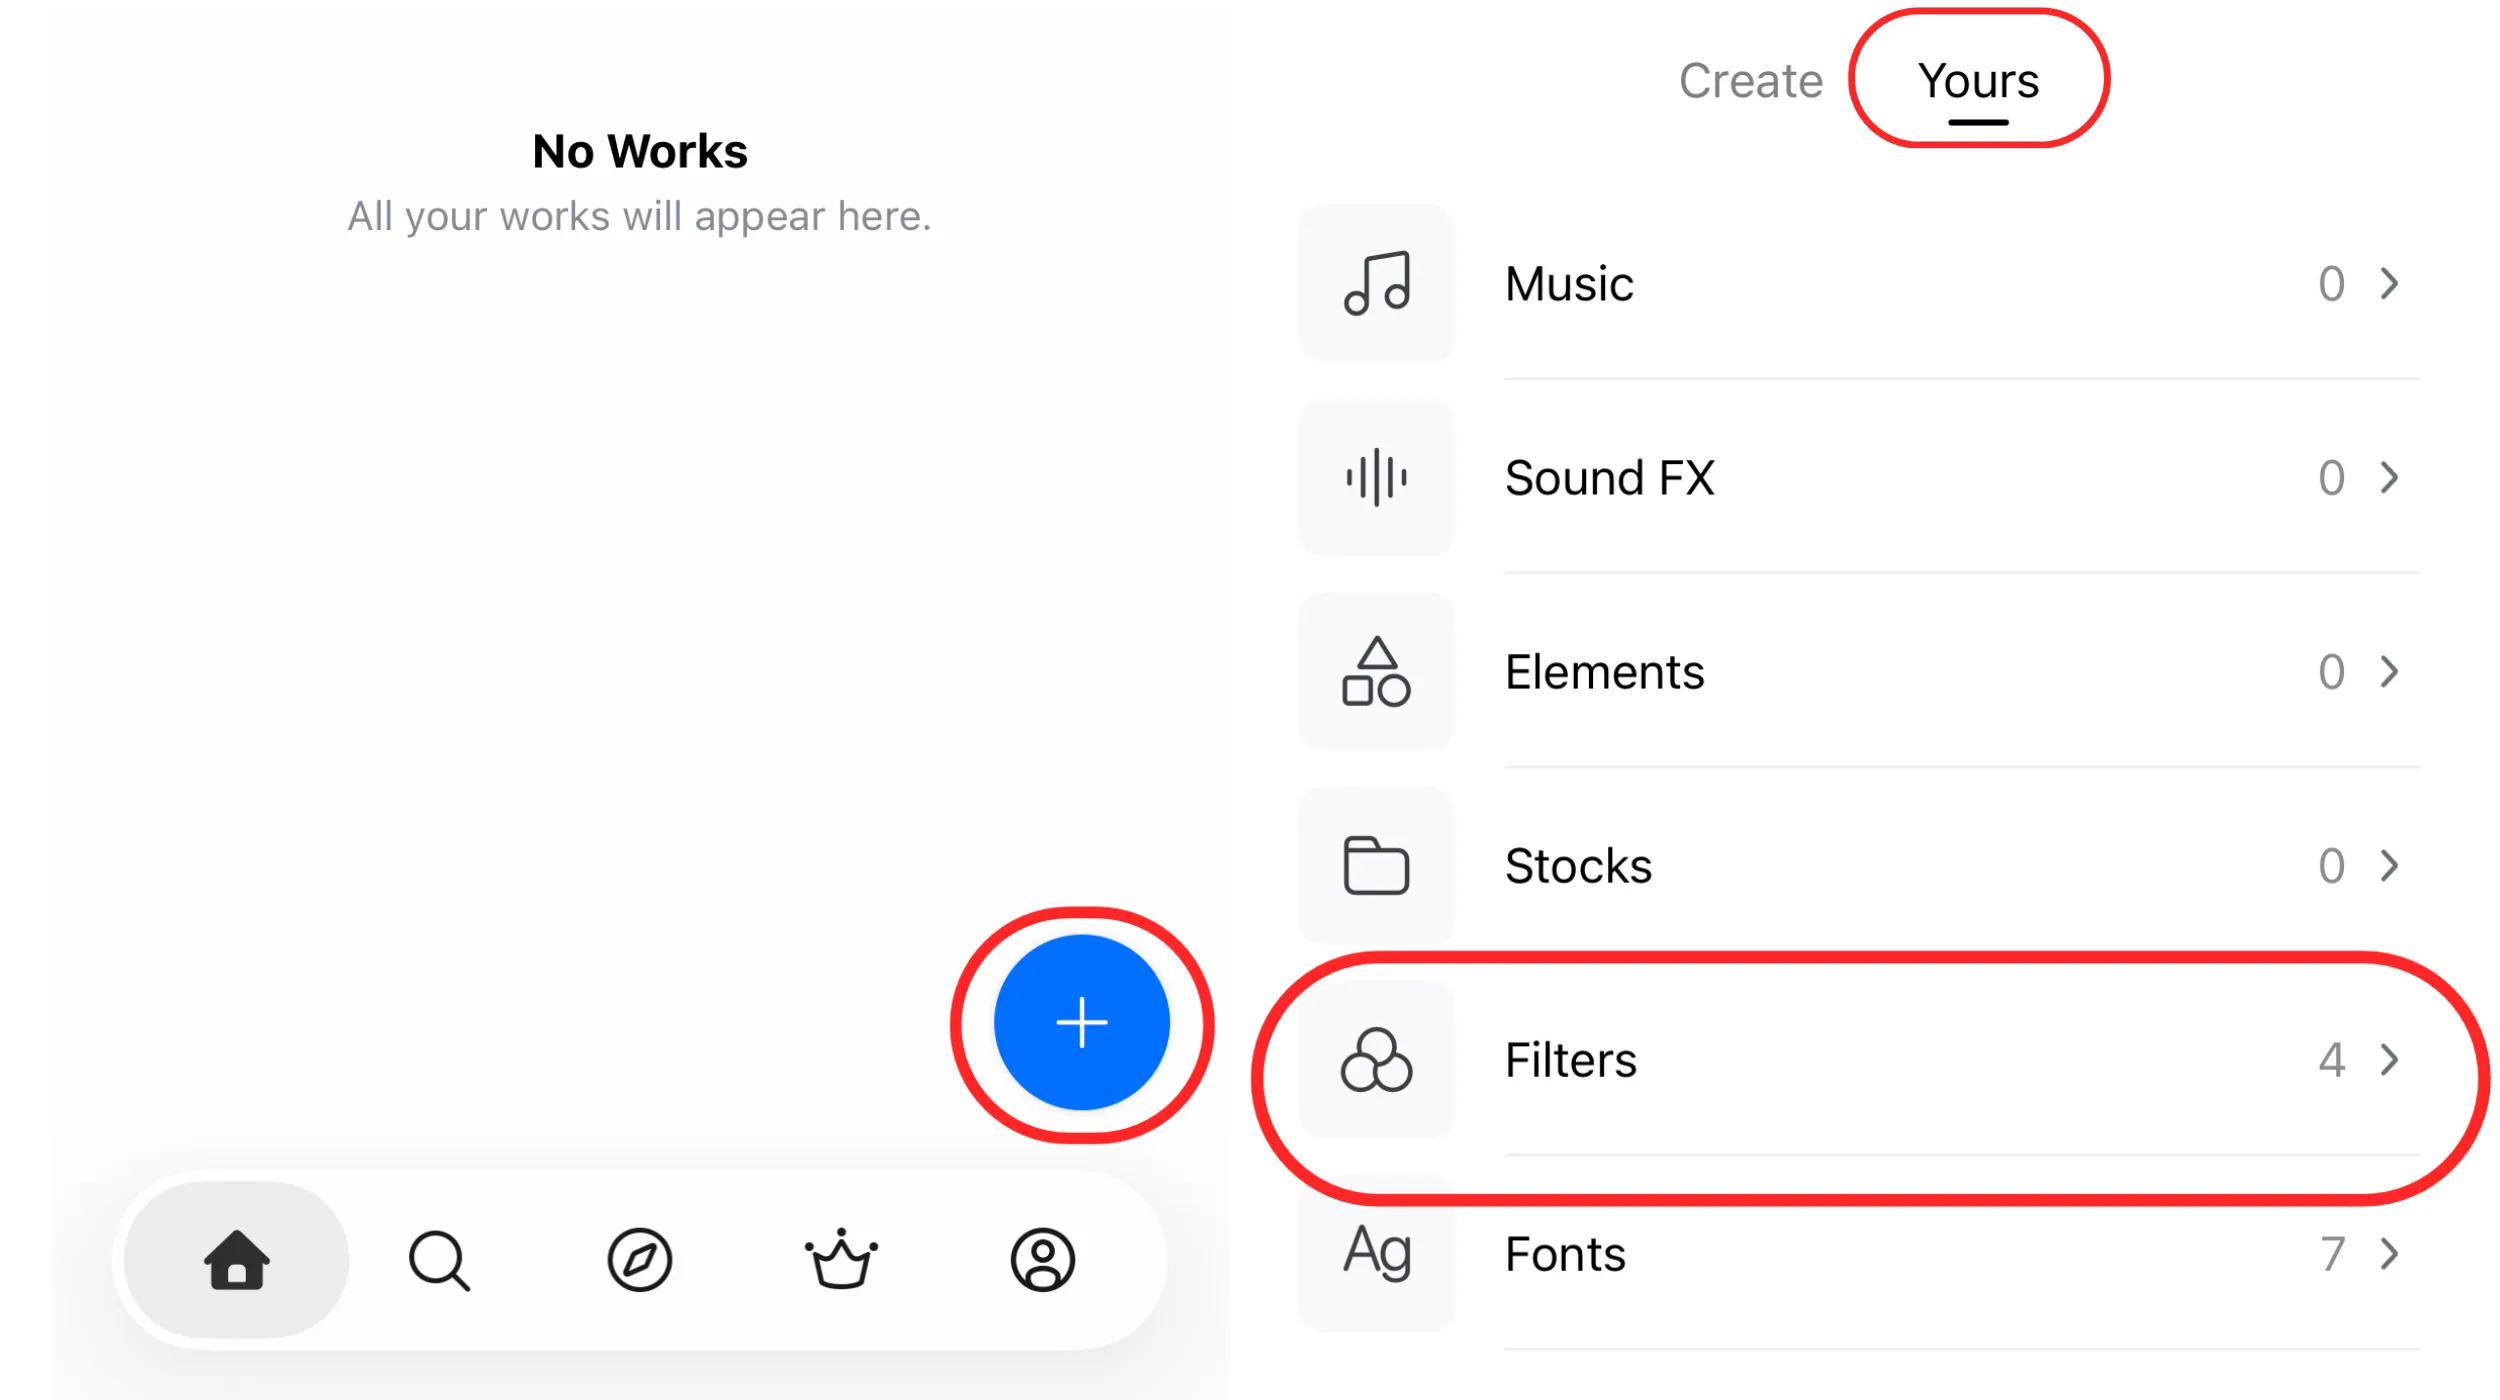
2. This will open the Filter Library, where you can find available filters, discover new filters, find your favorite filters, or view filters downloaded/imported by you.
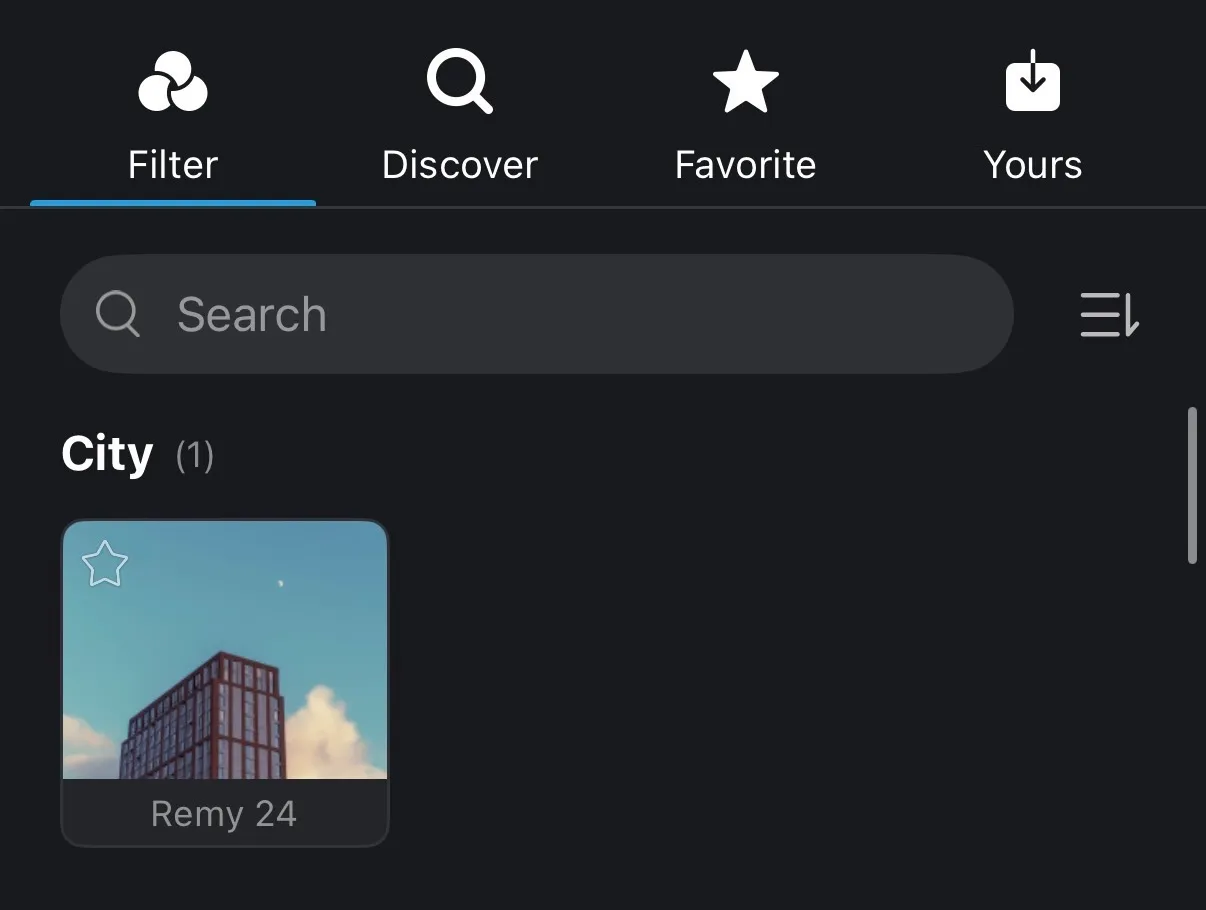
Filter Discover
1. On the home screen, tap [🔍] button > Tap [Filters]
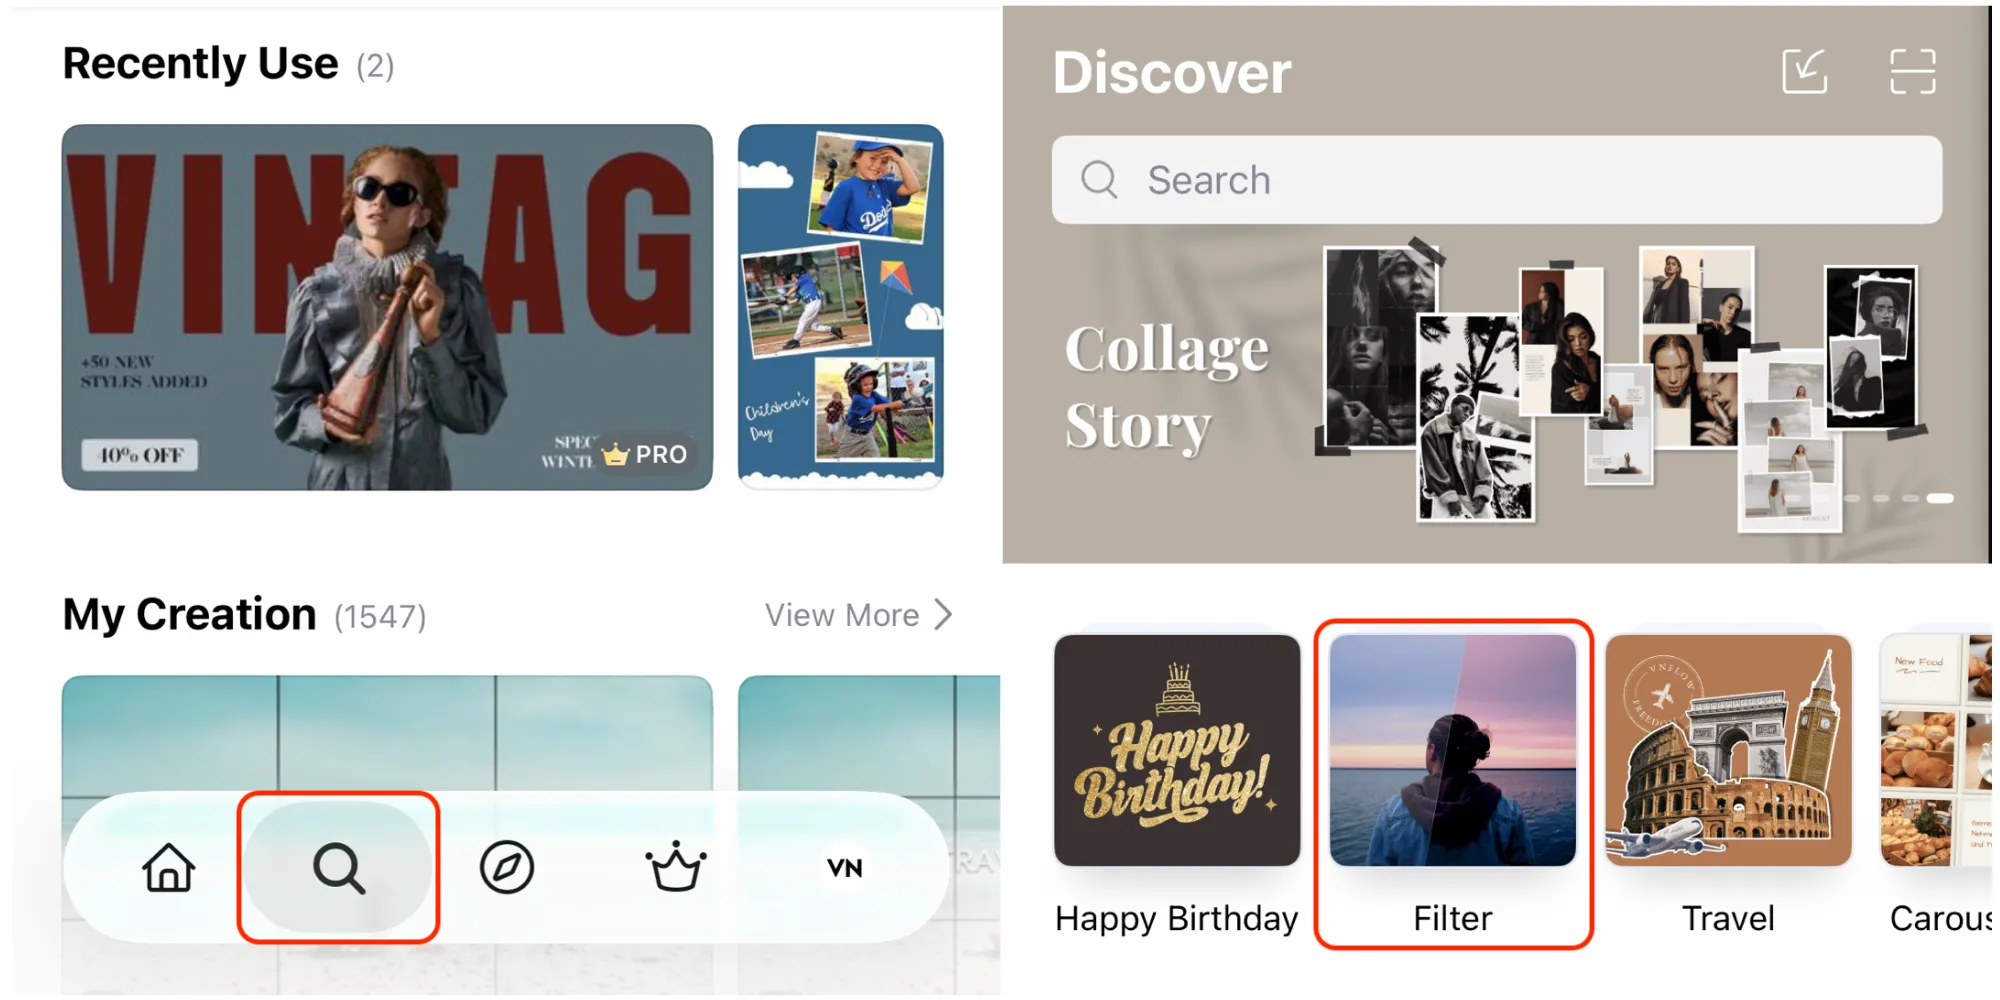
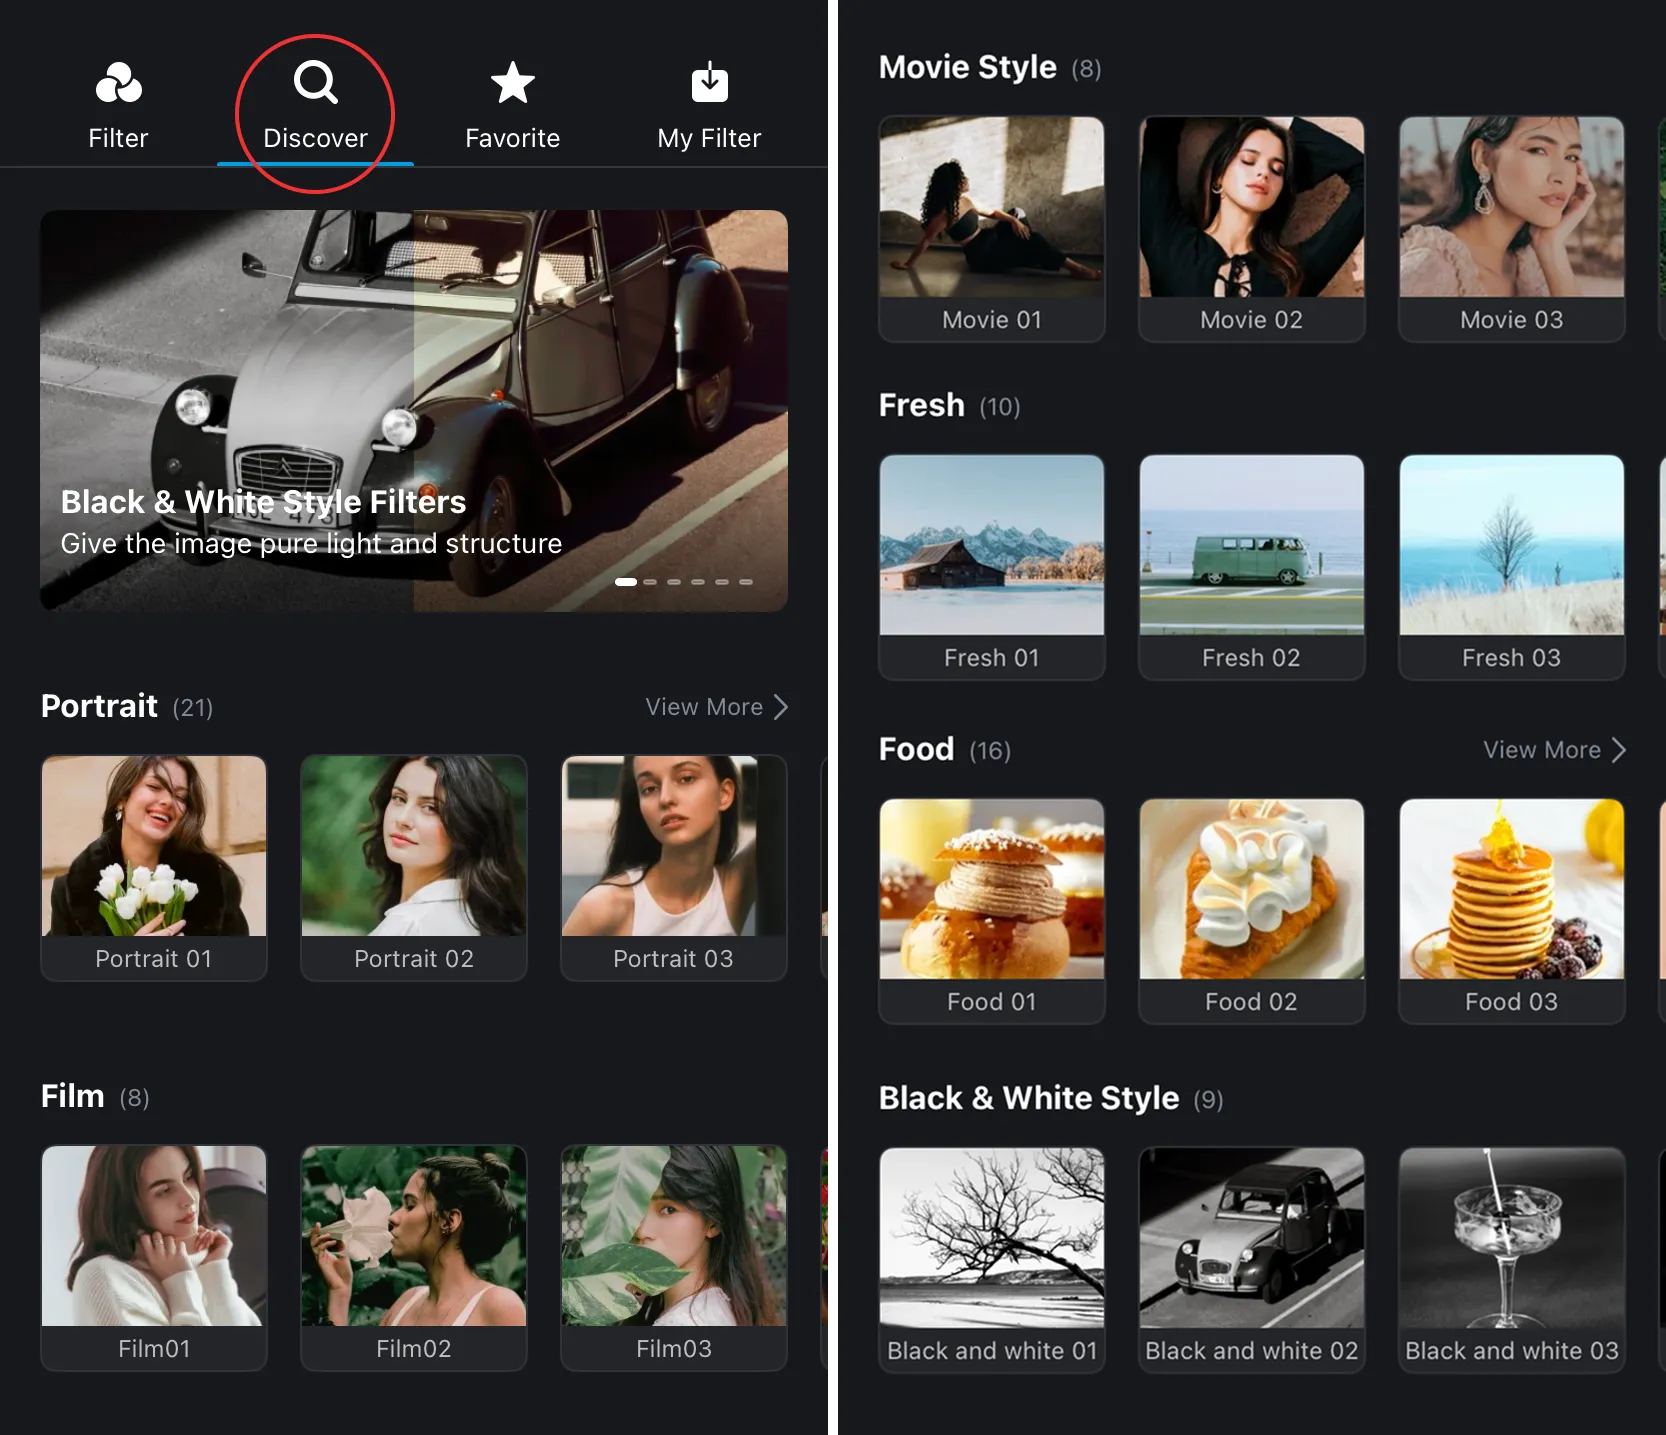
2. Go to the filter library and tap [Filter Market] to explore a variety of styles, including portrait, fresh, film, food, black & white, and more.
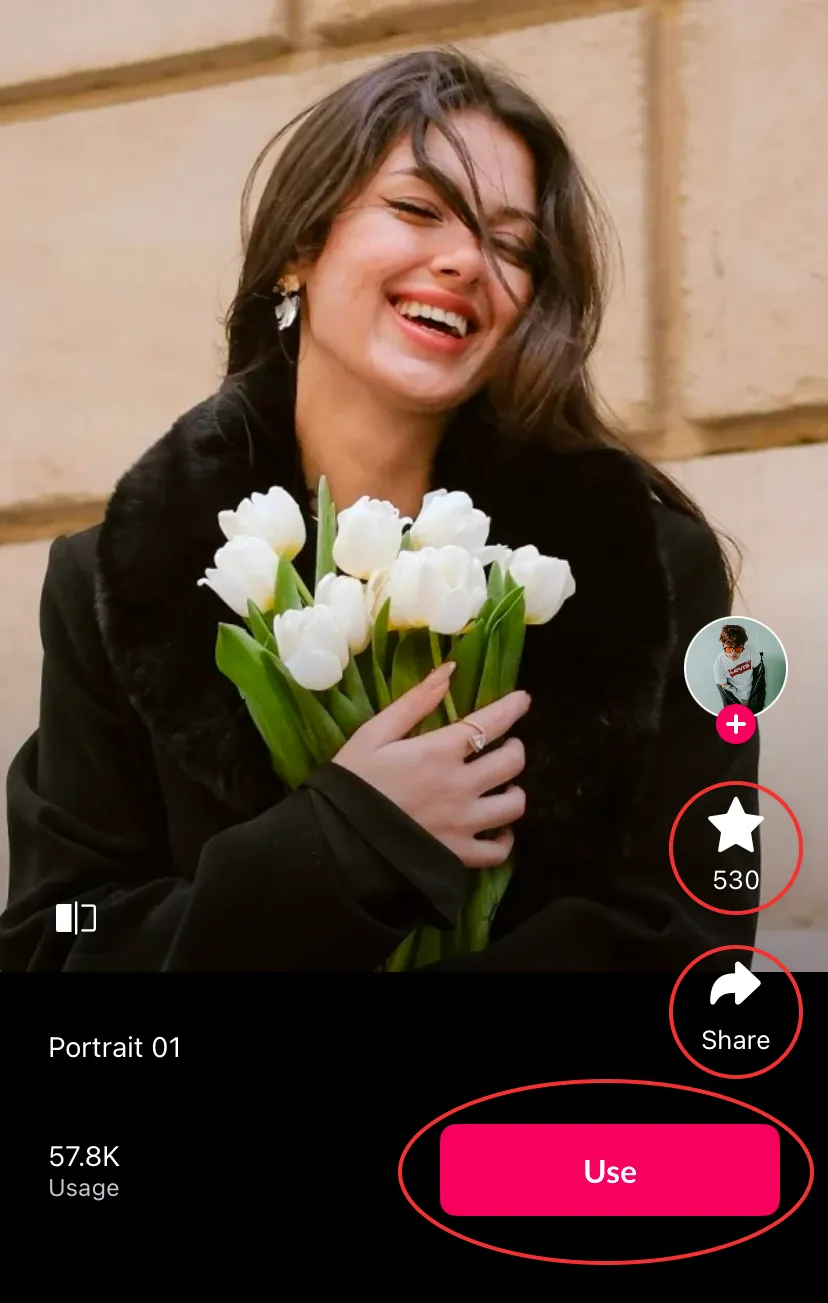
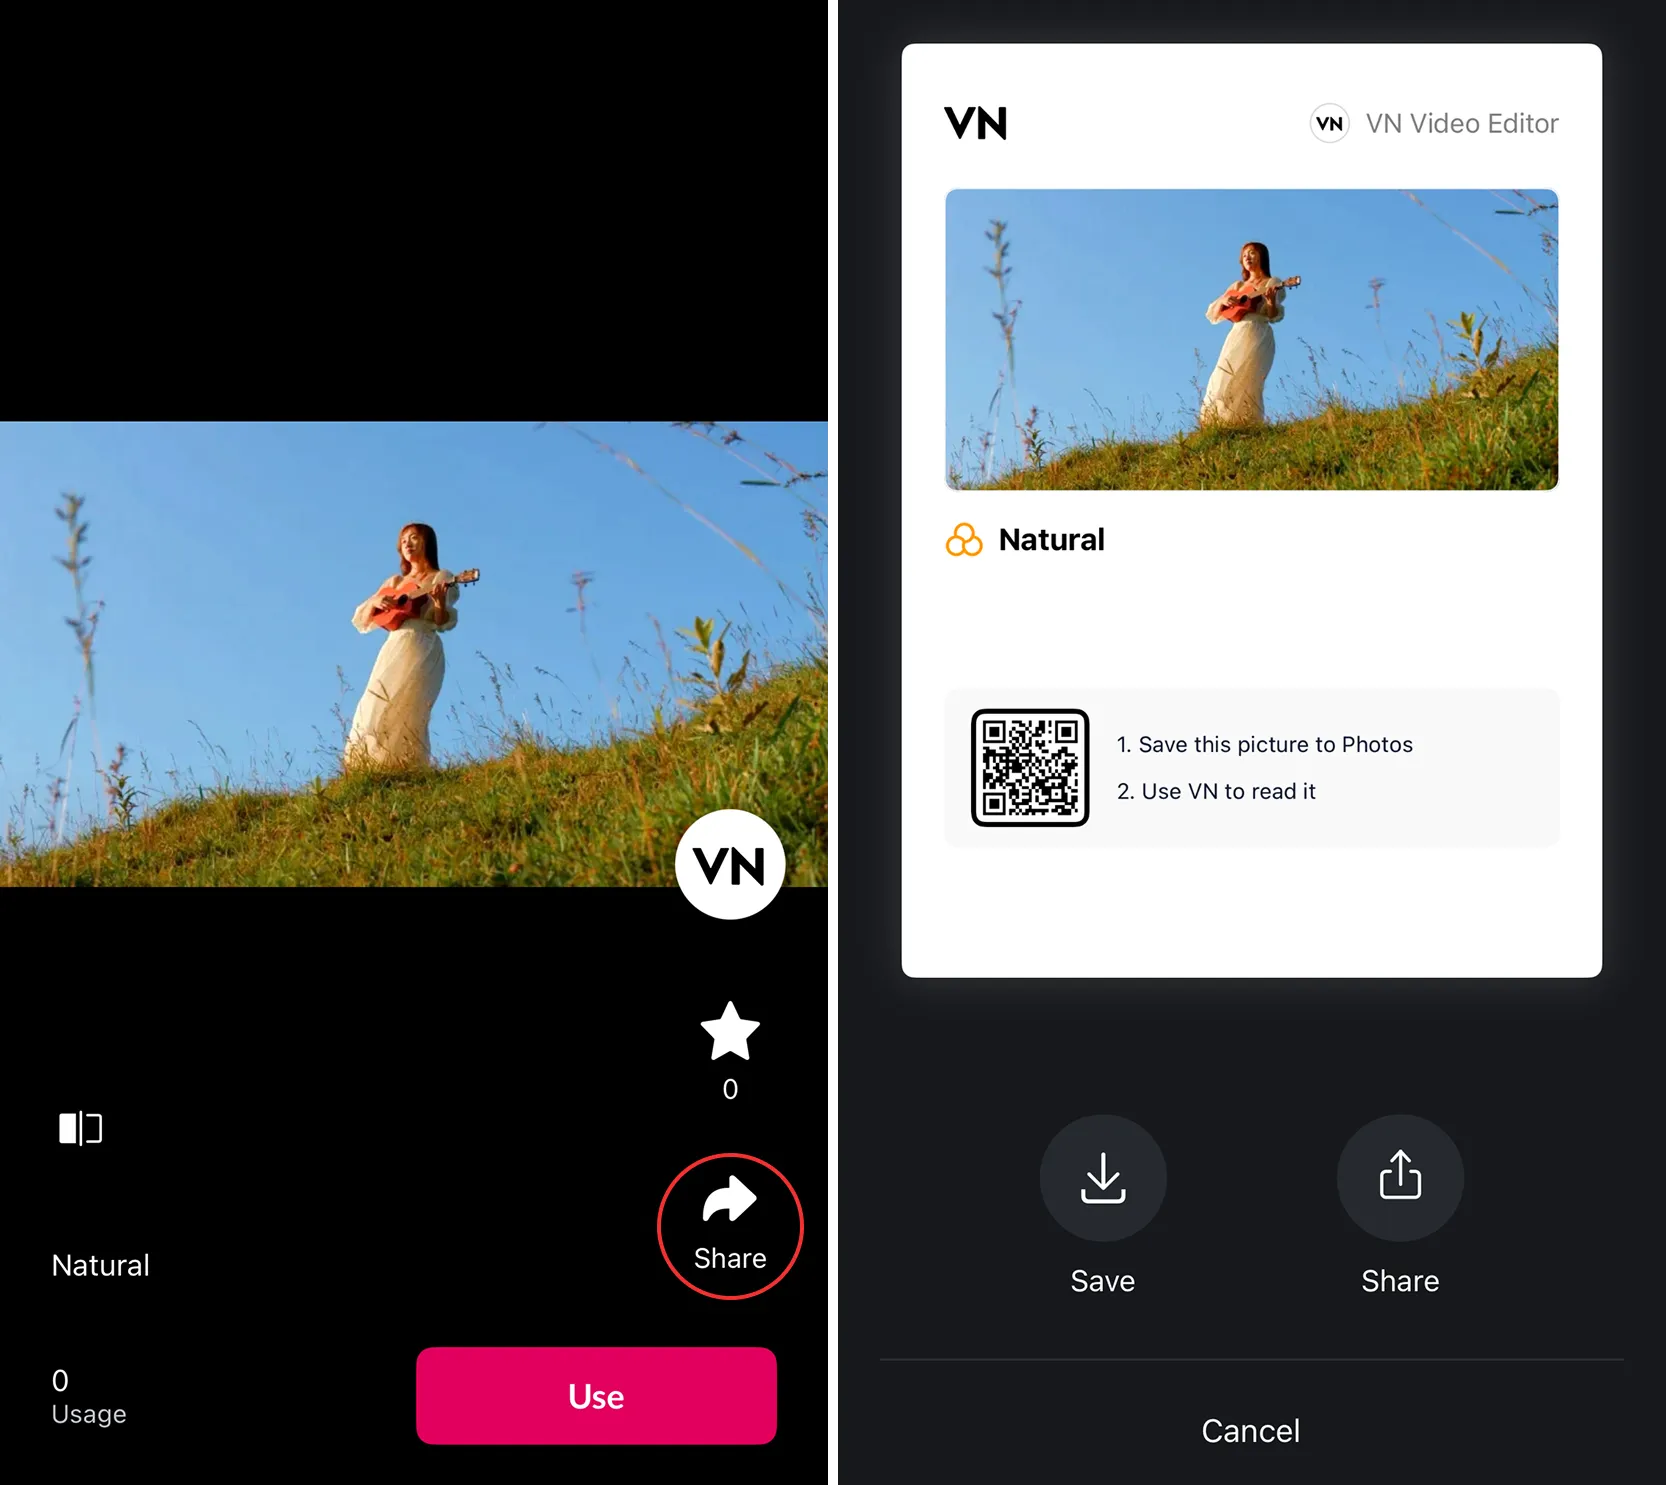
3. Tap a filter to view details, share, or favorite it. Tap the [Use] button to download and apply the filter instantly.
Manage My Filters
1. Go to the filter library and select the [My Filters] category.
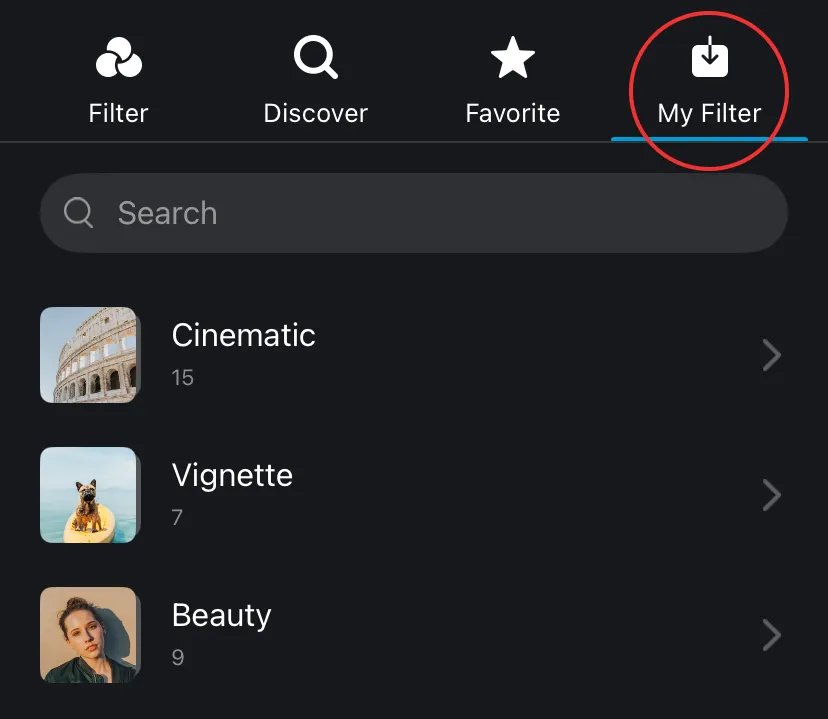
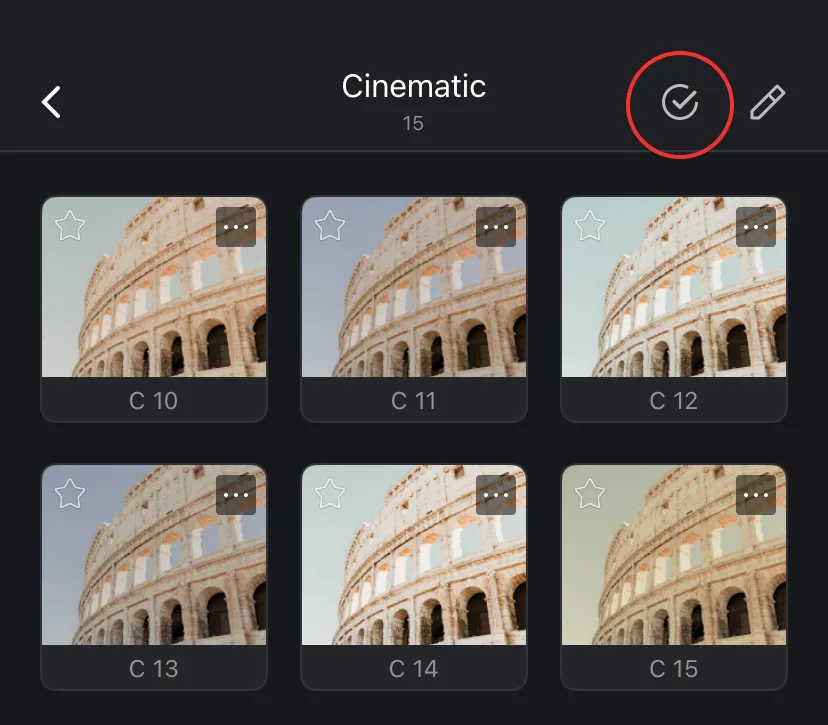
2. Open a filter folder and tap the [Management] icon in the top right corner to enter the management interface.
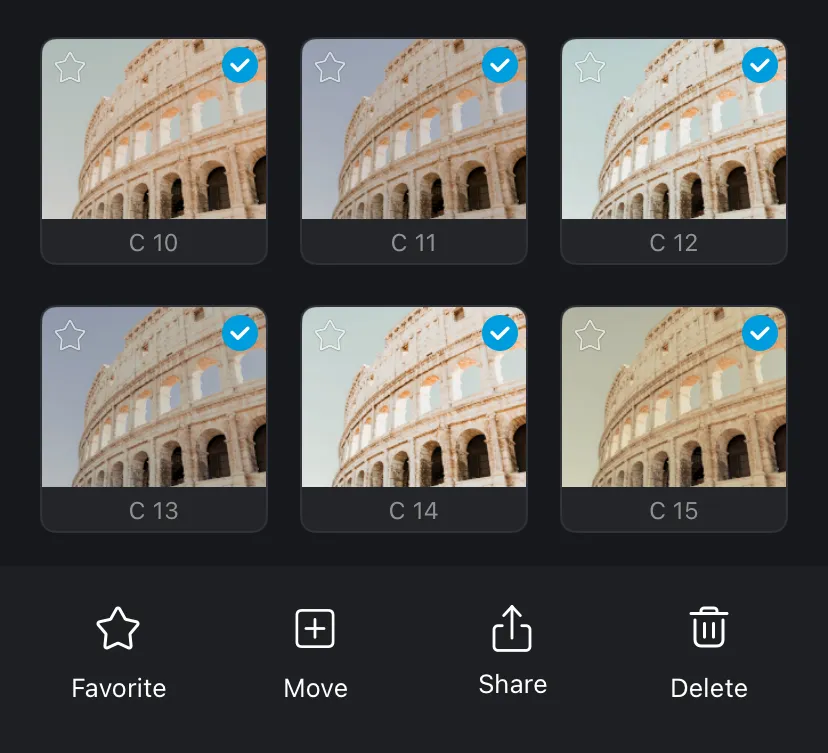
3. Select filters to batch favorite, move to other folders, share, or delete.
Set the Filter Display Order
1. Go to the filter library and tap the [Sorting] icon to enter the filter group sorting interface.
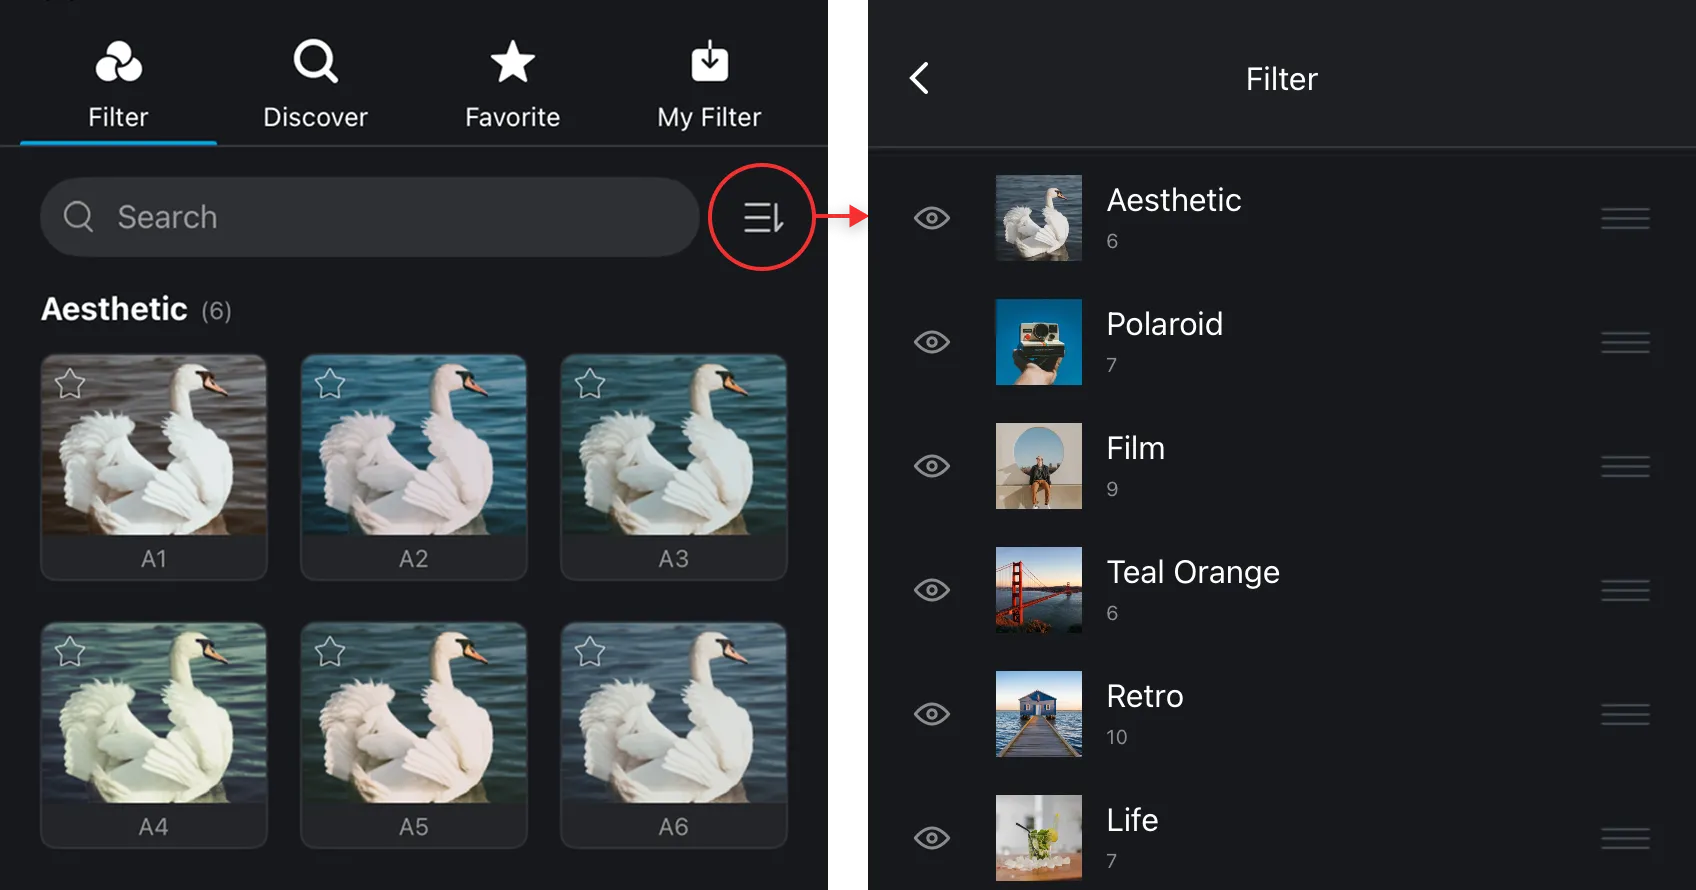
2. Hold and drag the filter group to adjust the order, or tap the [Eye] icon to hide the filter group you don’t want to display.
3. After adjustments, the filter panel in the editor will display the filter groups in the new order.
Creating Filters
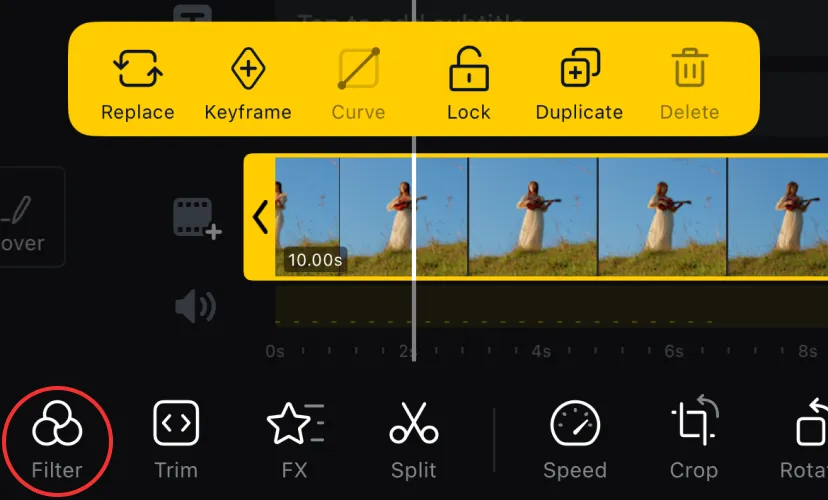
1. Tap on a video clip > Tap [Filter].
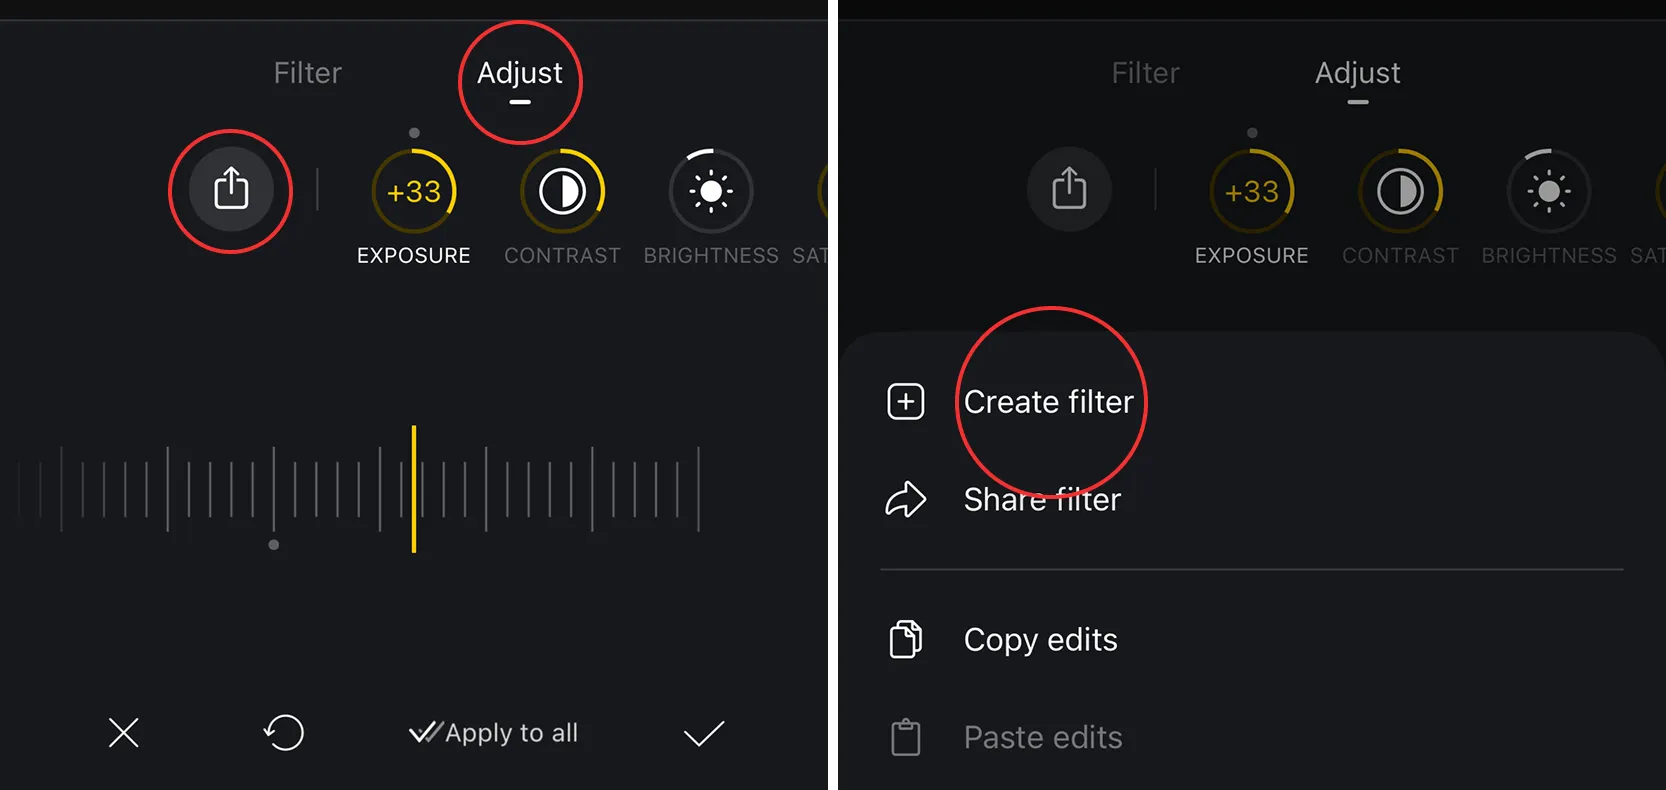
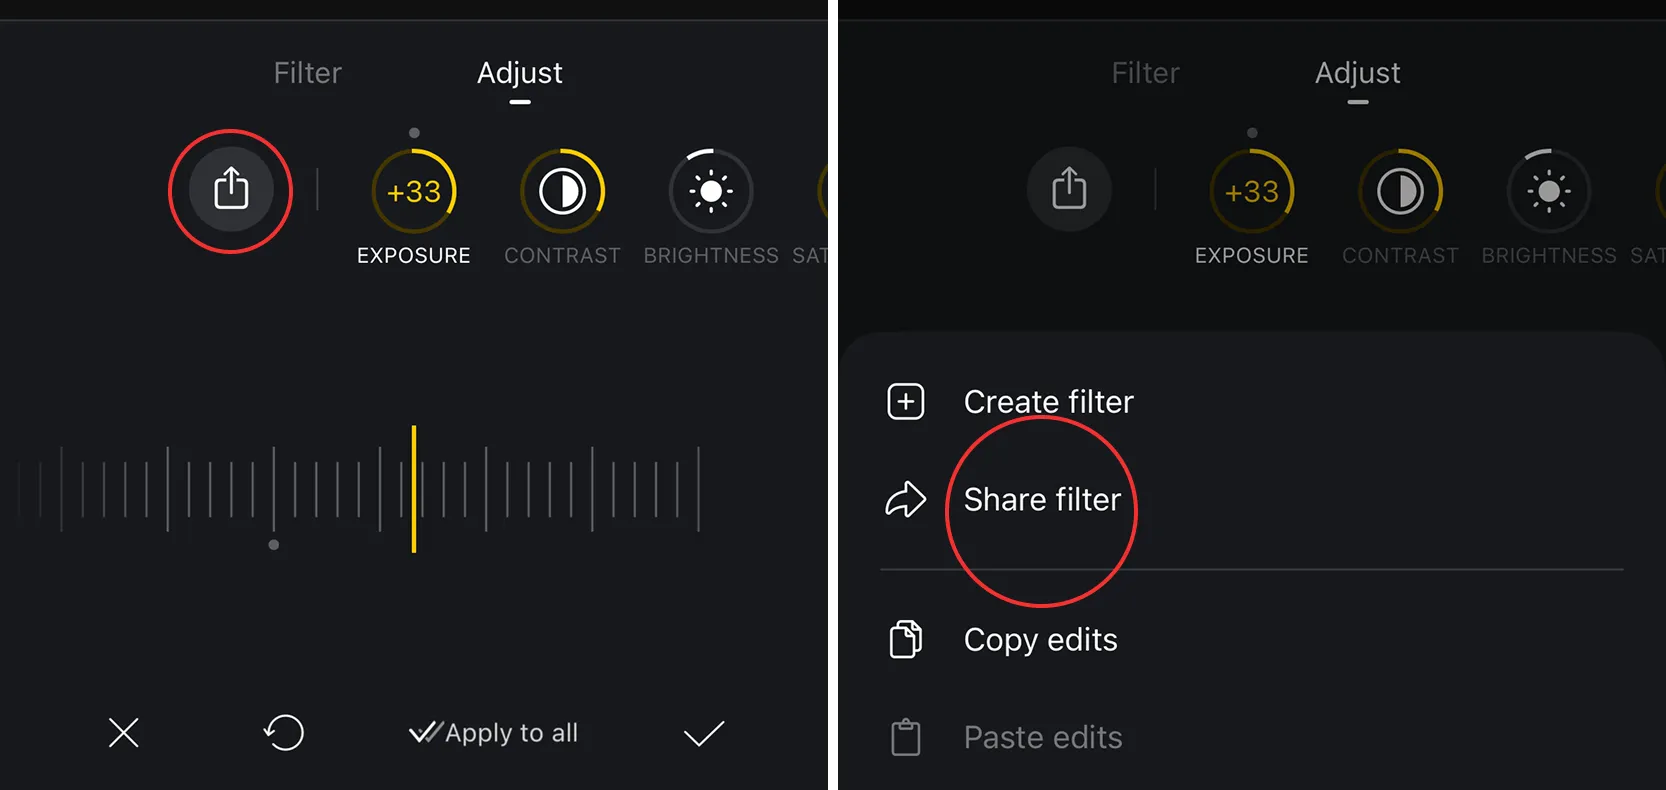
2. Tap [Adjust] to edit filter parameters > Tap the [Share] icon > Tap [Create Filter].
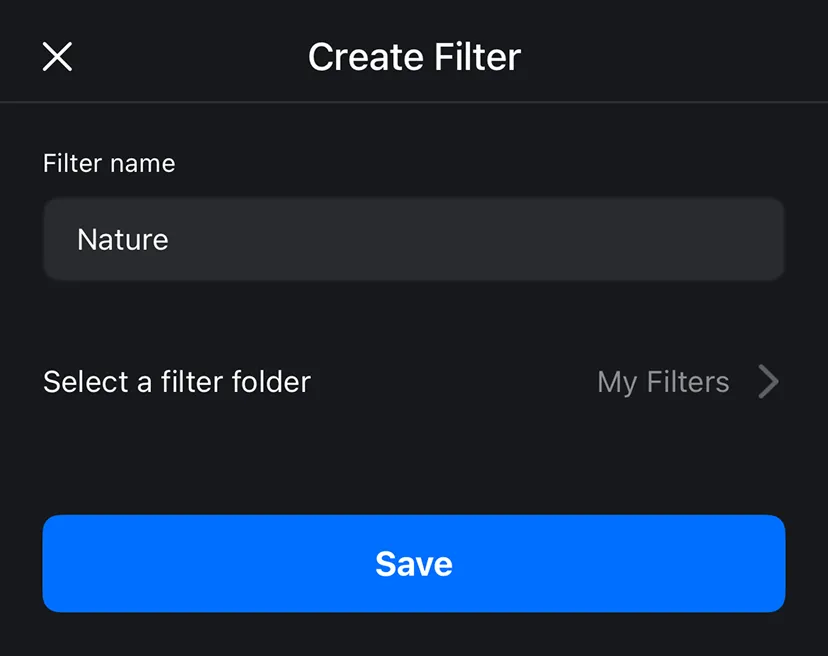
3. Enter the Filter Name, select a filter category, then tap [Save].
How to View Created Filters
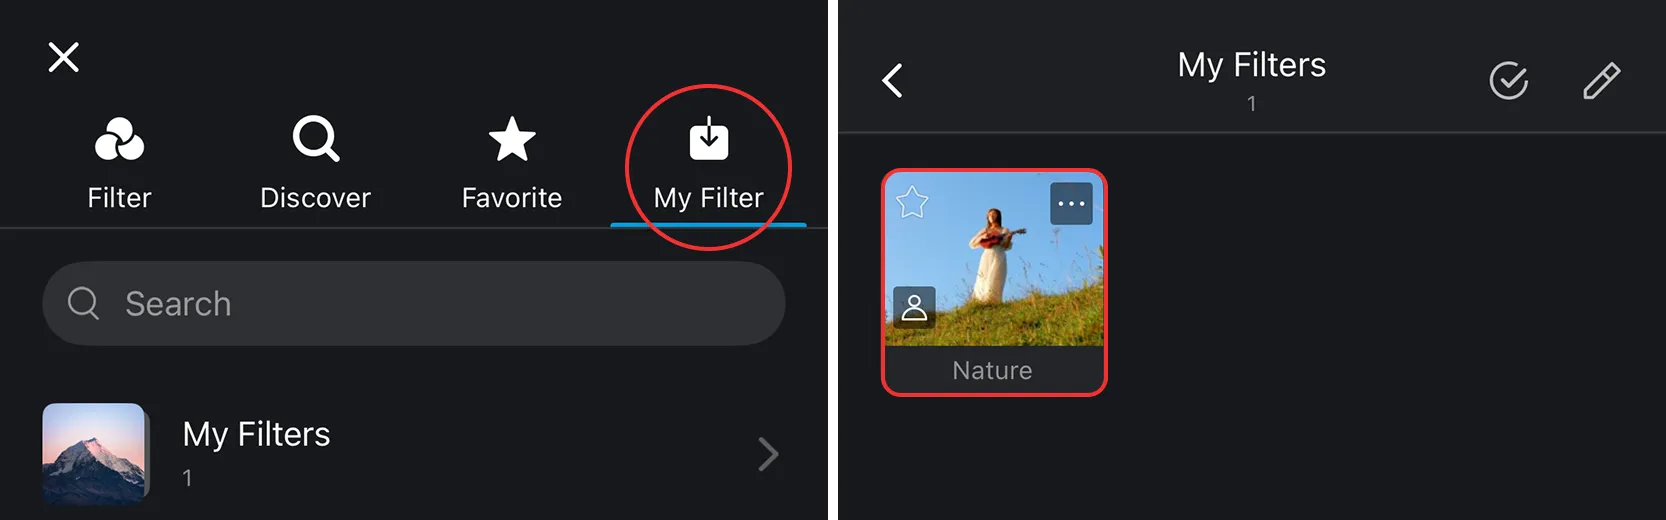
In the Filter Library, tap [My Filter], select the folder where your filter is stored, and find your created filters.
Share/Import Filter Files
Share Filter Files (Method 1)
1. On the filter adjustment page, tap the [Share] icon > Tap [Share Filter].
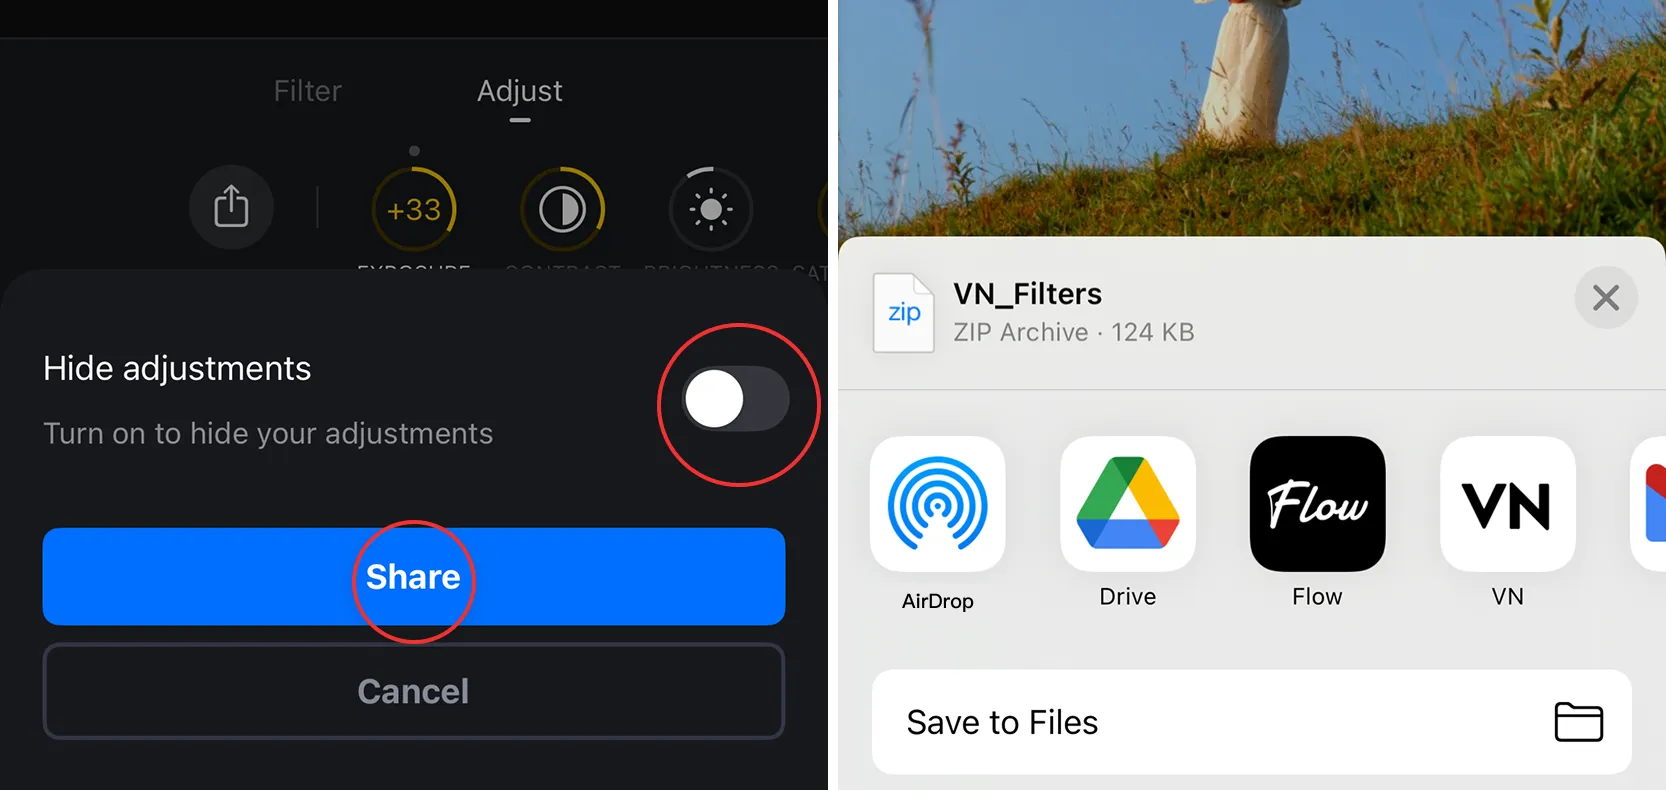
2. Choose whether to Hide adjustments > Tap [Share] to save or share the filter file.
Share Filter Files (Method 2)
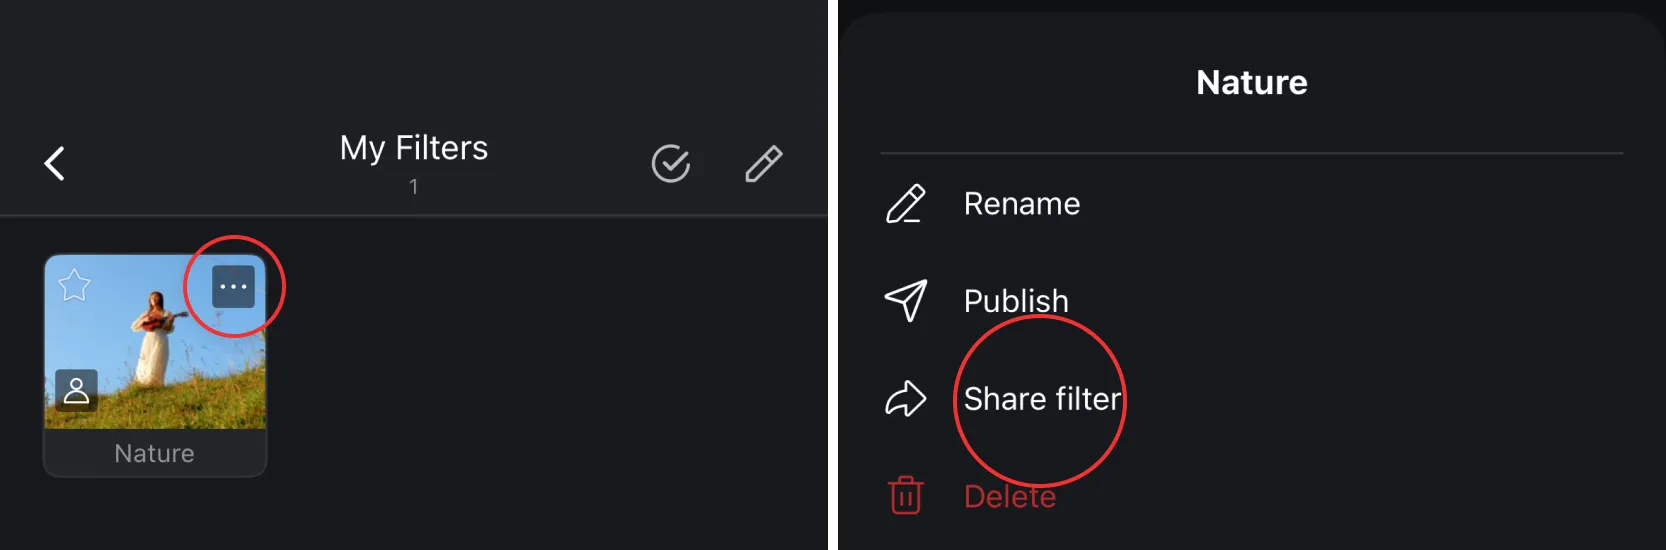
1. In the Filter Library, find the filter you want to share > Tap [...] icon > Tap [Share Filter].
Import Filter Files (Method 1)
1. Select a video clip > Tap [Filter]
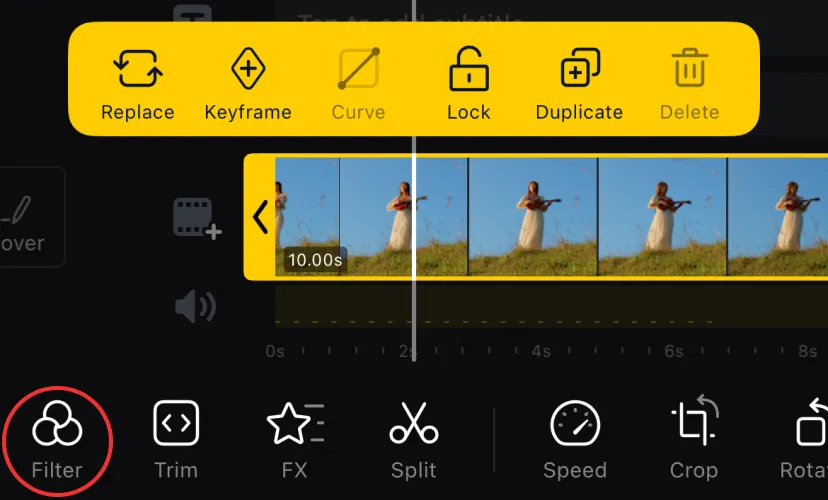
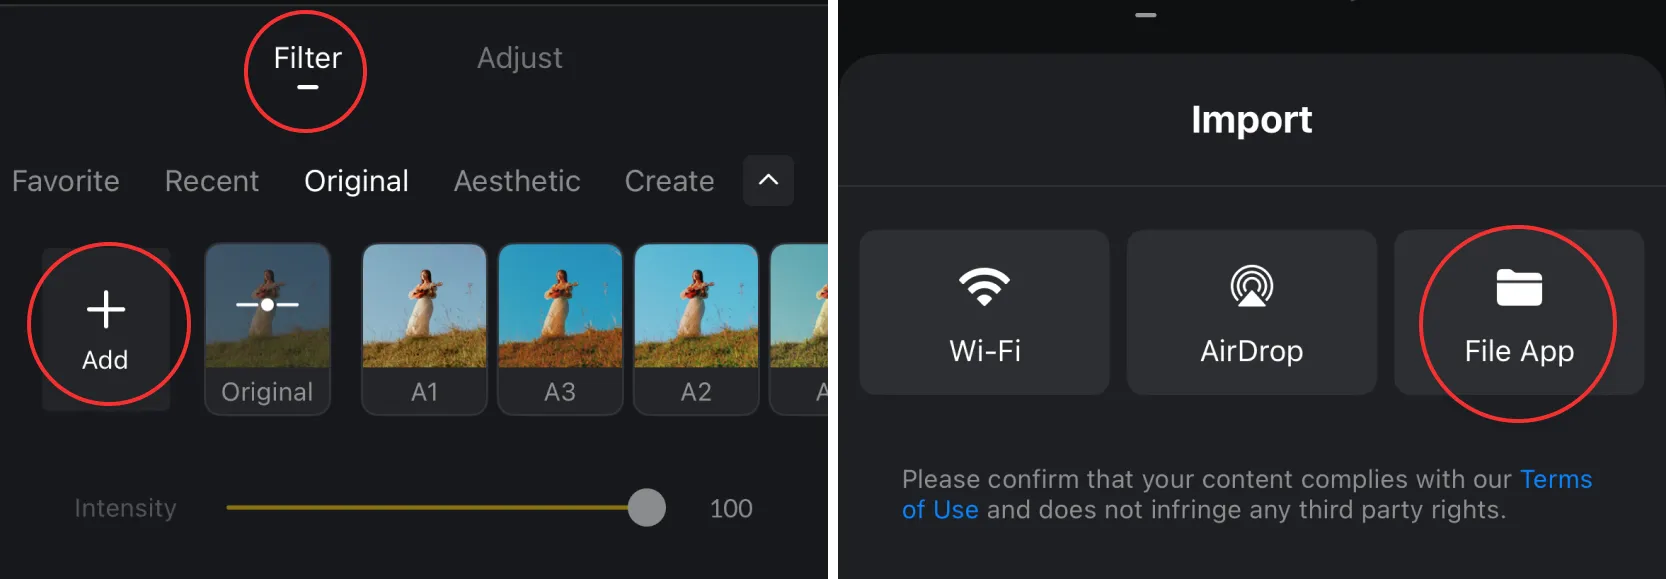
2. Tap [Filter] > Tap [Add] > Choose an import path (e.g., File App).
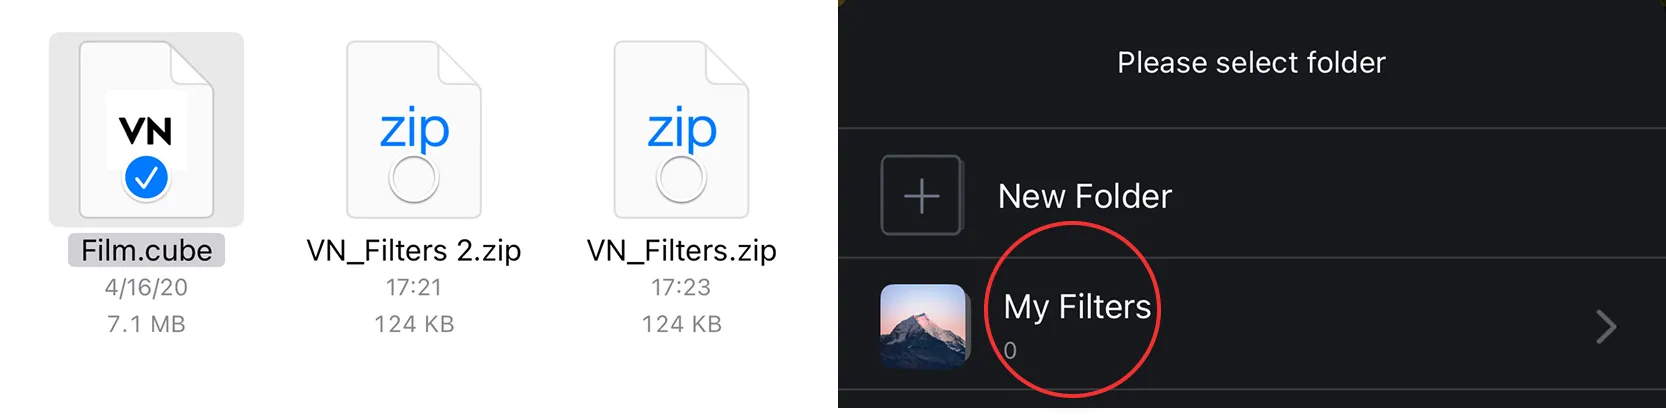
3. Select the Filter File to import > Place it in the appropriate filter category.
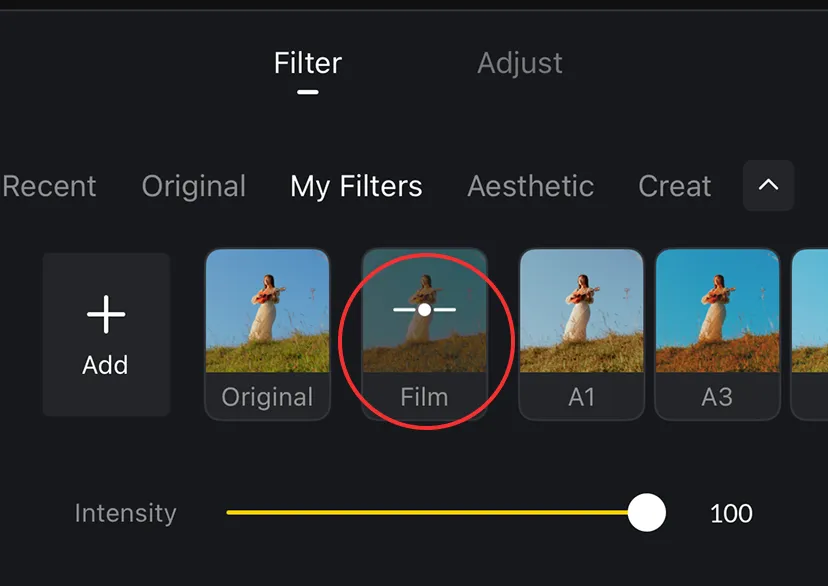
4. You can now apply the imported filter in the Filter section.
Import Filter Files (Method 2)
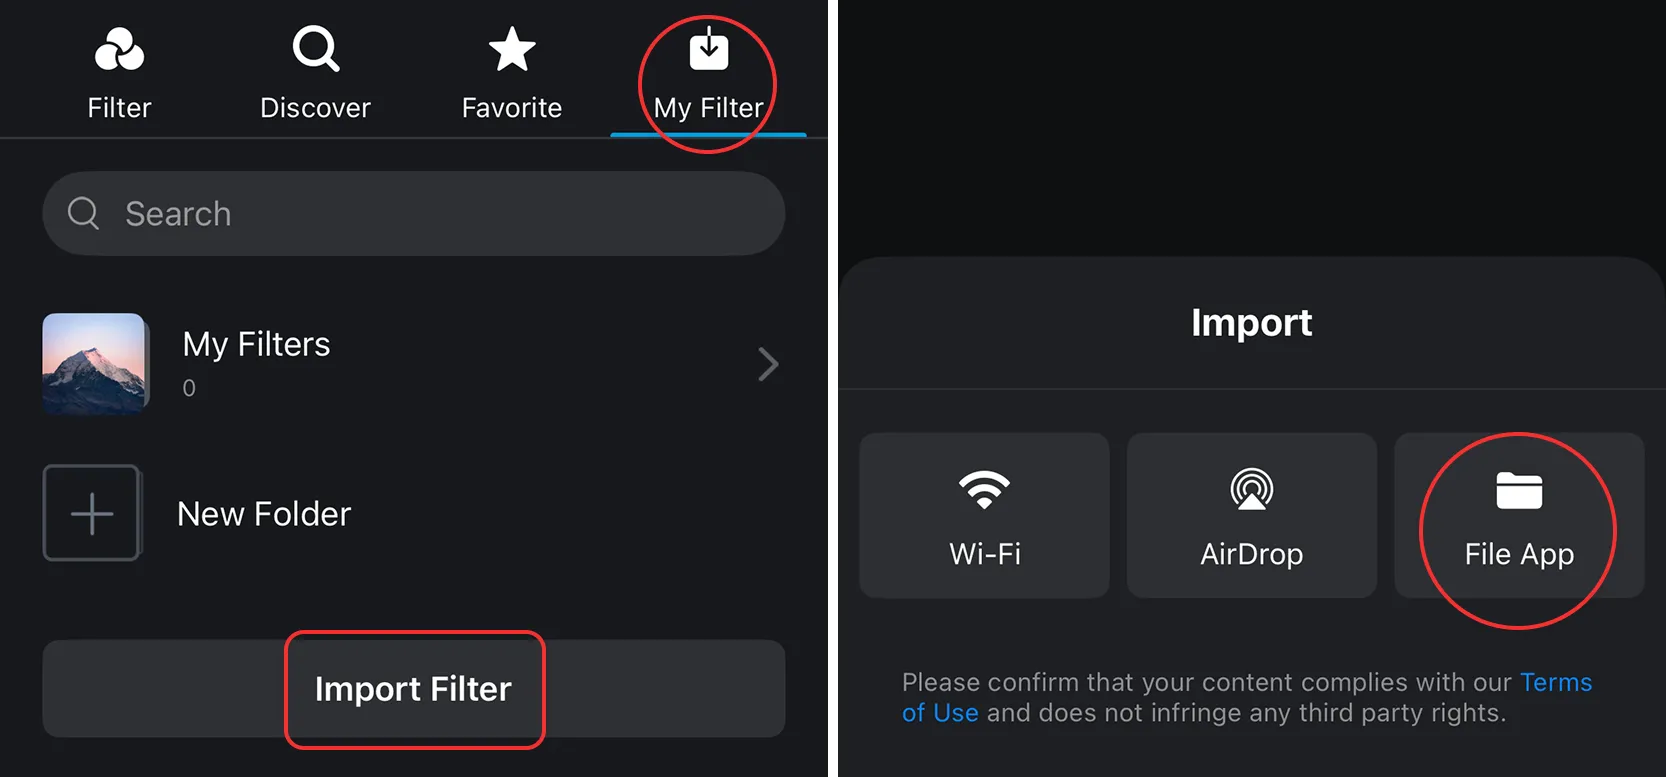
1. In the Filter Library, tap [My Filters] > Tap [Import Filter] > Choose an import path (e.g., File App)
2. Select the Filter File to import > Place it in the appropriate filter category.
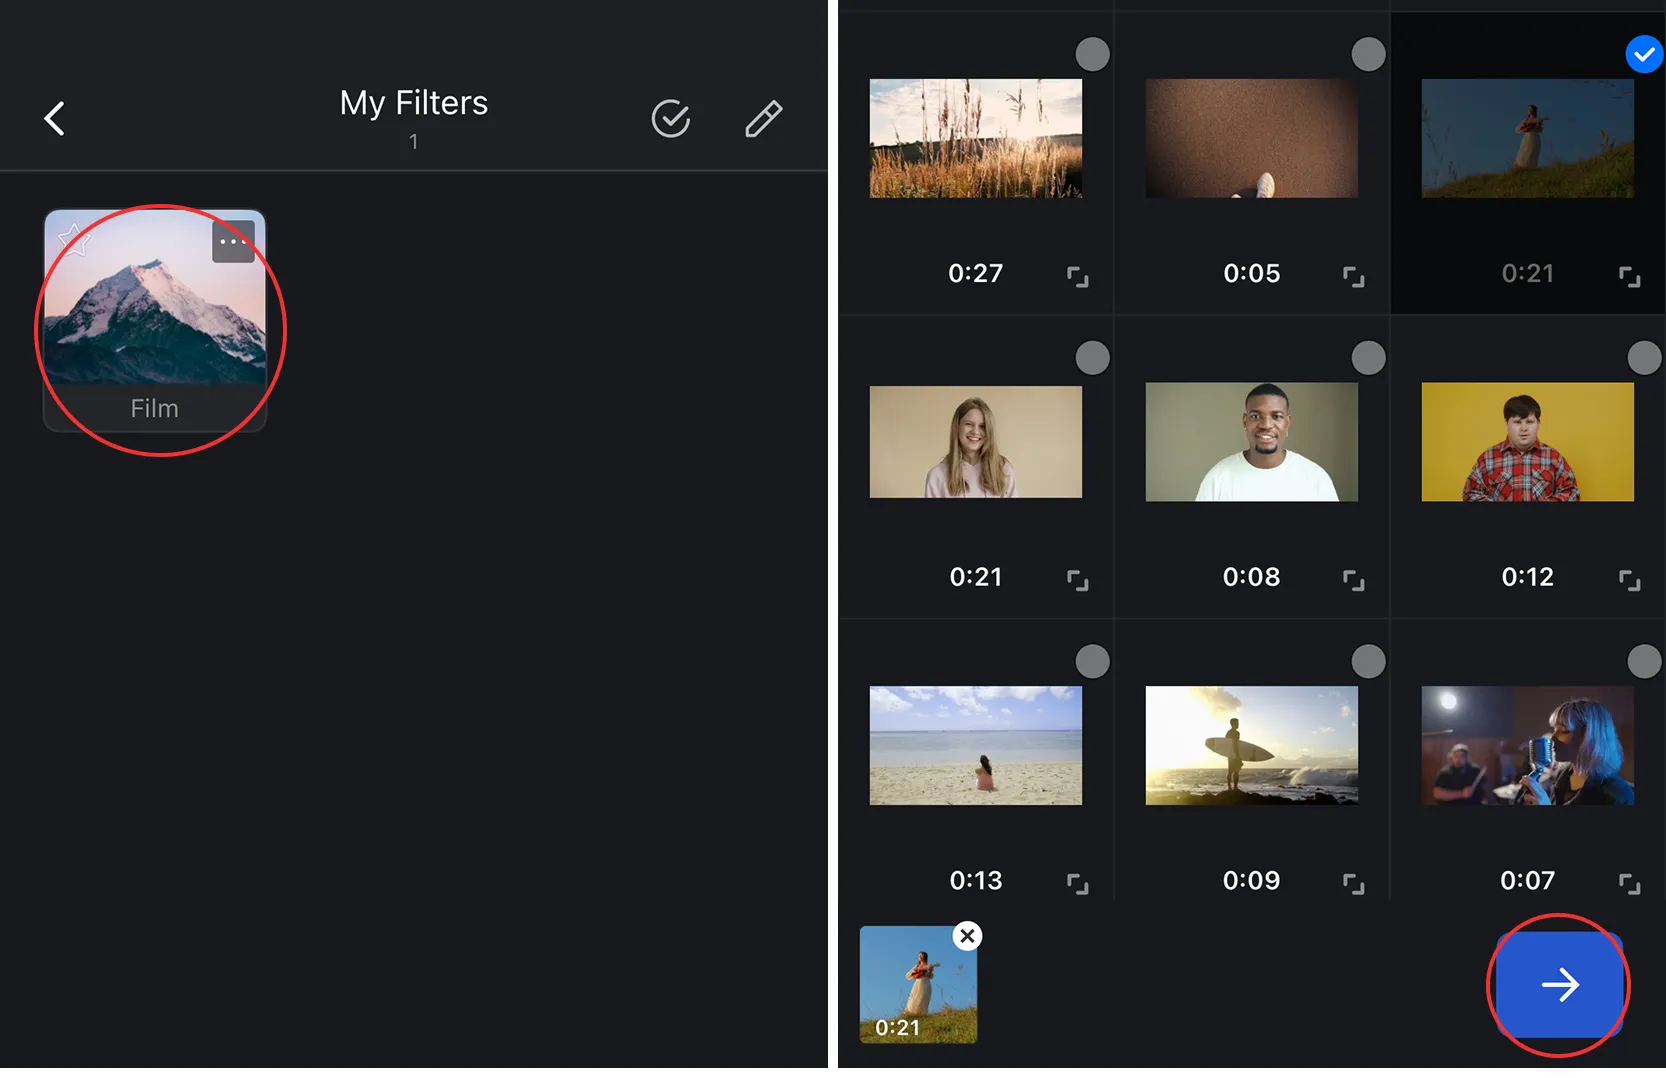
3. Tap the imported filter > Select the video clip you want to apply it to. The filter is now successfully applied.
Publishing Filters
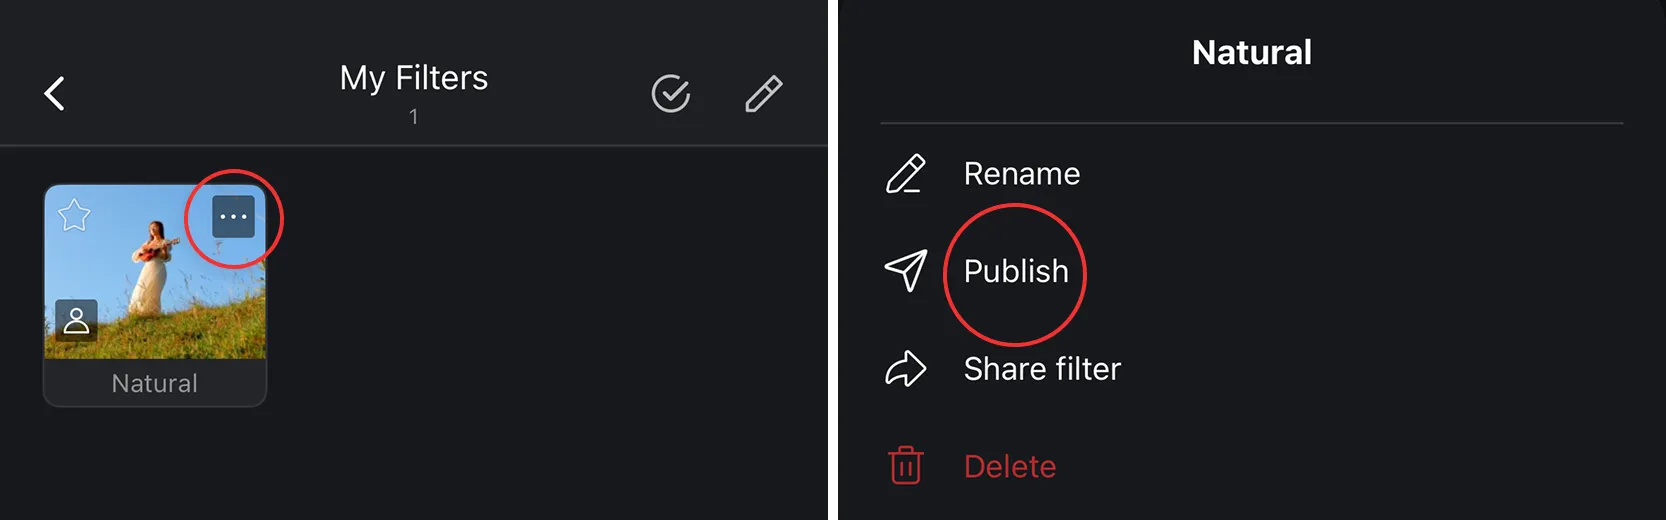
1. Tap [...] icon > Tap [Publish].
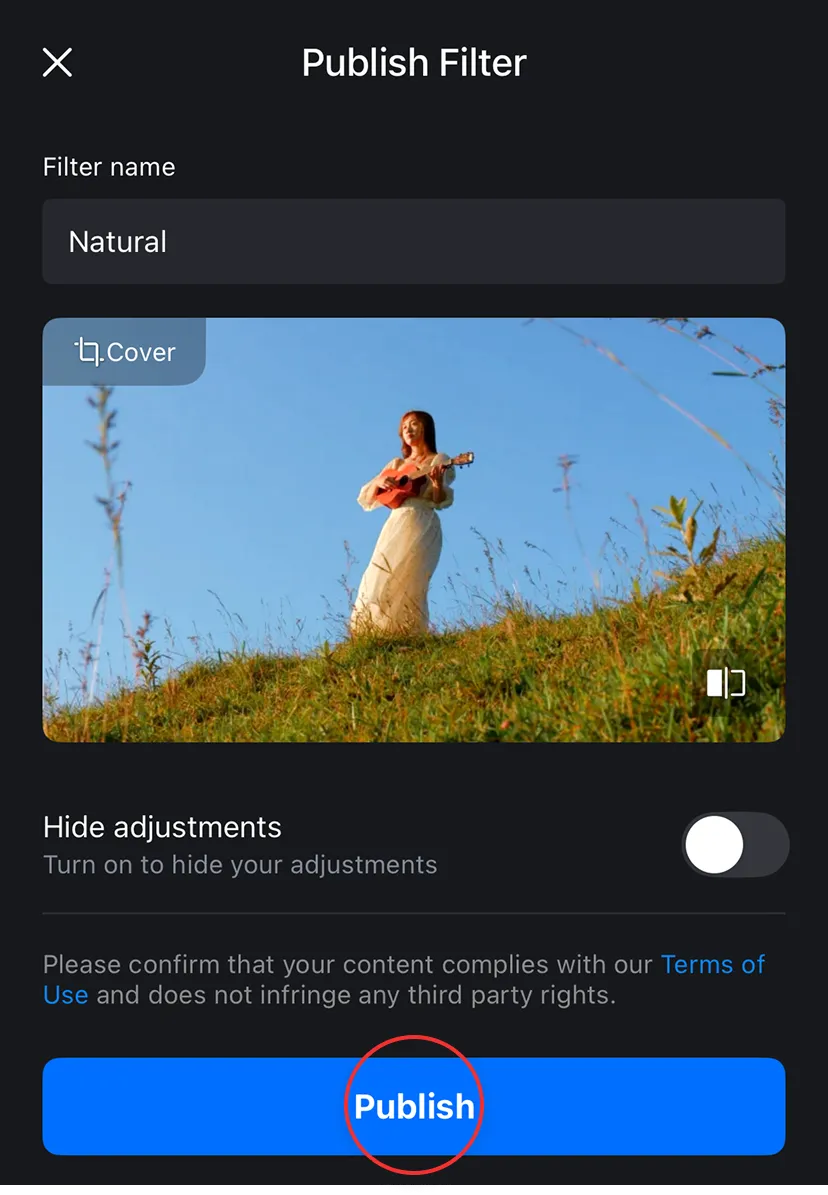
2. Edit the Filter Name, choose whether to Hide adjustments, then tap [Publish].
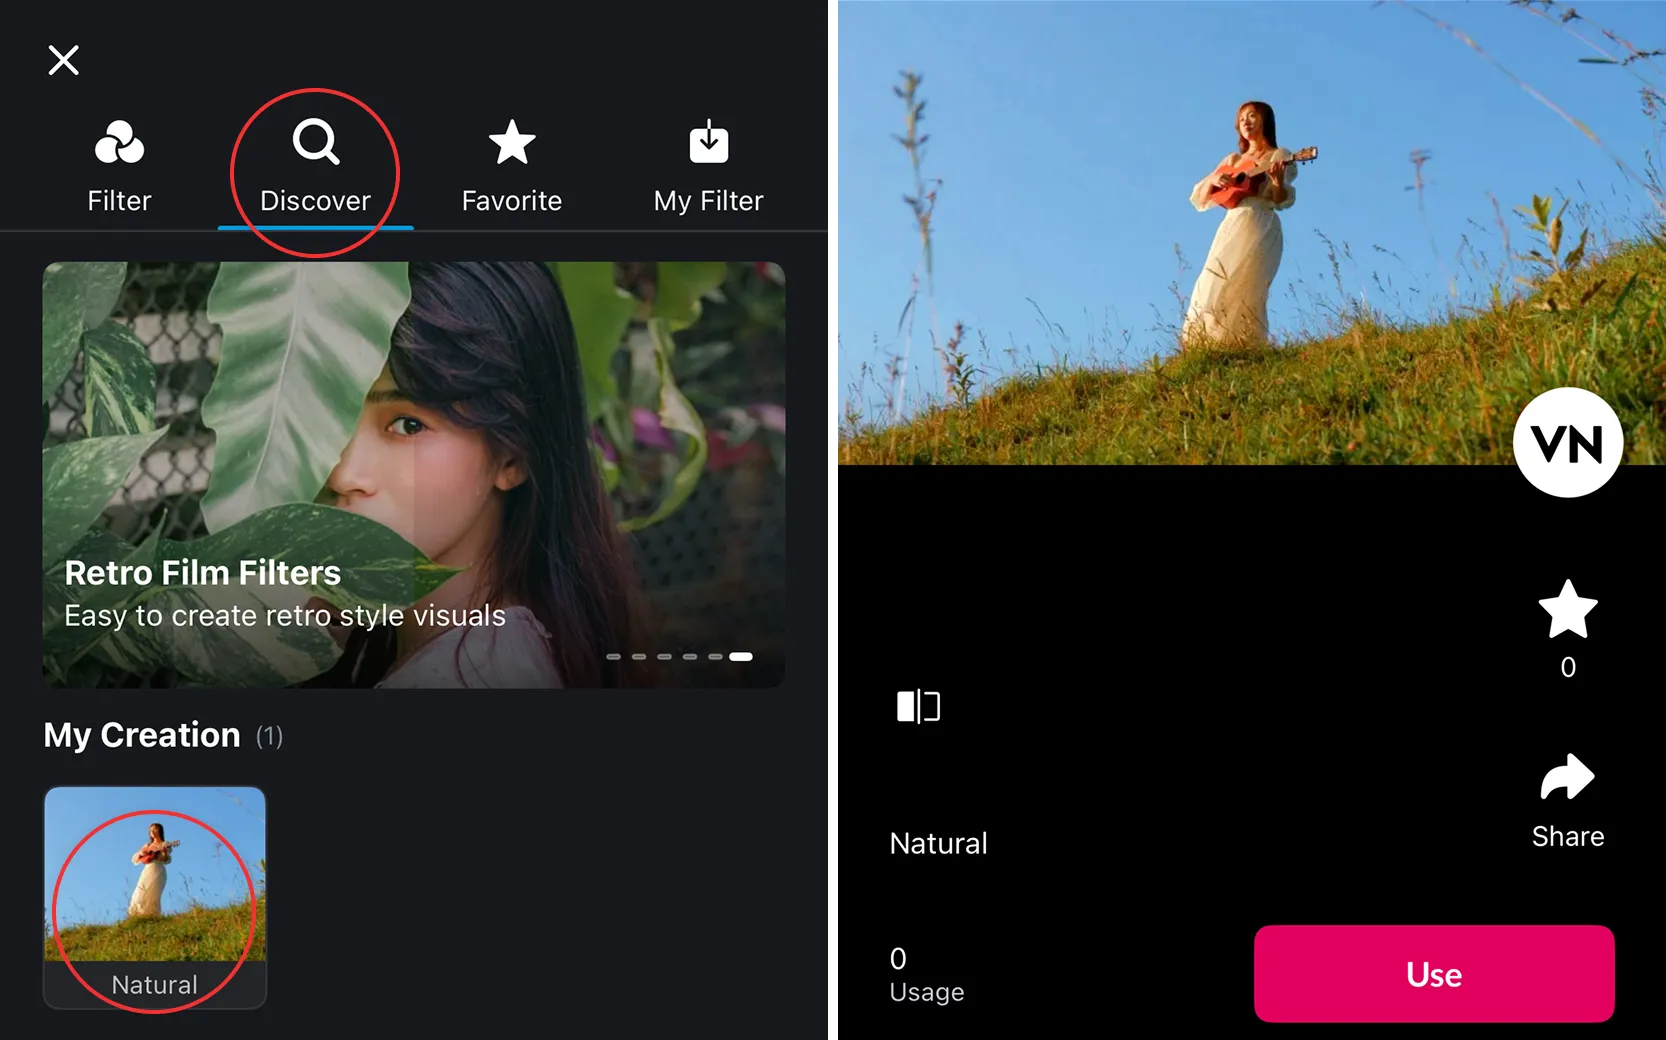
3. In the Filter Library, tap [Discover] to view your published filters.
Sharing/Using Filter QR Code
Sharing Filter QR Code
On the Filter Details page, tap [Share] to download or share the Filter QR Code.
Using Filter QR Code
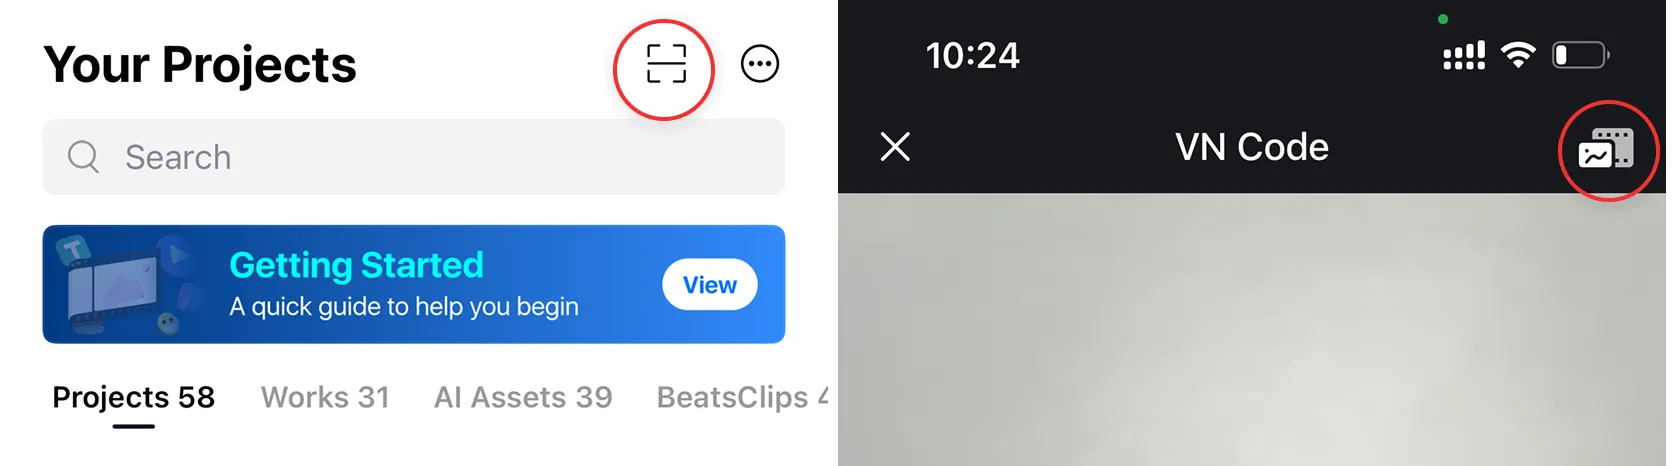
1. On the home screen, tap the [scan] icon > Tap the [Select Image] icon, then select the Filter QR Code.
2. Tap [Use], select the photo or video you want to apply the filter to > Tap [→] button to successfully apply it.