

Keyframe - Audio
Control audio volume by adding keyframes.
1. Select your audio track and tap [Keyframe] to add the first volume keyframe.
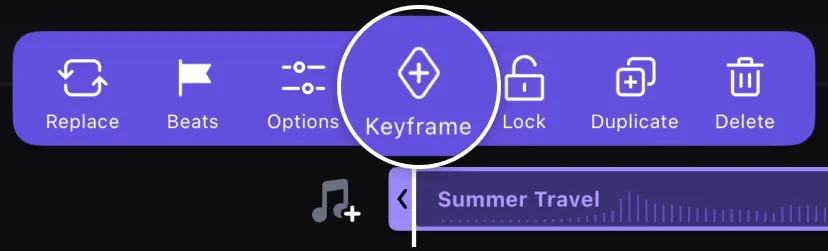
2. Move the playhead to a new position and adjust the volume. A new keyframe is created automatically, and the volume changes from the previous keyframe's level to the newly set level.
3. Continue moving the playhead and adjusting the volume to create additional keyframes.
Keyframe - Materials
Use keyframes to adjust the zoom, motion, rotation, and transparency of materials, including stickers, text, PiP, mosaic, and magnifier.
Adding Keyframes
1. Select the clip, Tap on the [Keyframe].
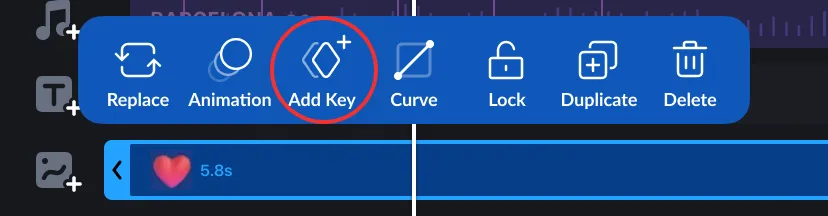
2. Add at least 2 keyframes and individually adjust the zoom, motion, rotation, or transparency effects.
Keyframe Curves
Use keyframe curves to control how quickly or slowly an adjustment changes between two keyframes. You can apply a preset, fine-tune any preset, or build a custom curve.
1. Select the clip, add at least two keyframes, and move the playhead between them.
2. Tap the keyframe, and then tap [Curve].
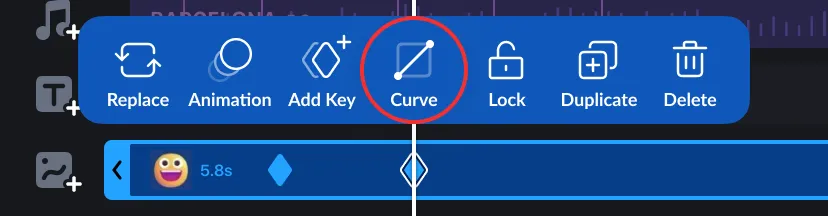
3. Preview the curve to see how it changes scaling, movement, rotation, or opacity between the selected keyframes.
Apply a Preset Curve
1. Tap the curve name above the graph to open the preset menu.
2. Select a curve based on the motion you want to create.
| Presets | Curve behavior | Recommended use |
|---|---|---|
| Original | Default behavior. | — |
| Ease, EaseIn, EaseOut | Adds smooth acceleration, deceleration, or both. | Natural movement and most general animations. |
| Cubic, CubicIn, CubicOut | Creates a stronger speed change than the Ease curves. | Smooth motion that needs more noticeable acceleration or deceleration. |
| Quart, QuartIn, QuartOut | Produces a more pronounced speed change than the Cubic curves. | Fast entrances, strong stops, and dramatic motion. |
| Circ, CircIn, CircOut | Creates a rounded curve with a sharper change near the beginning or end. | Smooth zooms, rotations, and movements with a distinct start or finish. |
| Back, BackIn, BackOut | Moves slightly backward or overshoots before settling. | Bounces, pop-in motion, and playful emphasis. |
| Stutter1, Stutter3 | Adds uneven changes or brief reversals to the motion. | Shakes, glitches, and stylized stop-start movement. |
| Damp1–Damp6 | Adds oscillations that gradually settle. Each numbered preset uses a different rebound pattern. | Spring, elastic, and repeated bounce effects. |
3. Tap the [Play] button to preview the result, and then tap the checkmark to apply the curve.
Custom Curve
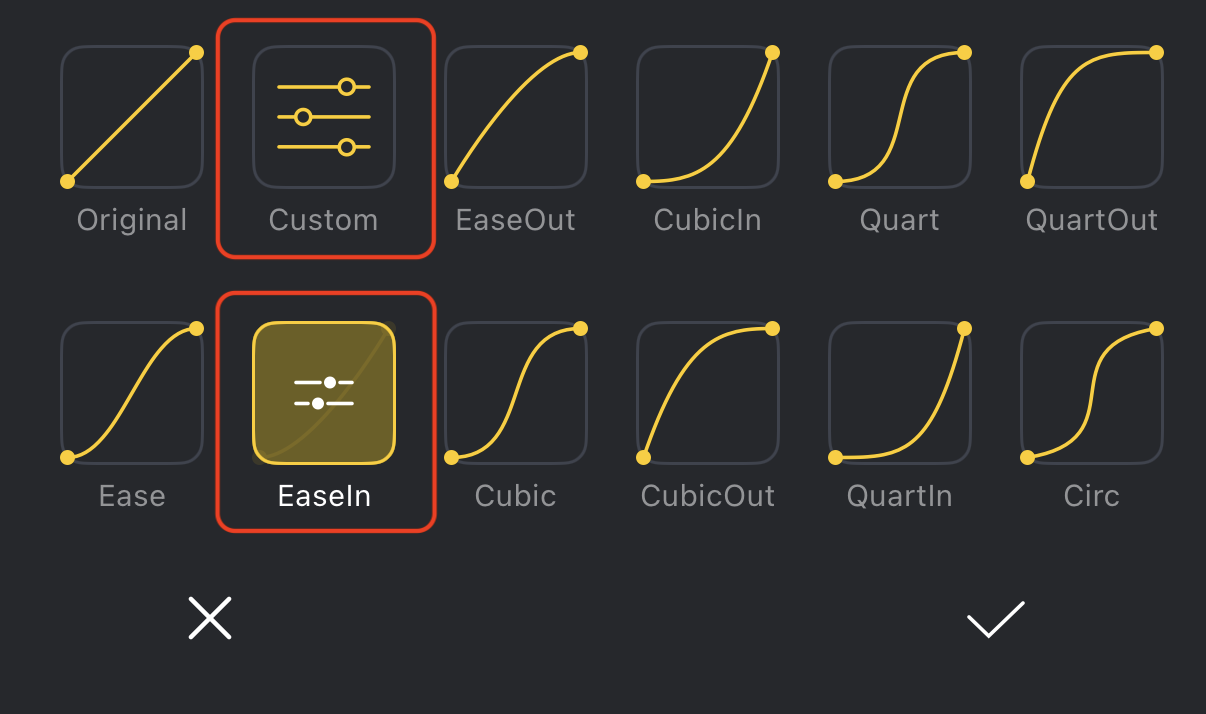
1. Open the curve editor by tapping [Custom] in the curve selector. To use a preset as a template, select the preset, and then tap the selected preset a second time.
Note
[Custom] opens the default straight line with three adjustable control points. When you open a preset as a template, the number of adjustable control points depends on the selected preset.
2. Drag the adjustable control points to shape the curve. The first and last points remain fixed.
3. Use the control-point button in the upper-right corner of the editor to add or remove a control point as needed.
4. Tap the [Play] button to preview your changes. The reset button restores the curve to its starting state: the Original curve when you start from [Custom], or the selected preset curve when you use a preset as a template. Tap the checkmark to apply the Custom curve, or tap [X] to cancel.
How the Custom Curve Editor Works
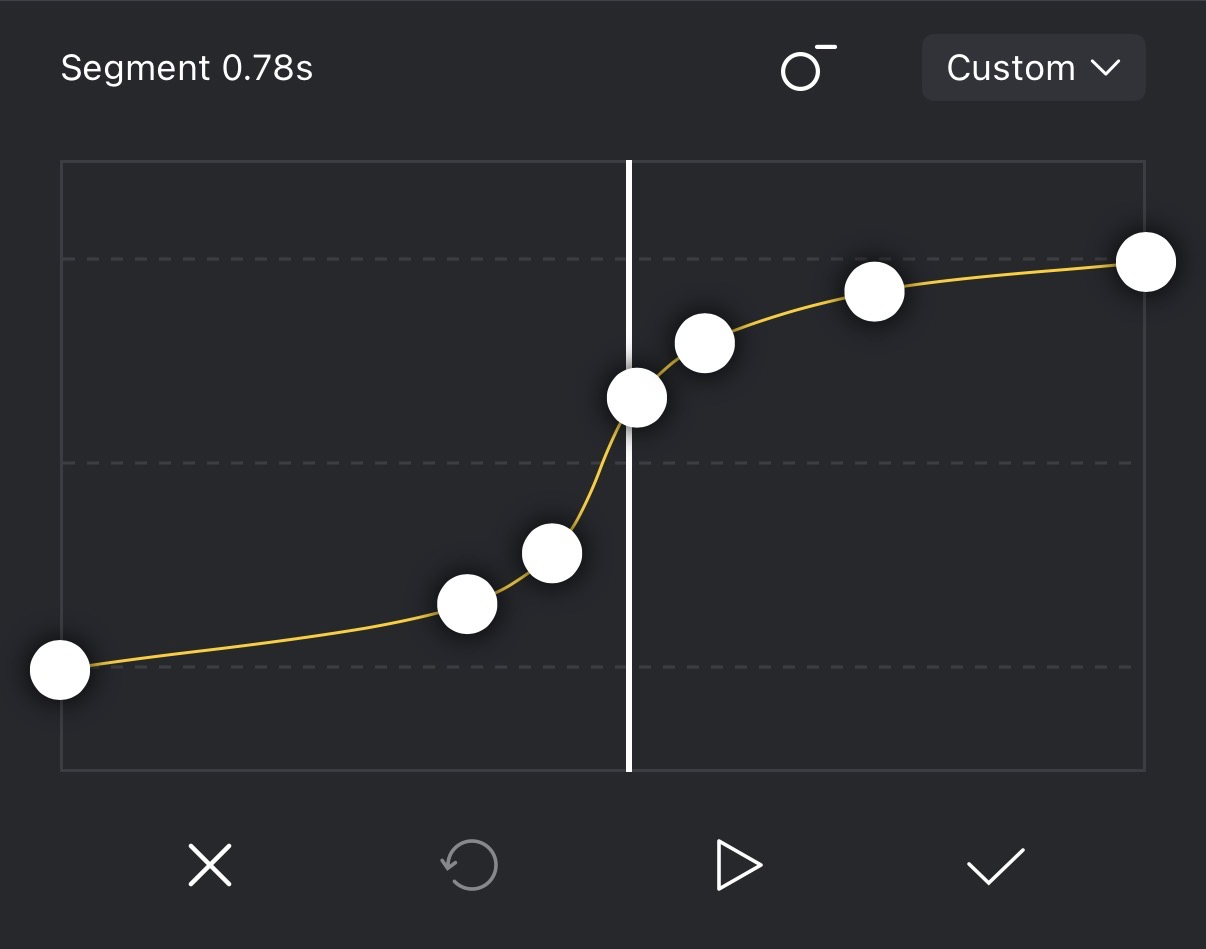
The graph controls how an adjustment progresses between two keyframes. Use the horizontal axis to control when the change occurs and the vertical axis to control the direction and progress of the change.
| Editor element | How to read or use it |
|---|---|
| Horizontal axis | Represents time between the two keyframes. The left edge is the first keyframe and the right edge is the second. Moving a control point horizontally changes when that part of the animation occurs. |
| Vertical axis | Represents the change between the two keyframe states. Moving from bottom to top plays the change in its normal direction. A downward section plays the change in reverse. |
| 0 and 1 dotted lines | The 0 line represents the first keyframe state at 0%, while the 1 line represents the second keyframe state at 100%. A straight line from 0 to 1 plays the change at an even pace. |
| Extra vertical range | The editor provides 25% of additional space below 0 and above 1. Moving the curve into these areas takes the animation beyond its set starting or ending state. |
| Fixed endpoints | The first point stays at the left edge at 0, and the last point stays at the right edge at 1. These points cannot be moved. |
| Adjustable control points | Drag a point horizontally to change its timing or vertically to change its progress, direction, or overshoot. |
| Curve steepness | A steeper section plays the change faster. A flatter section plays it more slowly. |
For example, if an item moves from the left side to the right edge, moving the curve above 1 makes the item travel beyond the right edge. If the curve then returns to 1, the item returns to its set ending position.