
Create a custom mask
Note: [Custom] mask requires VN Pro subscription.
A custom mask gives you precise control over the visible area of a video, photo, or other layer. Draw an outline that follows a subject, object, or any area of the frame, then refine it whenever your design changes.
Custom masks are useful for creative reveals, layered compositions, cutout effects, and transitions that preset shapes cannot achieve.
- Select a material on the timeline, then tap [Mask].
- Tap [Custom] in the mask picker to enter the custom mask editor.
A yellow outline shows the visible area of the masked material, and white points show the shape’s anchor points.
Manipulate mask
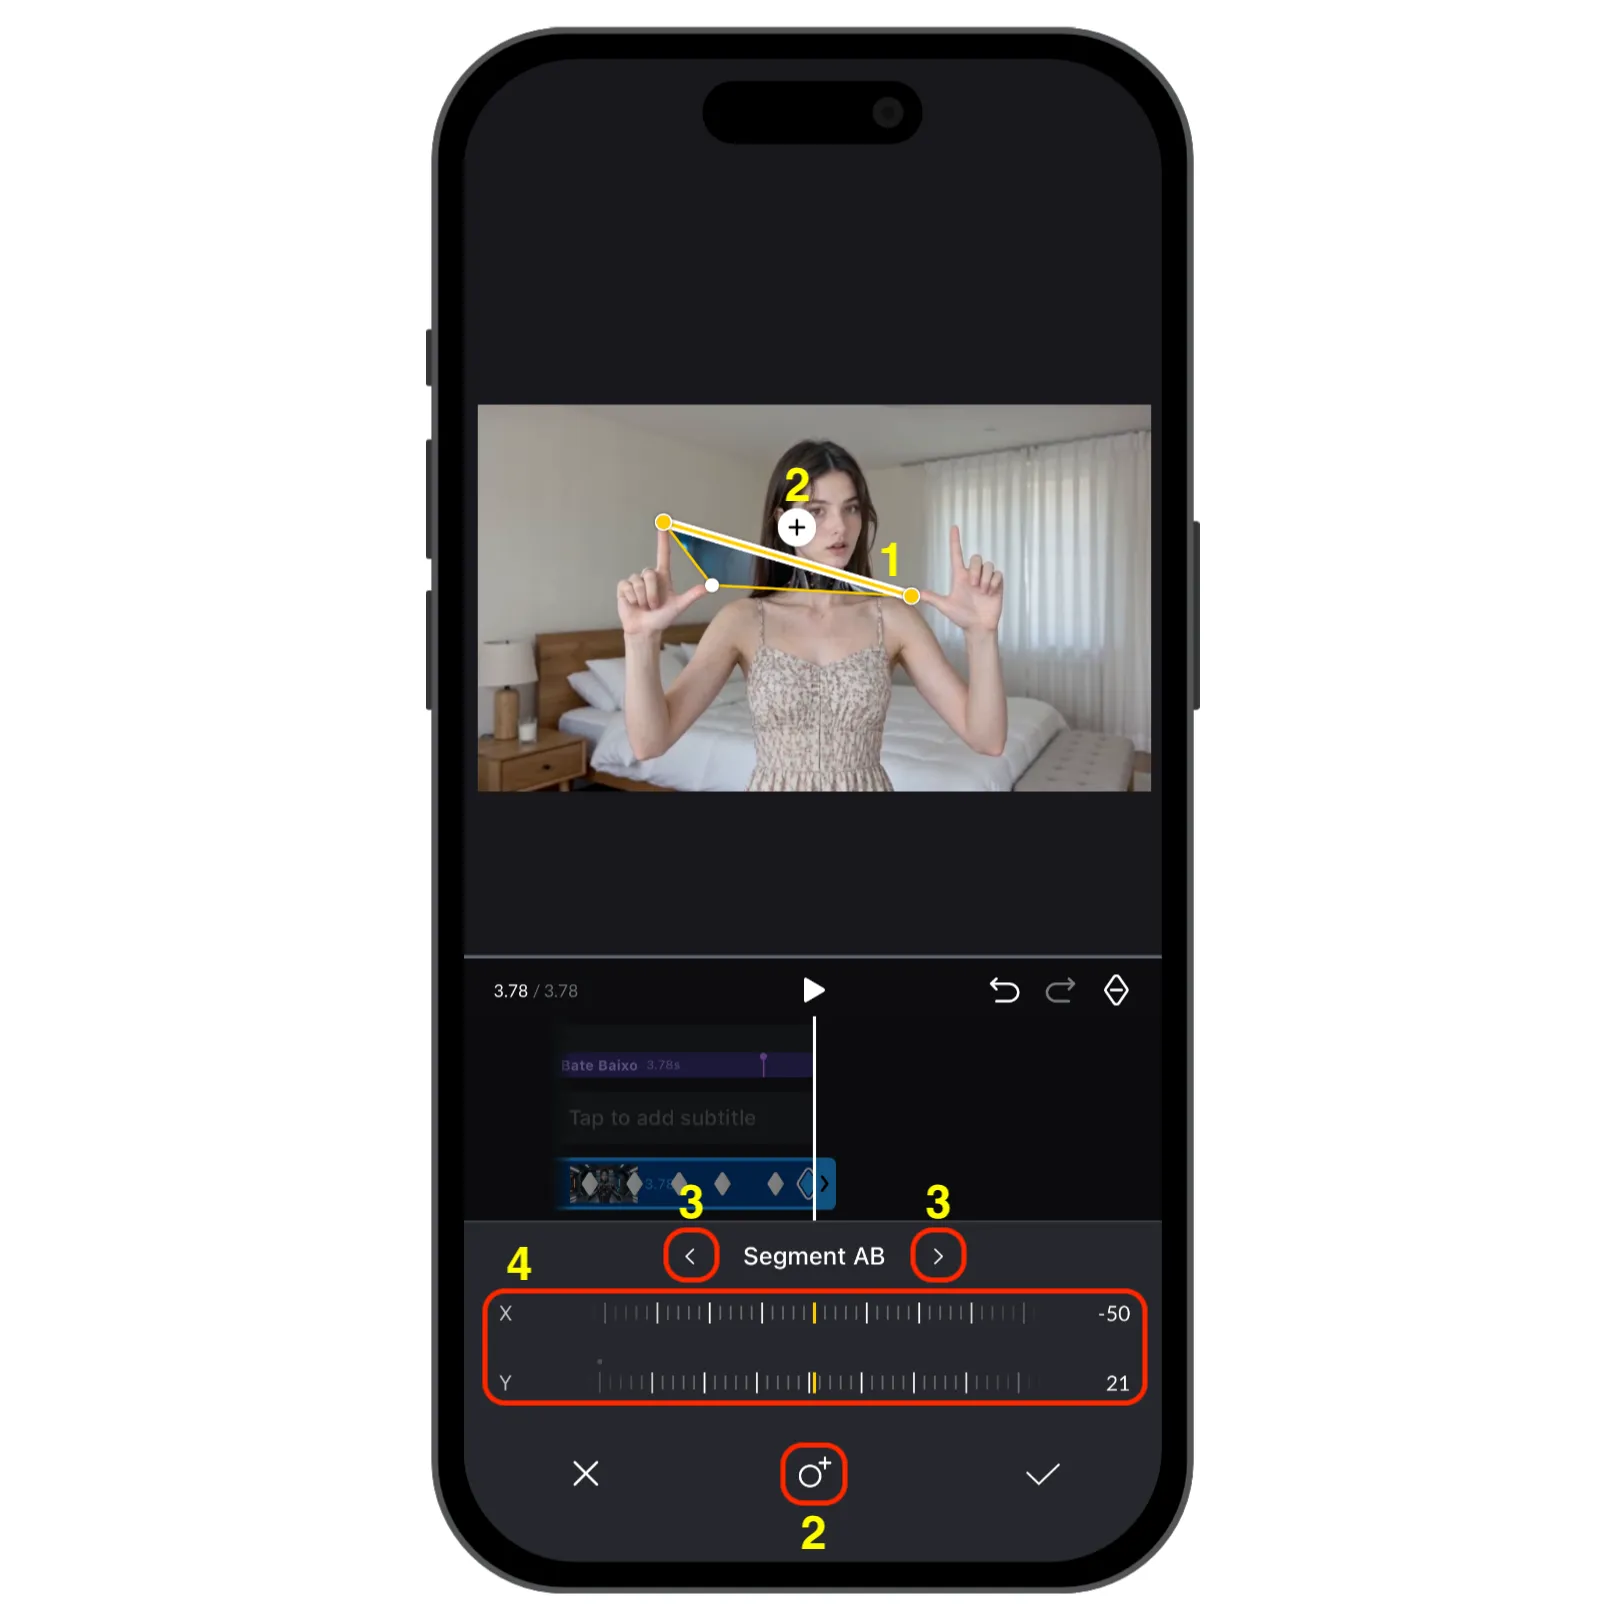
Edge manipulation
Tap any edge to hightlight the edge to select it.
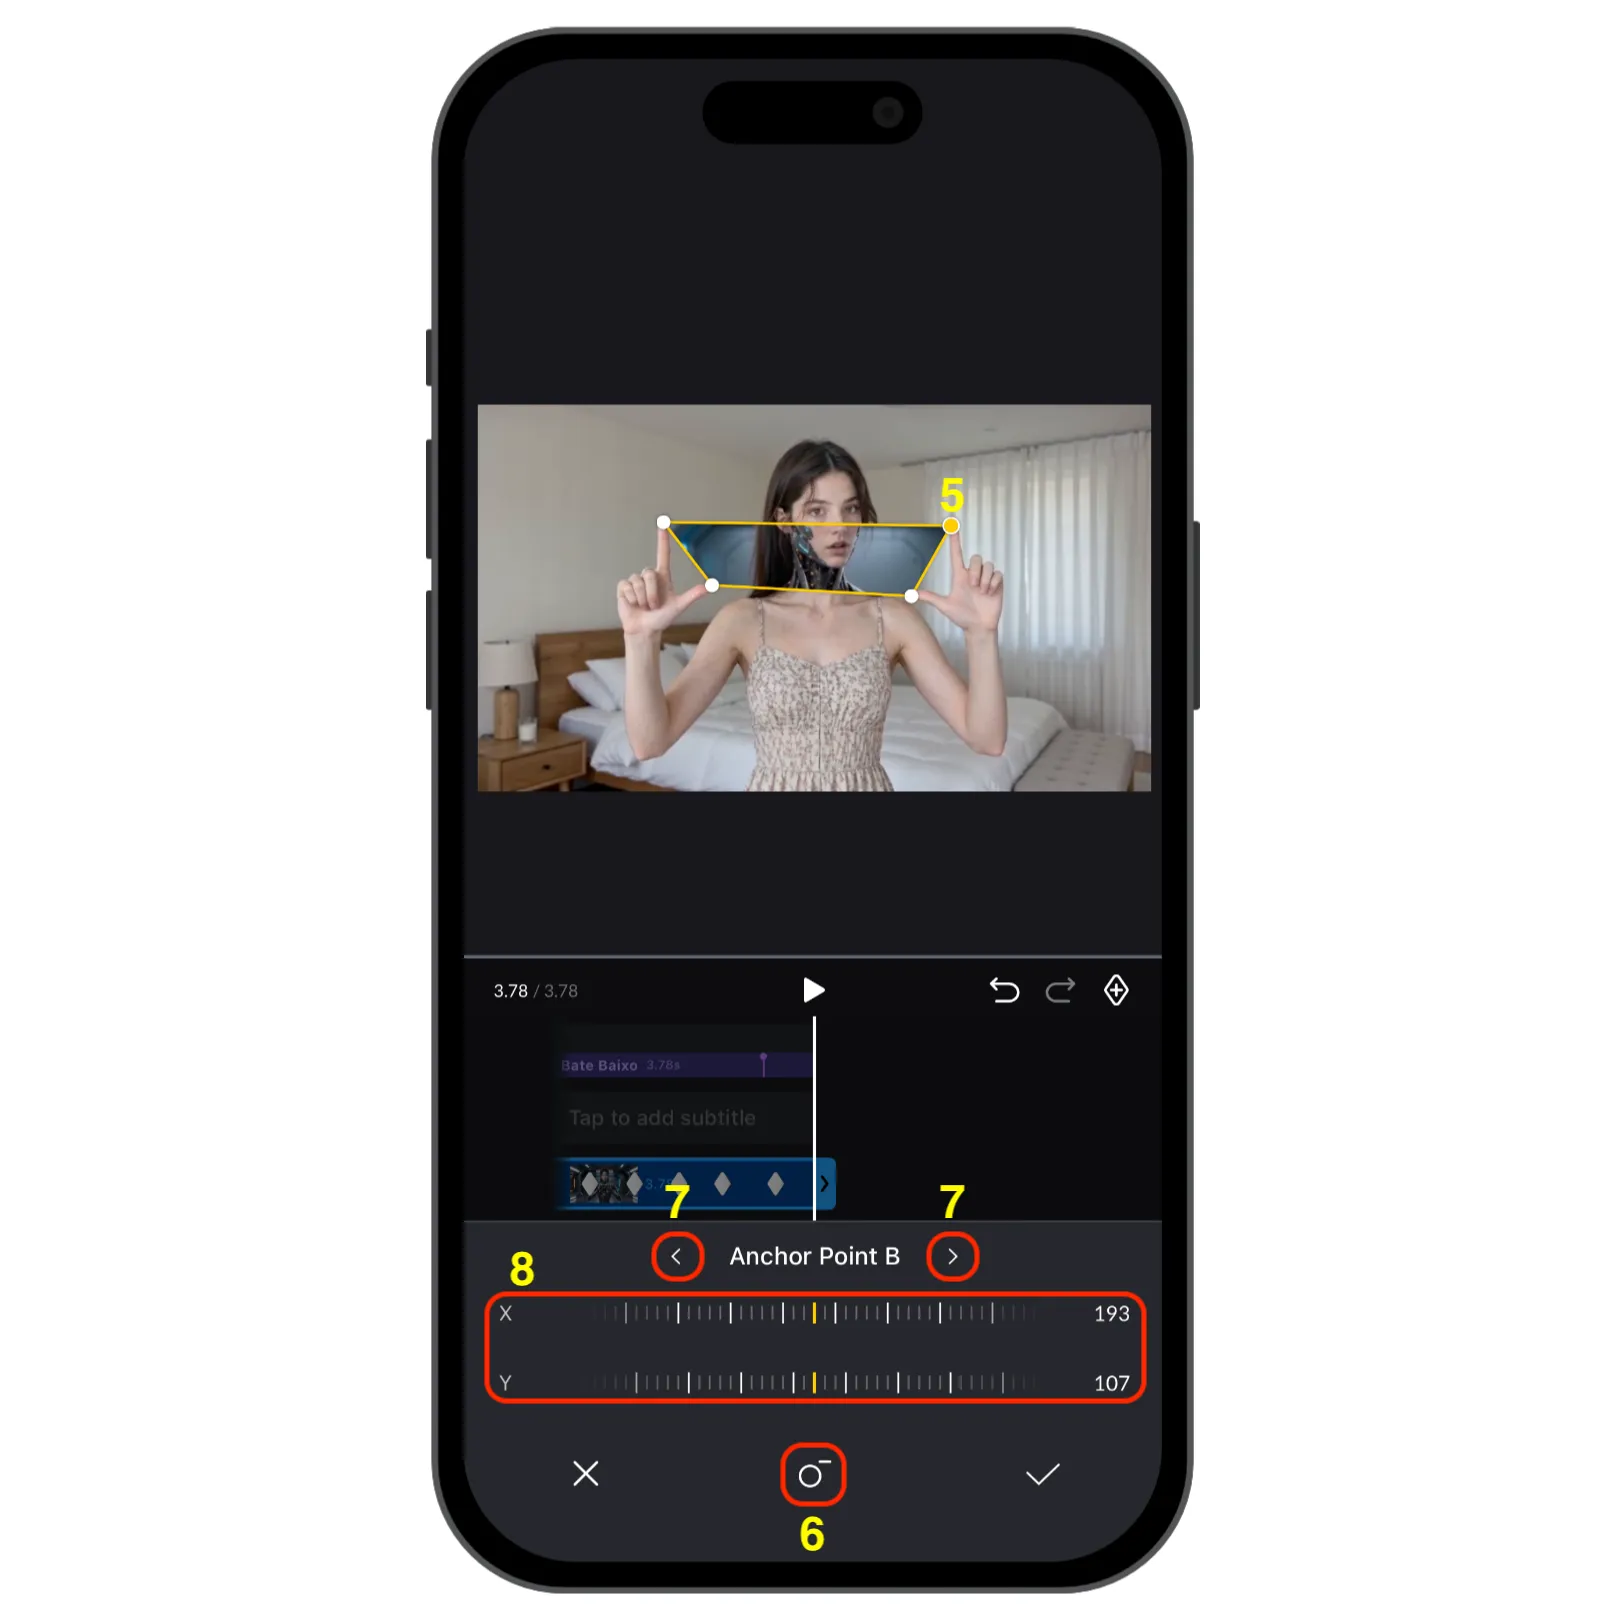
To add a new point, tap the plus sign next to the edge or tap the lower middle add point button.
Switch between different edges by tapping on it in the canvas or use the edge switcher arrow next to the edge name.
Move the edge by dragging it on the canvas or fine tune it by using the movement control in the lower menu.
Point manipulation
Tap any point to hightlight the point and select it.
To delete a point, select it and tap the remove control.
Switch between different points by tapping on it in the canvas or use the point switcher arrow next to the point name.
Move the point by dragging it on the canvas or fine tune it by using the movement control in the lower menu.
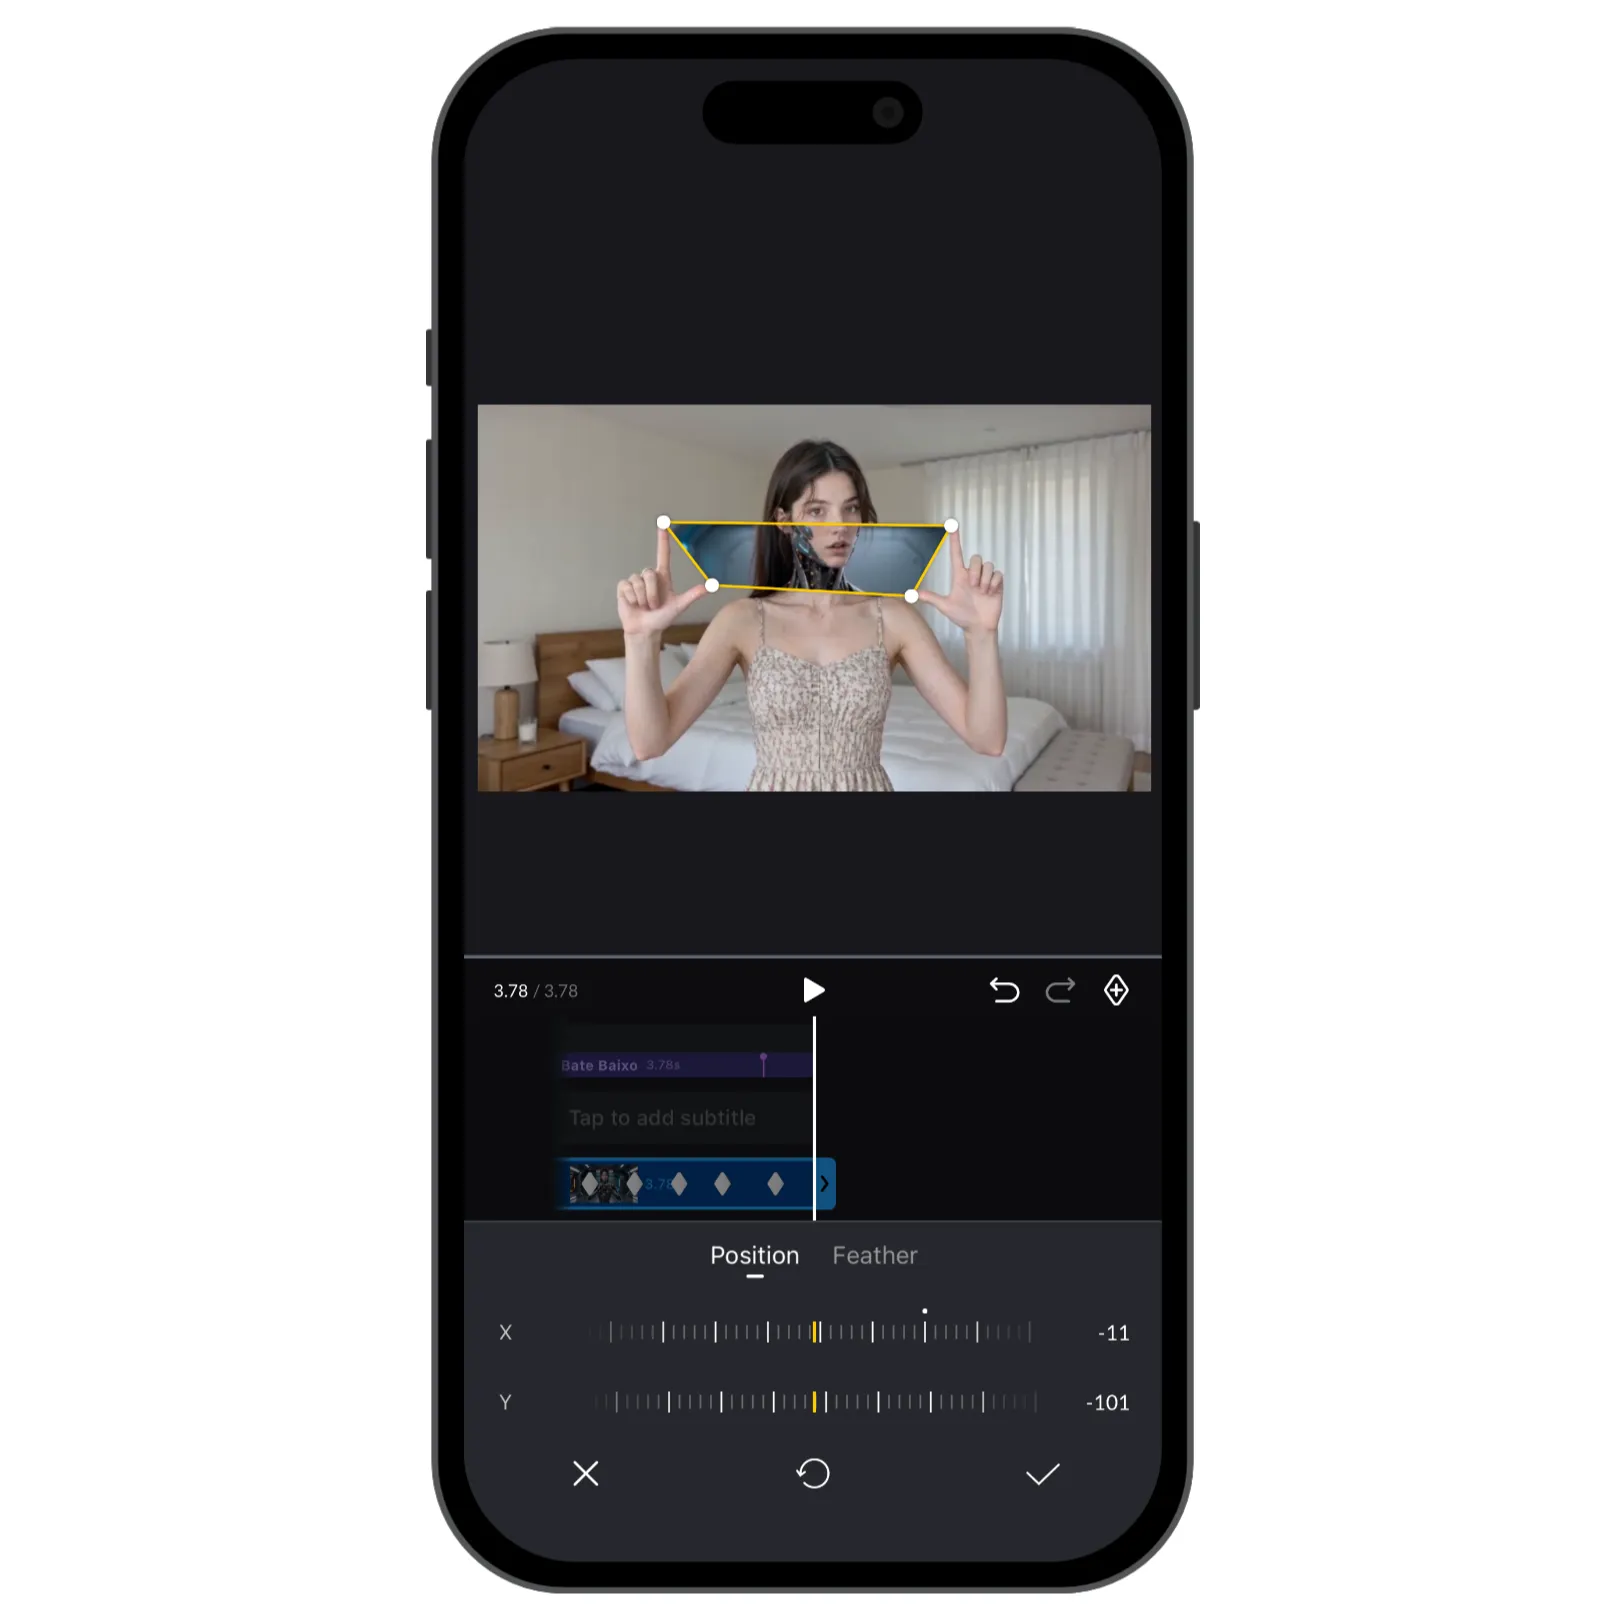
Move the mask area
When no point or line is selected, drag inside the outline to move the entire mask, or use the position wheel to move it more precisely. This keeps the shape intact while you reposition it on the canvas.
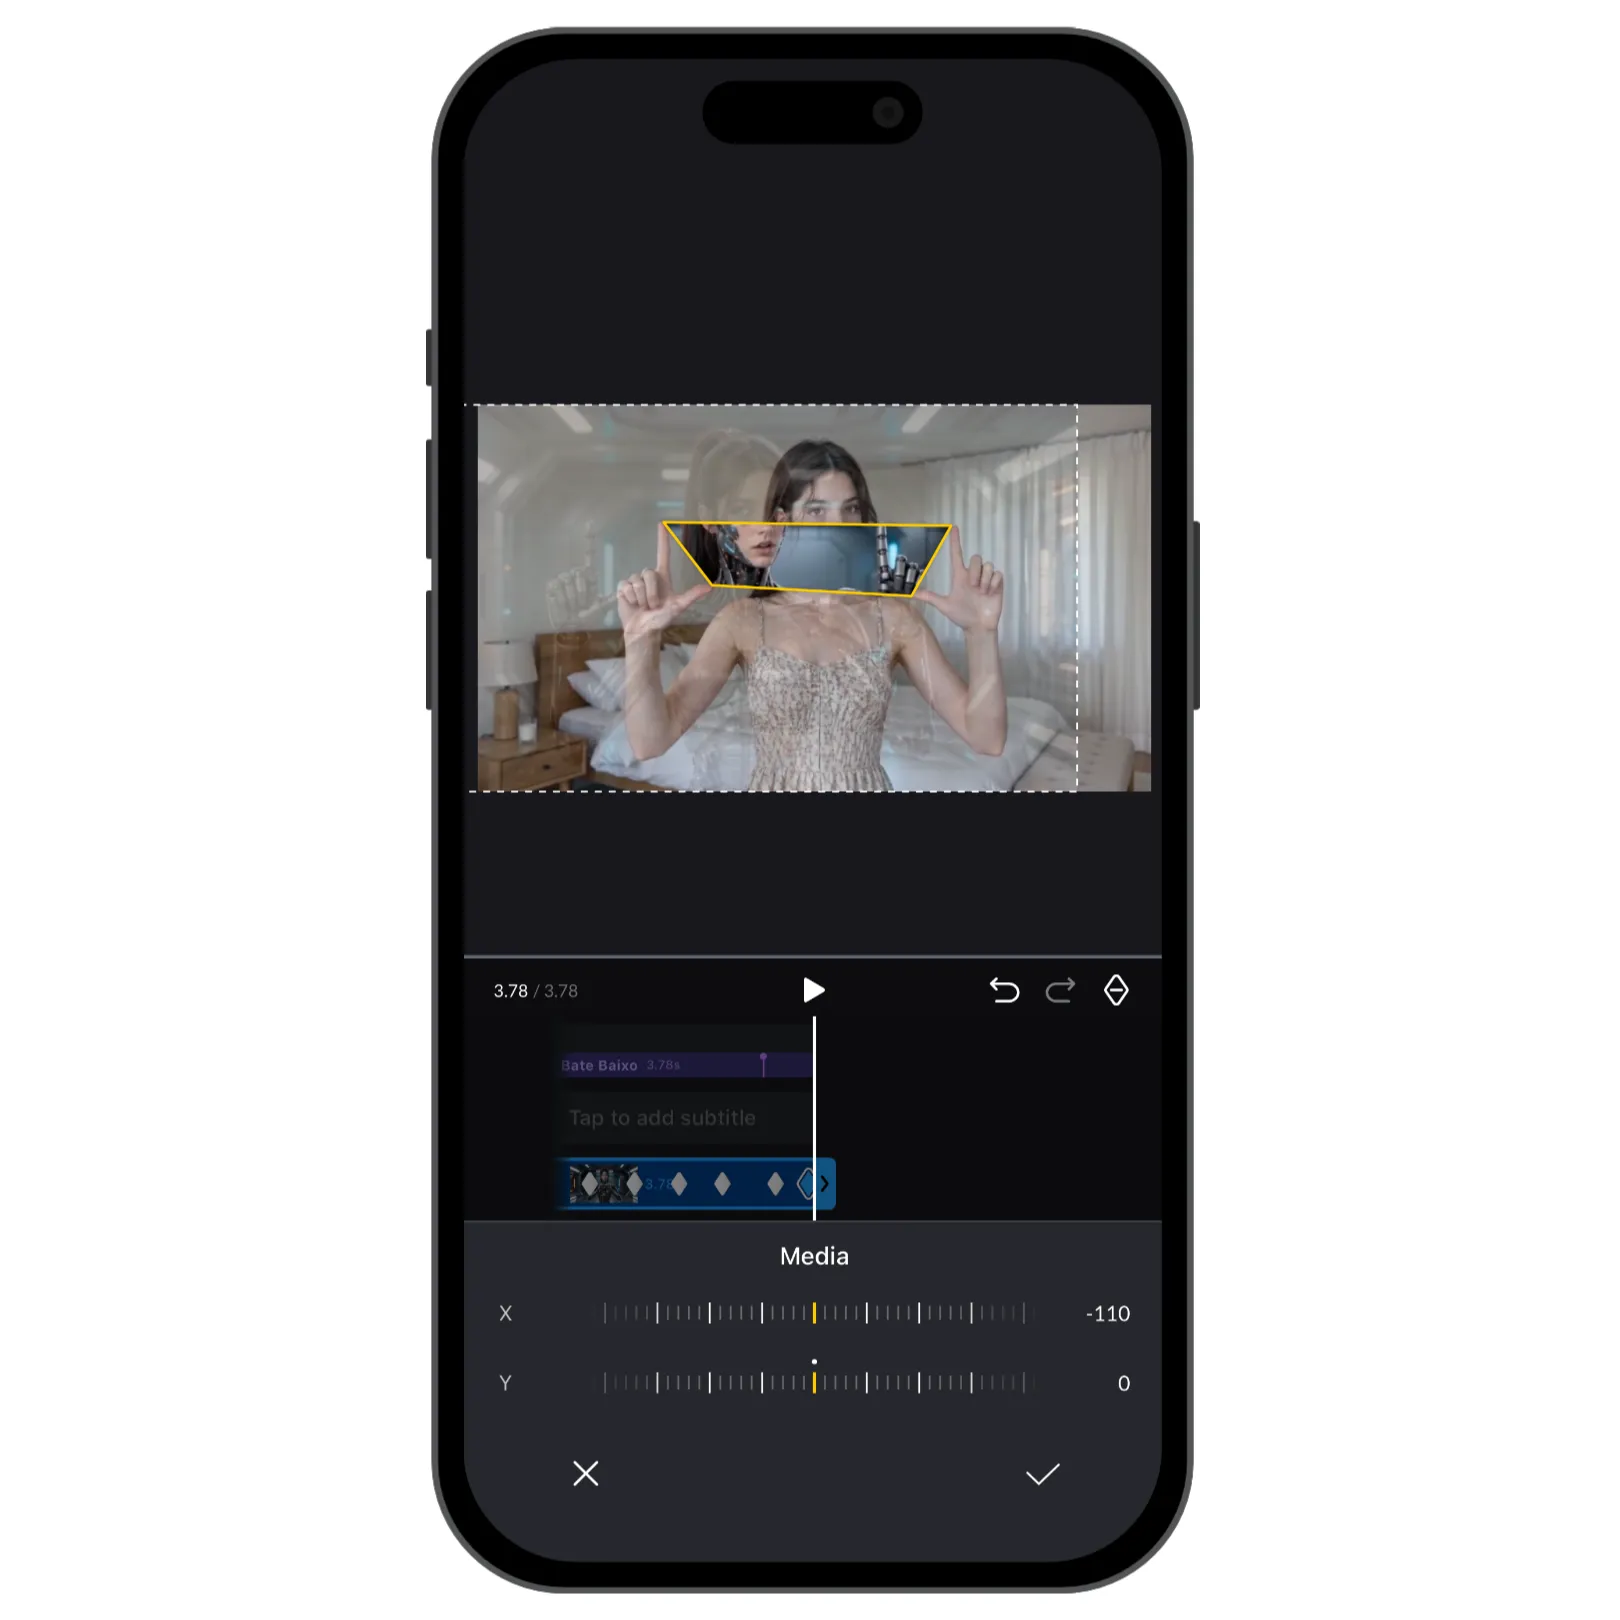
Move the material inside the mask
Tap the content inside the mask to select the material, then drag to move the video or photo without moving the mask. This makes it easy to reposition the content inside a carefully shaped outline.
Adjust custom mask settings
- Adjust [Feather] to soften the edge and blend the masked material naturally into the layers below.
- Use [Reverse] to show the area outside your outline instead of the area inside it.
- Tap [Show Underlying Layer] (the image-and-eye icon) to make the masked content transparent and preview the layer underneath while you build the composition. This helps you with matching the masked layer with the below layer to create the desired effect.
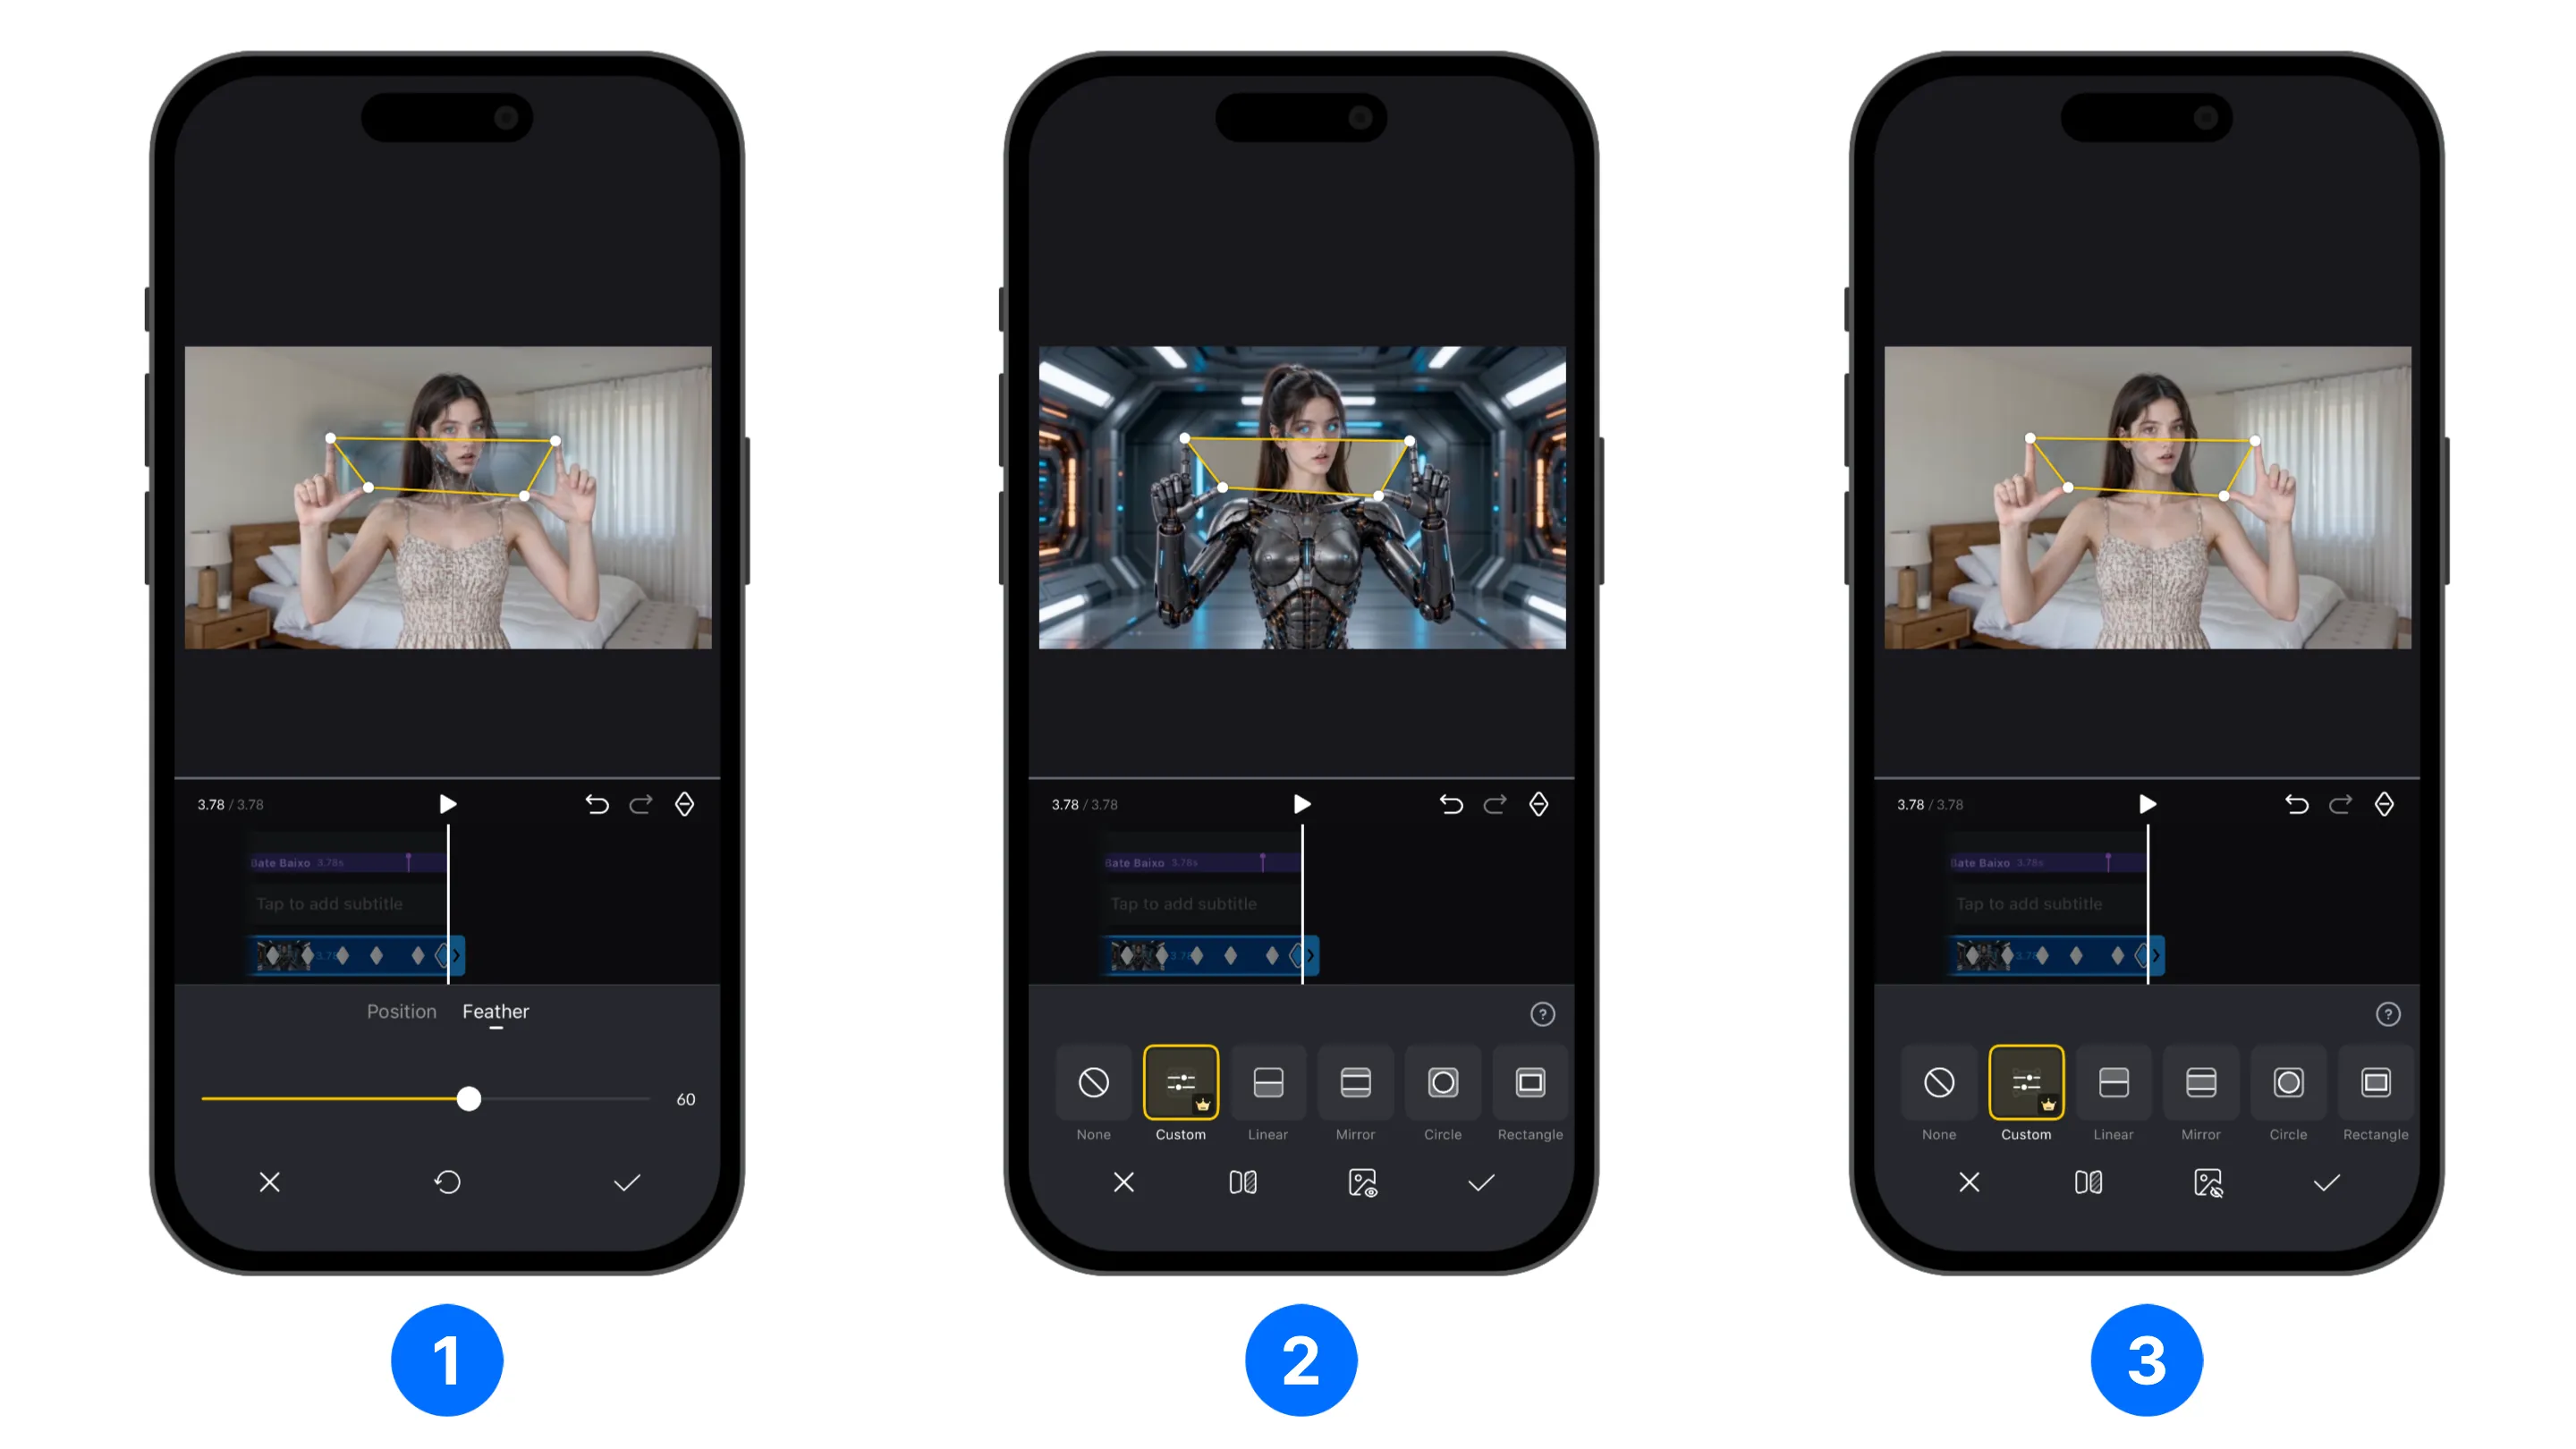
Custom masks can be edited at any time, so you can keep refining the shape, placement, and edge softness until the result looks right.
Animate a custom mask with keyframes
Use keyframes to animate a custom mask. Unlike preset masks, a custom mask lets you animate each point independently, so the outline can change shape and follow movement. For example, the mask follows the fingertips shown in the video below.