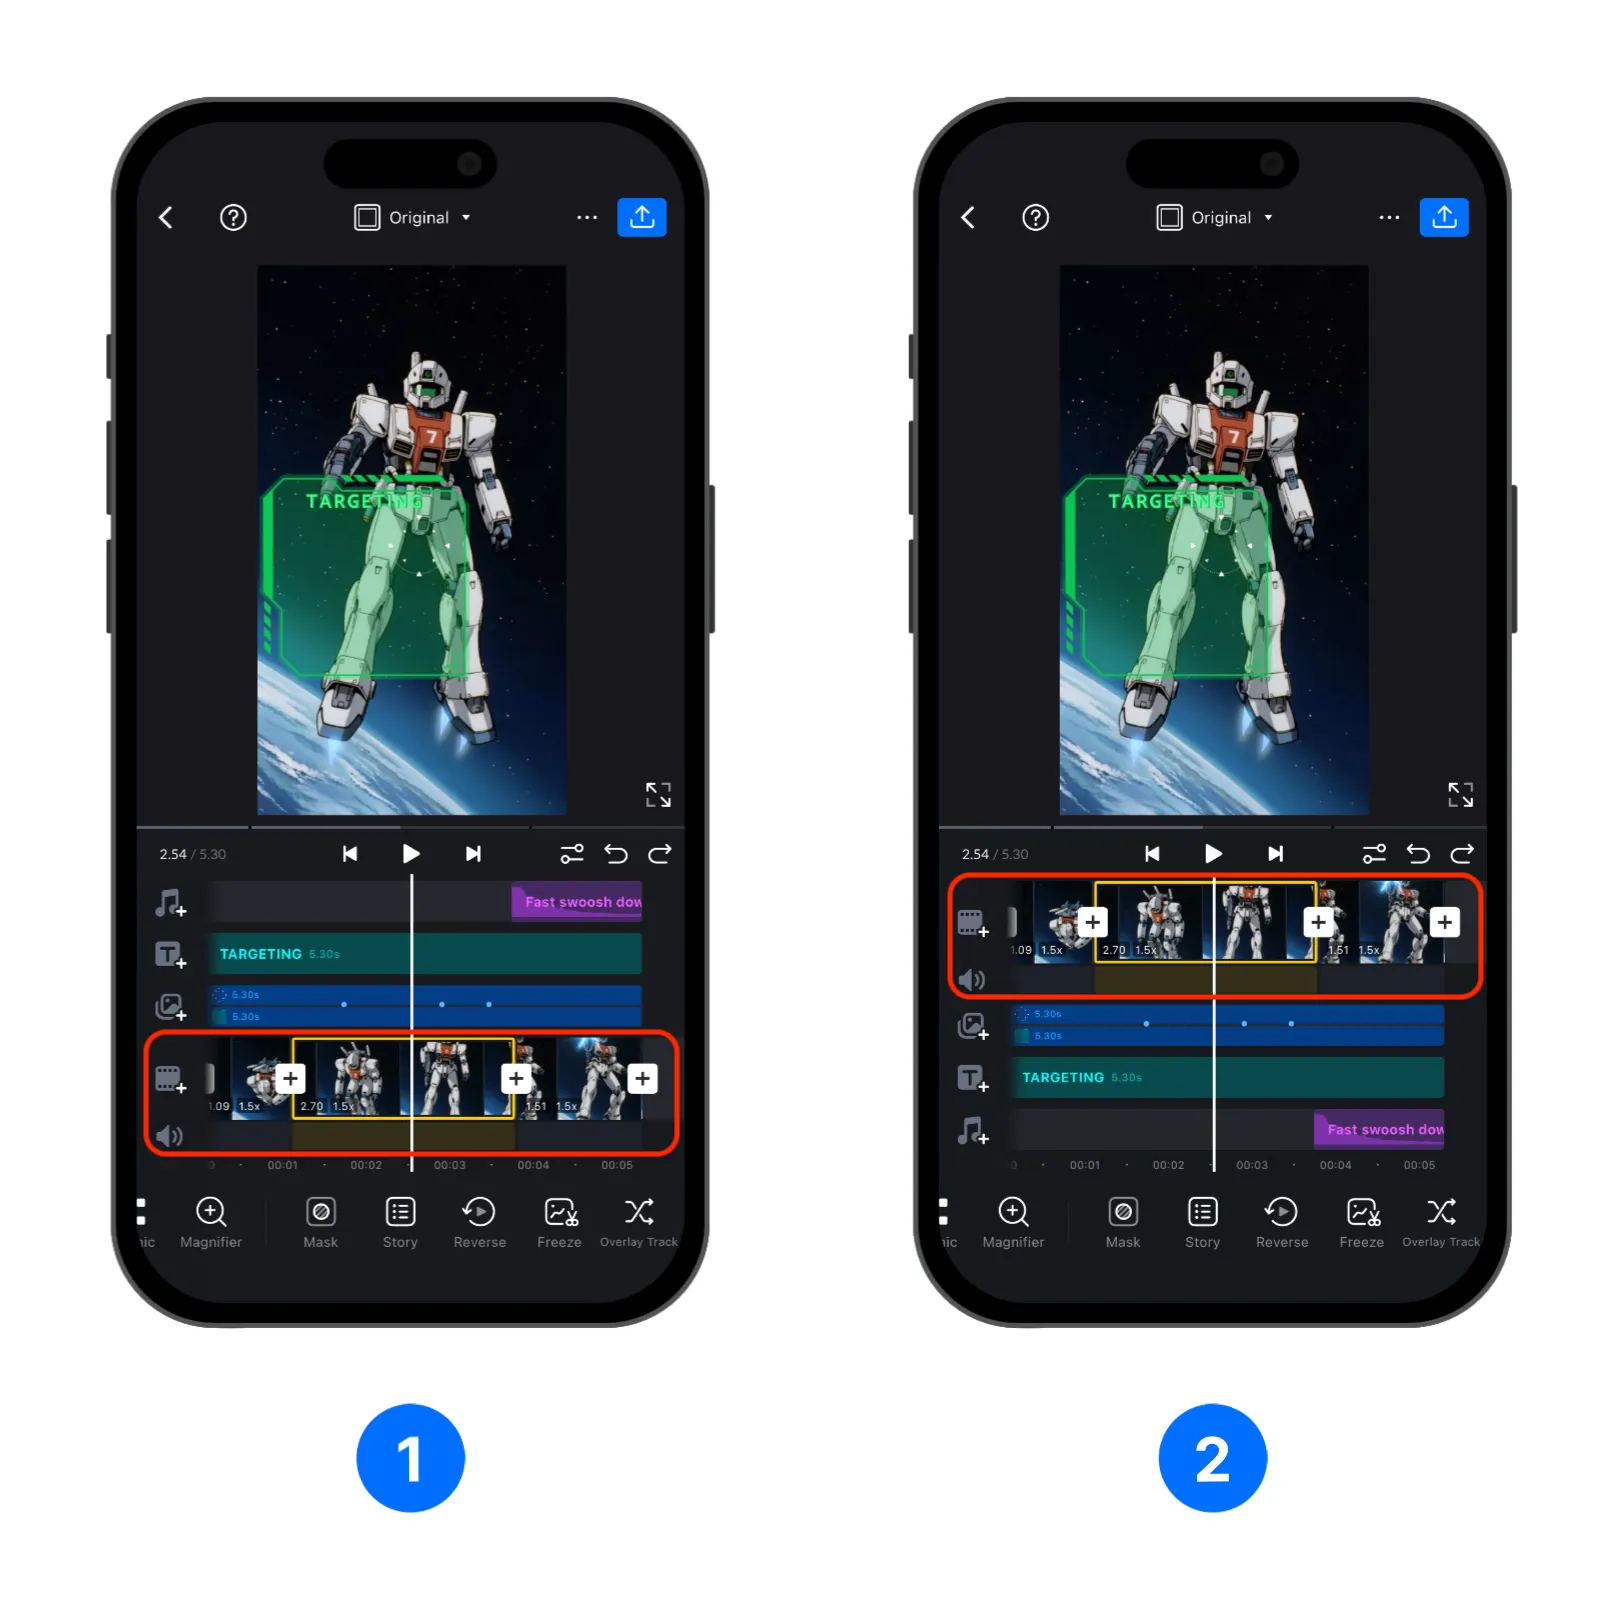

Options under [Main Track] alows you to change the main track behavior or position.
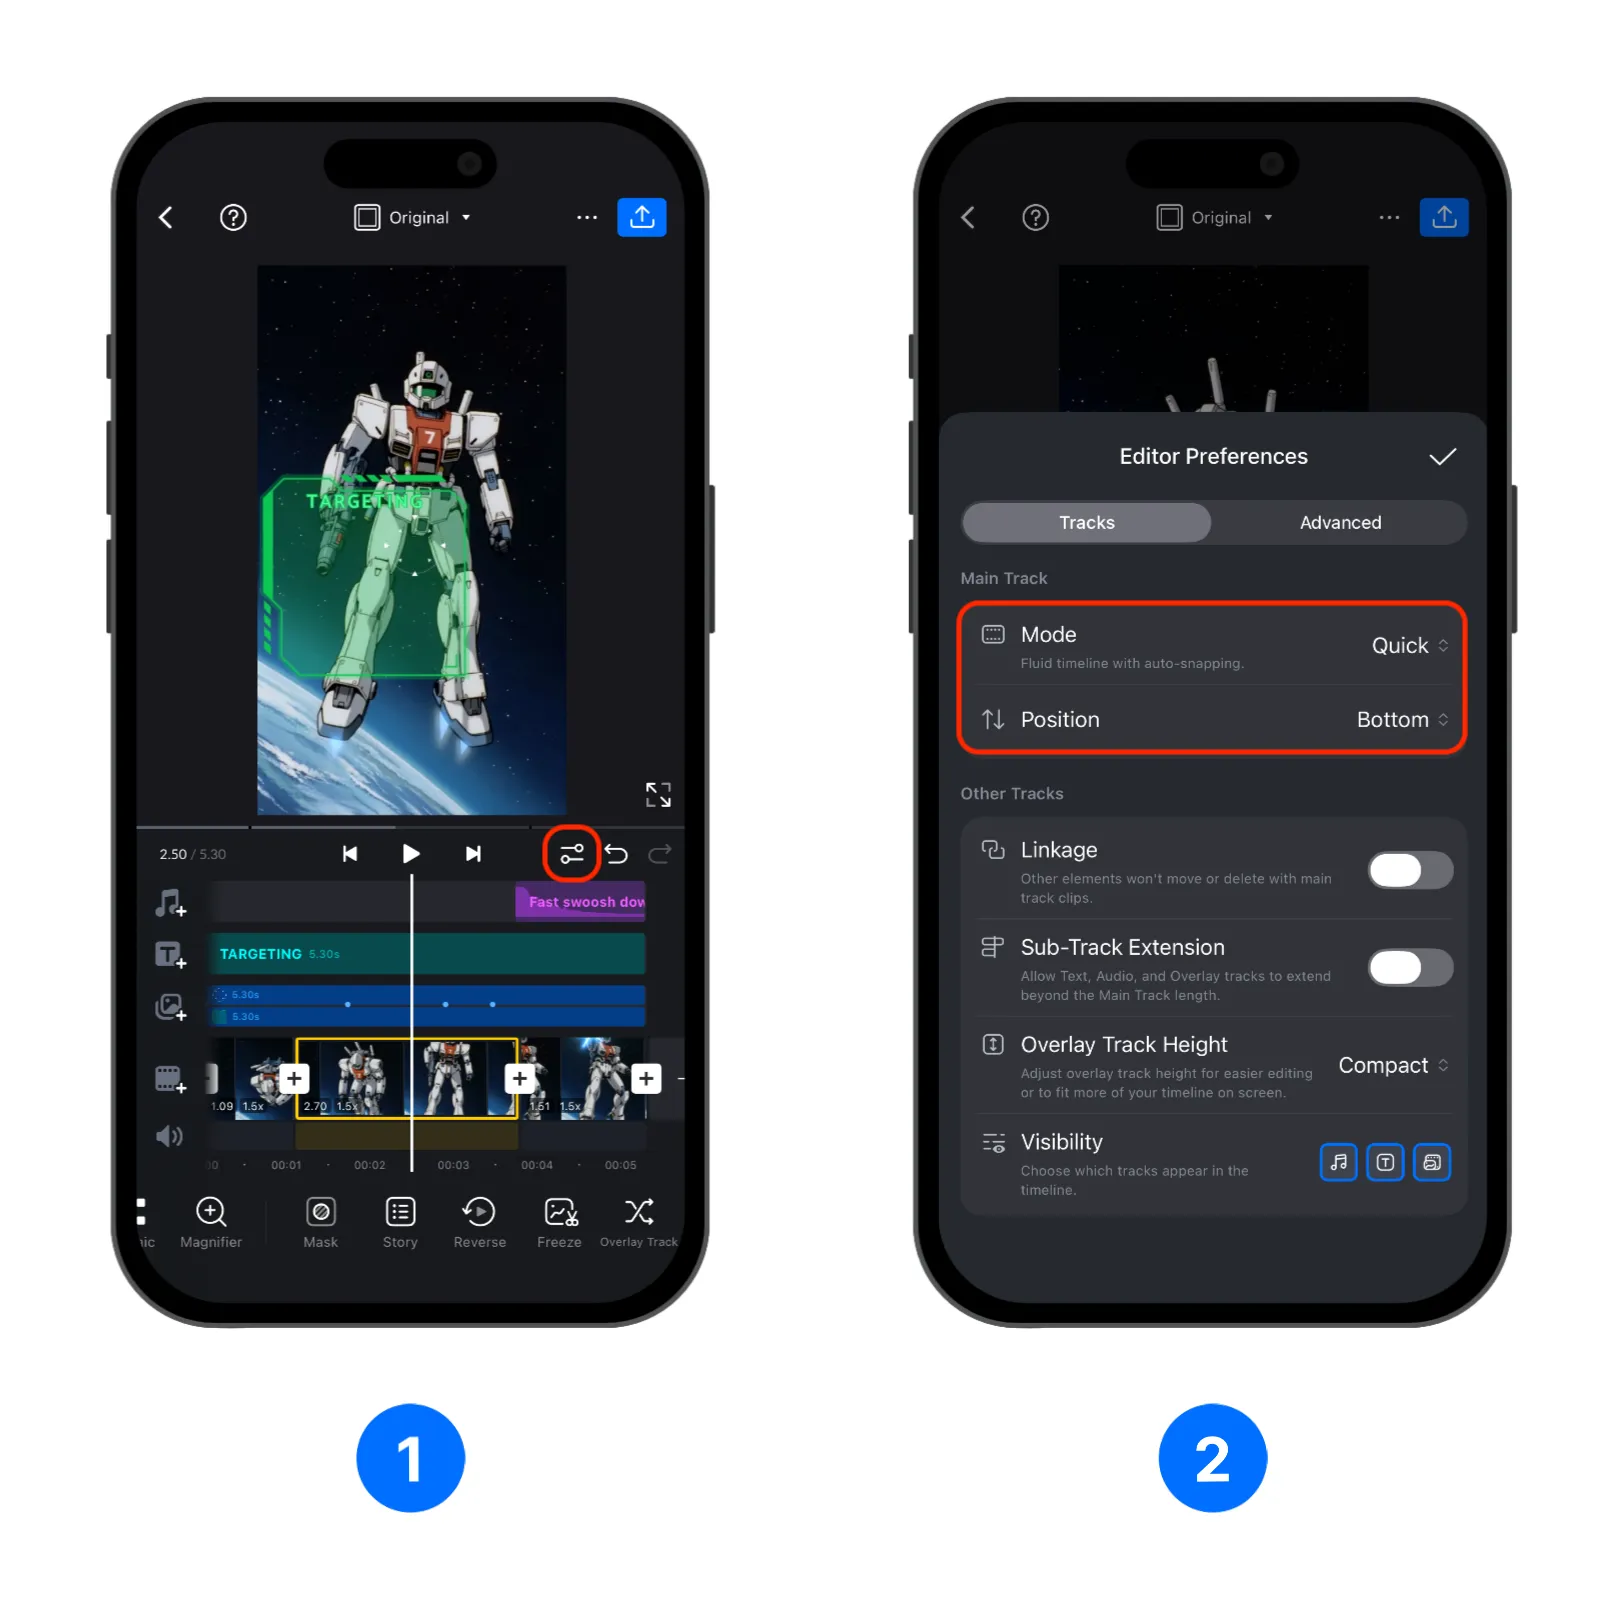
1. Open a project in VN and enter the editor, then tap the [Editor Preferences] button in the editor toolbar.
2. In [Editor Preferences], go to [Main Track Mode] and tap [Quick] or [Pro] to switch between the two modes or use Position to change the main track's position on the editor.
Quick Mode
[Quick] is the default behavior of VN when you first stated using it. Use [Quick Mode] when you want a fluid timeline editing experience and doesn't care too much about keeping each clip in a specific timestamp. This mode helps main-track clips stay connected while you arrange or edit them.
Pro Mode
Use [Pro Mode] when you want absolute timestamps and more manual control. When in Pro mode, deleting a clip will create an empty space keeping the other objects in the same position on the timeline. You can later replace the empty space with other clip.
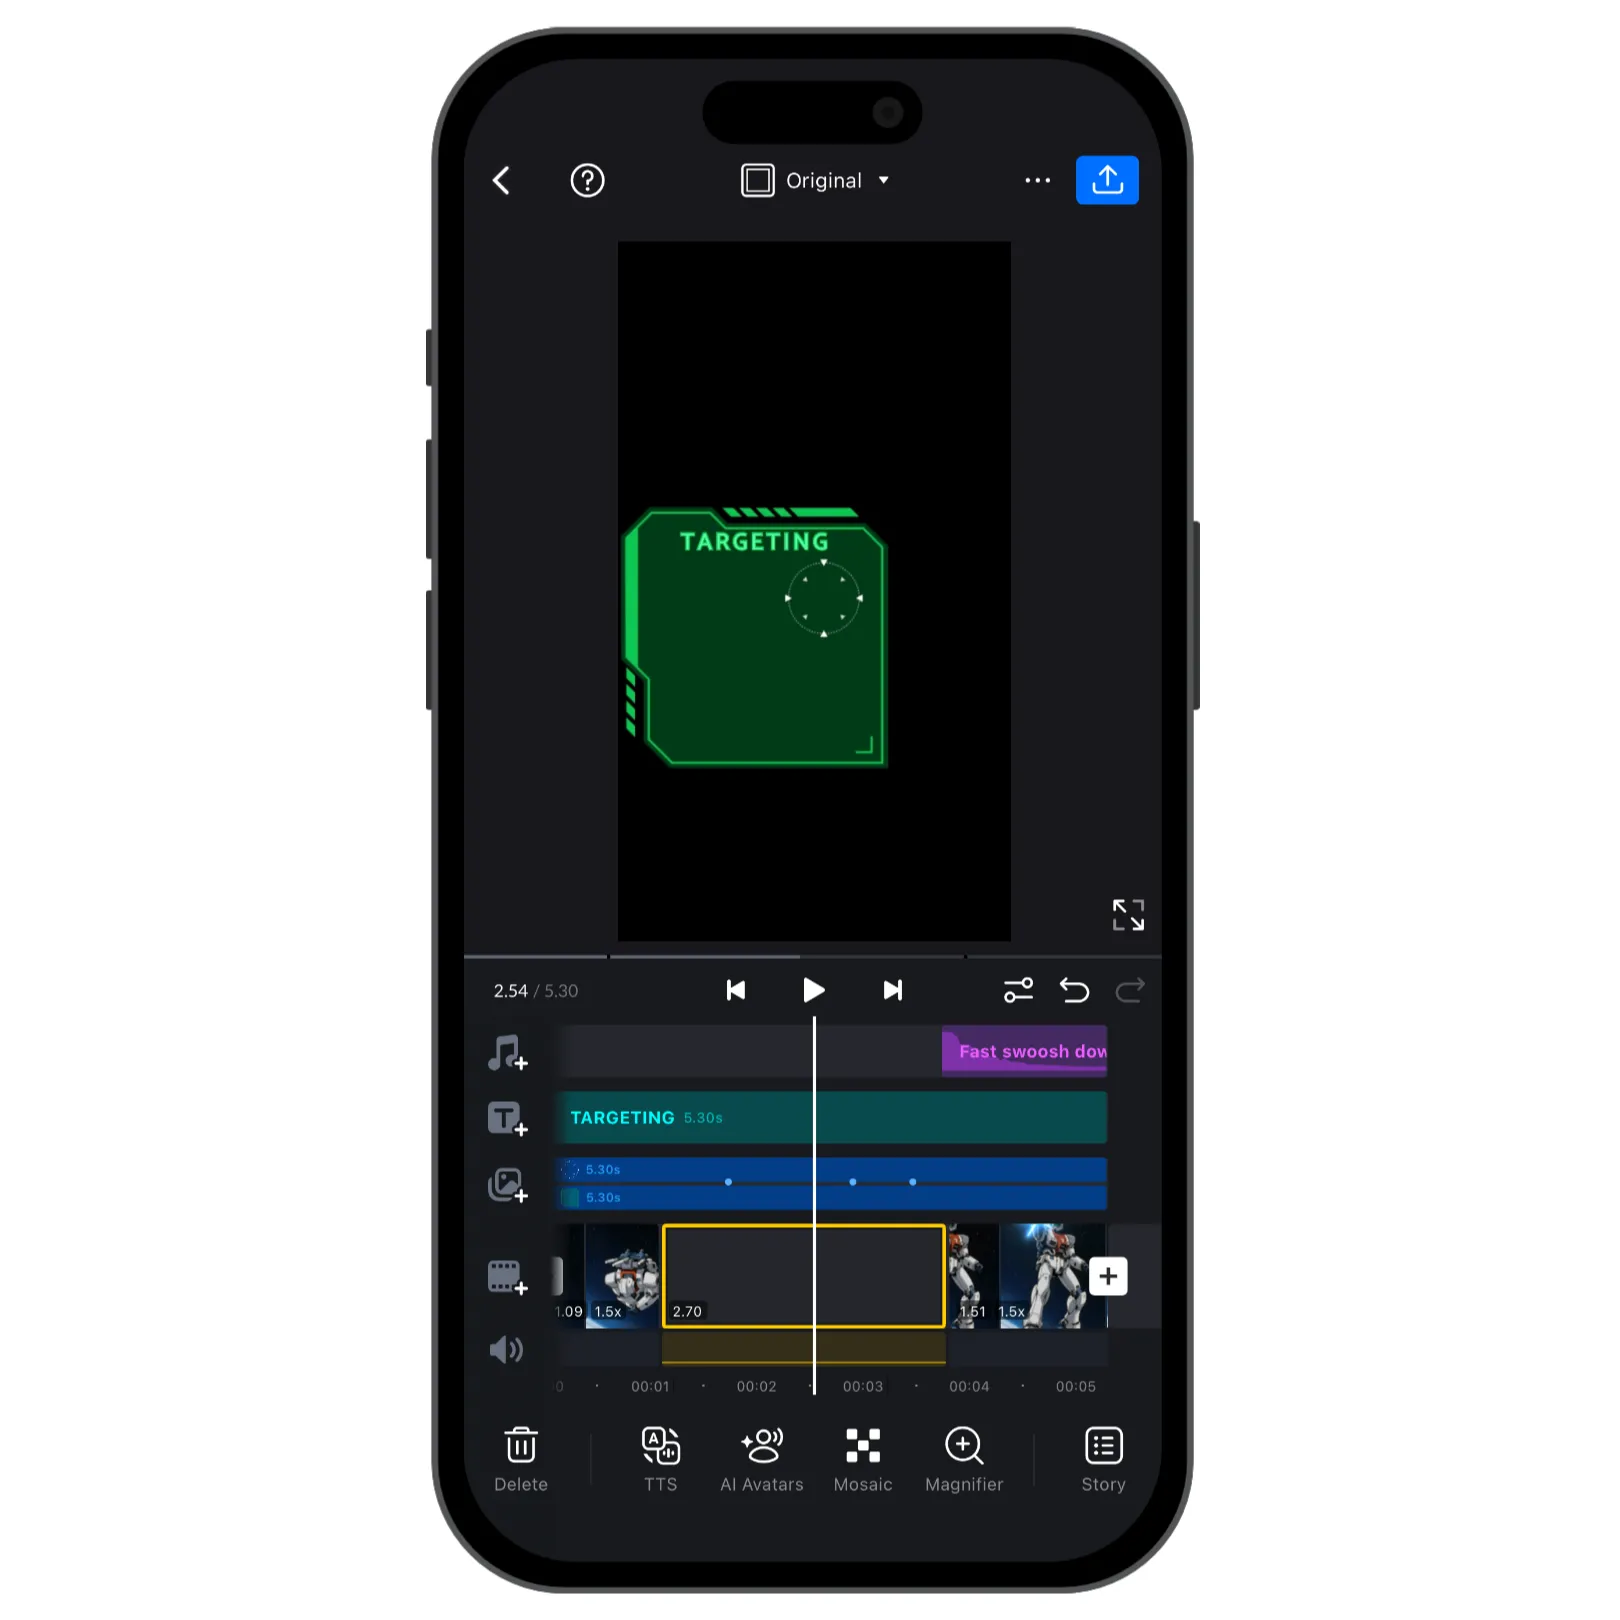
This mode is useful when you need to keep empty spaces, align clips at exact times, or wants to keep later clips in the same position after you deleted previous clip.
Auto-Ripple
[Auto-Ripple] is available when you switch to [Pro] mode in [Main Track] > [Mode] . When enabled, editing a main-track clip automatically shifts subsequent clips so the timeline stays connected, this is the default behavior.
When disabled, triming a clip does not affect later clips as they will be keept to their original timestamps, which can leave a gap in the timeline (the gap can be edited like any clips).
Position
[Position] controls where the Main Track appears in the timeline.
1. Choose [Top] to move the Main Track to the top of the track stack. 2. Choose [Bottom] to move the Main Track to the bottom of the track stack.