
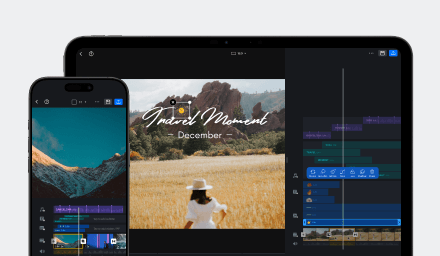

A VN template keeps the structure, timing, effects, text styles, and other design choices from an existing project while allowing other users to replace selected media and edit selected text.
Before creating the template, finish the project and decide which clips and text layers should remain editable. For recommendations on preparing replaceable content, see Tips for Creating Better VN Templates.
Create a VN Template
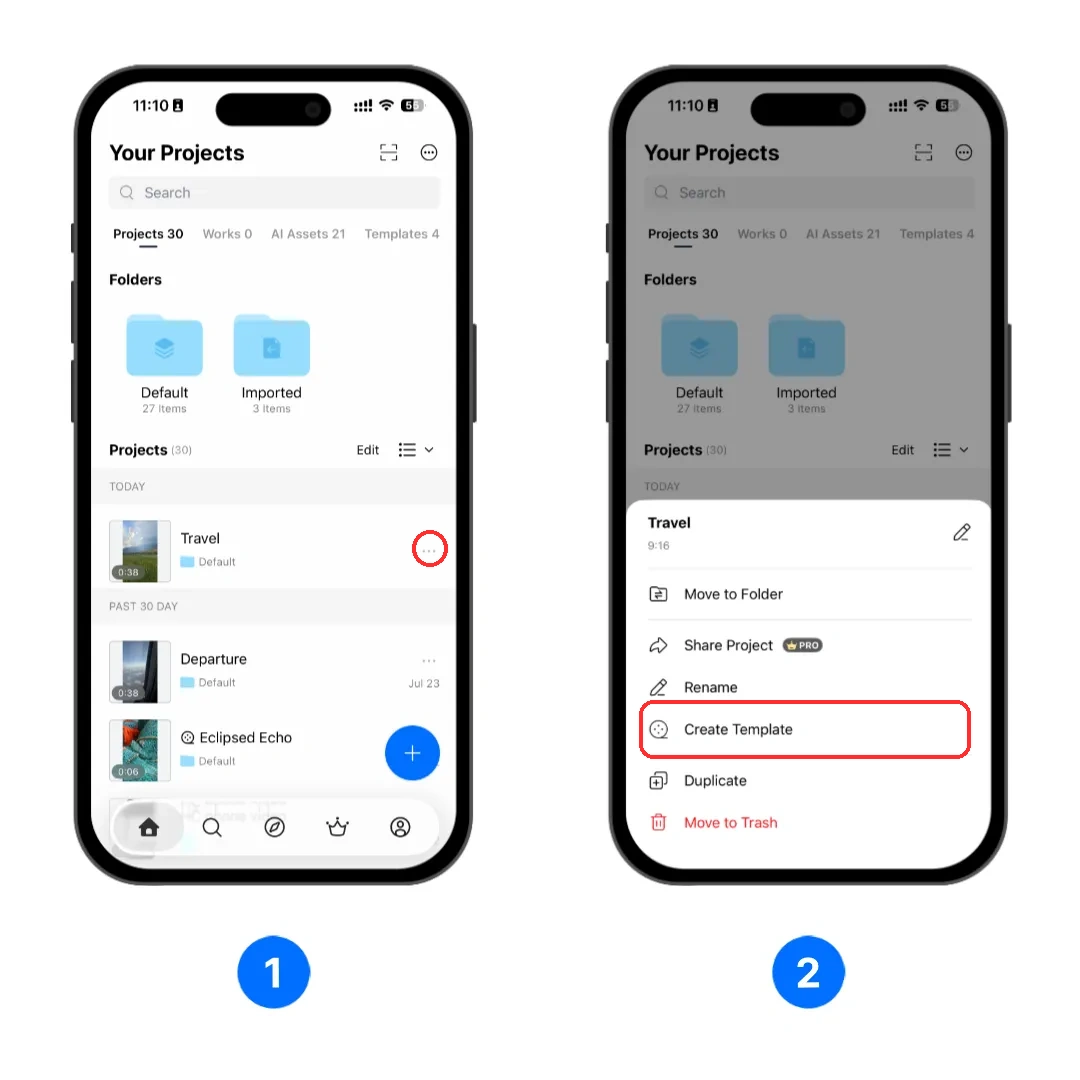
1. On the [Home] screen, locate the project you want to turn into a template and tap [...] beside it.
2. Tap [Create Template].
3. On the [Create Template] screen, choose the content that users can change:
- Under [Clips], select each photo, video, or element that users should replace with their own choice.
- Under [Texts], select each text layer that users should be able to edit.
Review the selections, then tap [Next].
4. Wait for the Export to finish. Keep the VN app open and in the foreground.
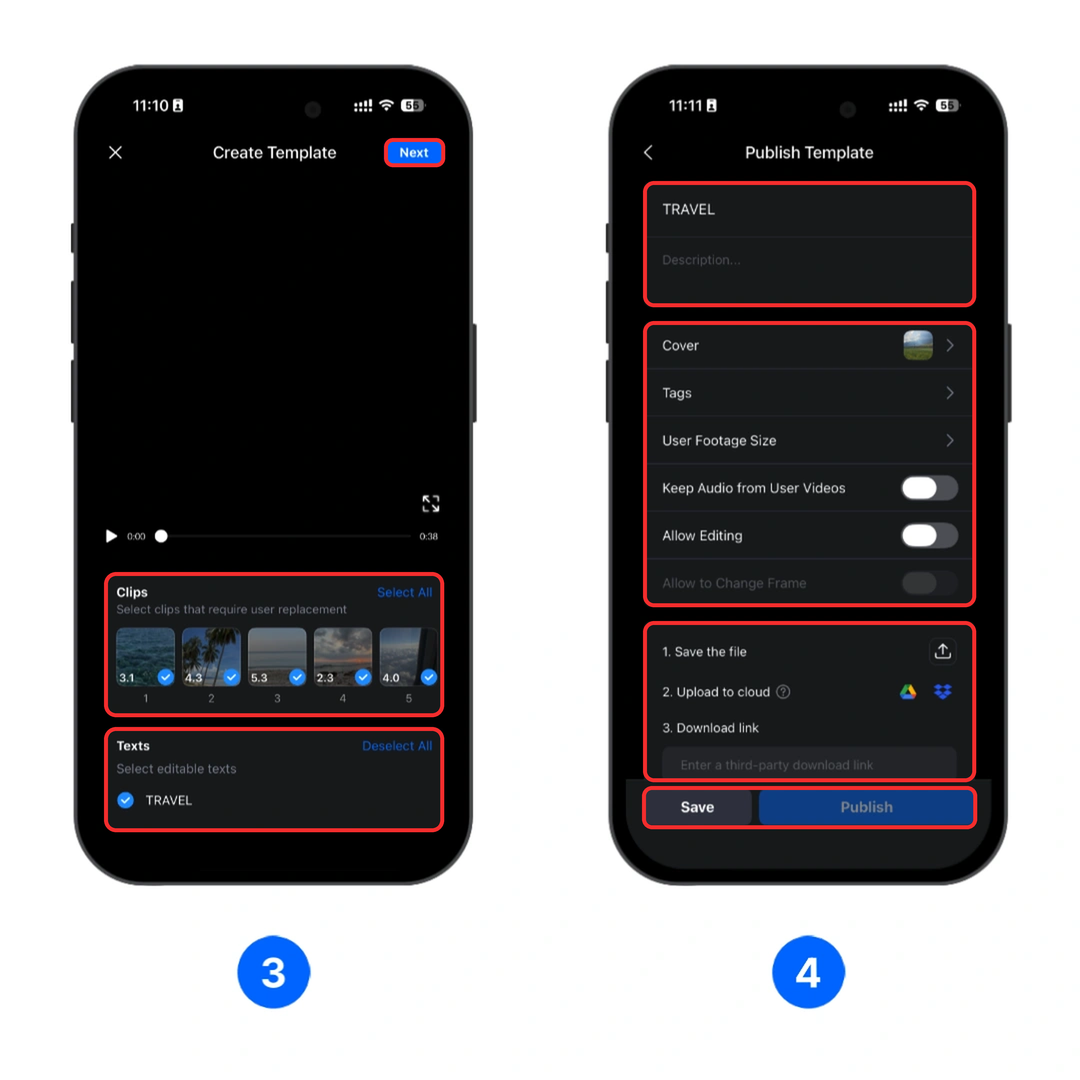
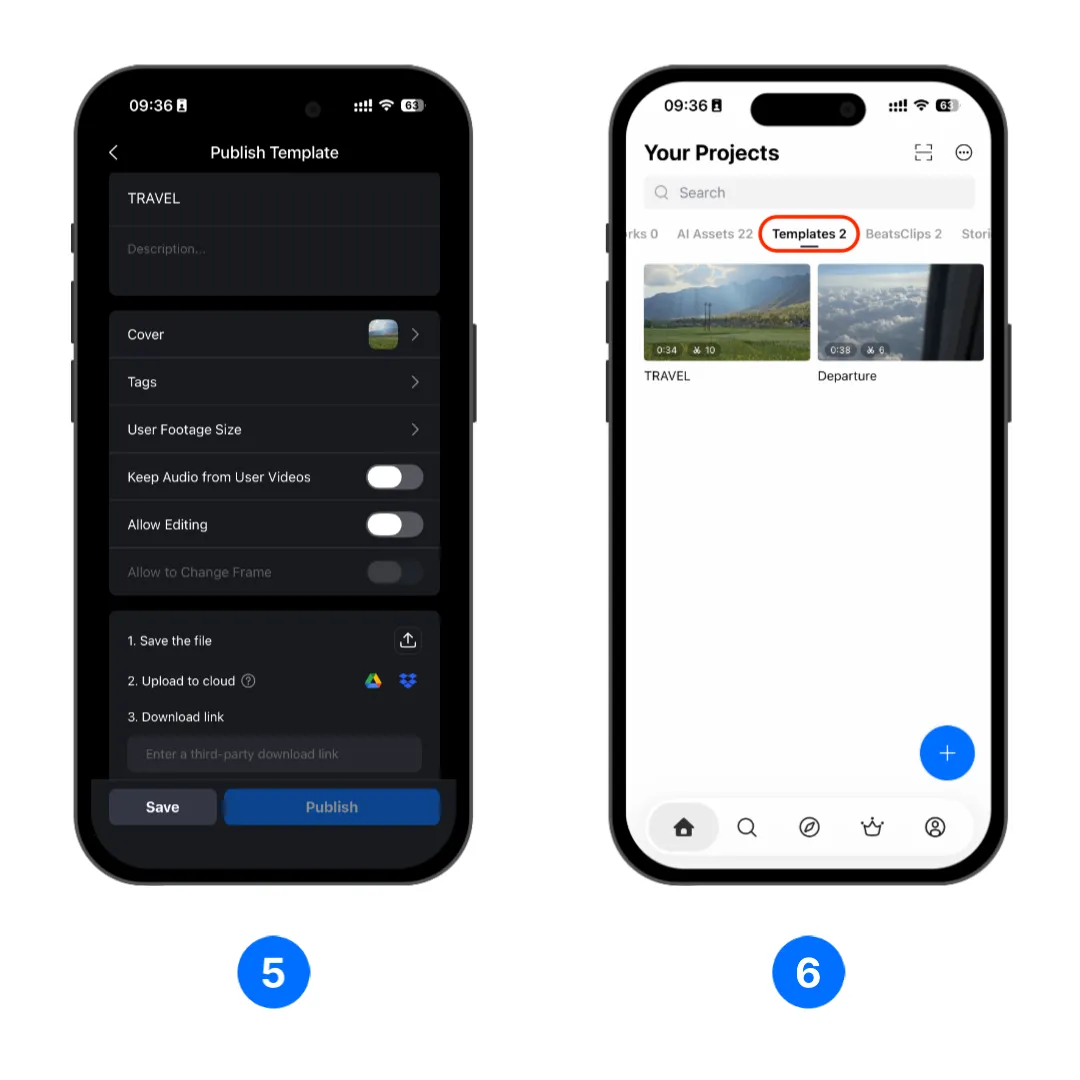
5. On the [Publish Template] screen, enter a title and optional description, then configure the cover, tags, and usage settings.
| Setting | What it controls |
|---|---|
| [User Footage Size] | How replacement photos or videos fit the template's media area. |
| [Keep Audio from User Videos] | Whether the original audio from replacement video clips is retained. |
| [Allow Editing] | Whether users can enter the full editor and change the template structure after filling it. |
| [Allow to Change Frame] | Whether users can change the template's aspect ratio when editing. |
Tap [Save] to save the template.
Note
If you choose to [Publish] the template, you will need to tap the button in [Save the file], and upload the saved VN template file to a supported cloud service.Make sure the file is set to Allow anyone with the link to access. Paste the file link into the [Download link] field before publishing.
6. You can find the saved template on [Home] screen's [Templates] tab.
For sharing the VN Template as VN Code or VN Template file, visit How to Share a VN Template.